
For decades, nay, centuries, we have been limited to the C-clamp, one of the most versatile, useful and perhaps most recognized tool. But why does C get all the glory? What of the other 25 letters?
People of my generation, my father’s generation, and my grandfather’s generations have clamped with one letter, and one letter only. But why C? And why now?
Here at Clamp-Co we thought we needed a change. So we set out to develop an entire line of Alphabet Clamps.
[Robb Godshaw] is the mastermind behind this revolution in clamping technology. Designed to German standards (DIN 1451), and made in America, the Alphabet Clamp set provides unrivaled clamping functionality for work in the industry, at the shop, or even at home. Perhaps the most functional previously unheard-of clamp is the U-Clamp, providing a deep throat for those extra hard to reach parts.
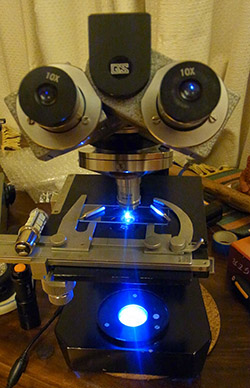 We’re not quite sure where [Andy] hangs out, but he recently found a pile of broken microscopes in a dumpster. They’re old and obsolete microscopes made for biological specimens and not inspecting surface mount devices and electronic components, but the quality of the optics is outstanding and hey, free microscope.


