Turning A Shipping Container Into A 3D Printer

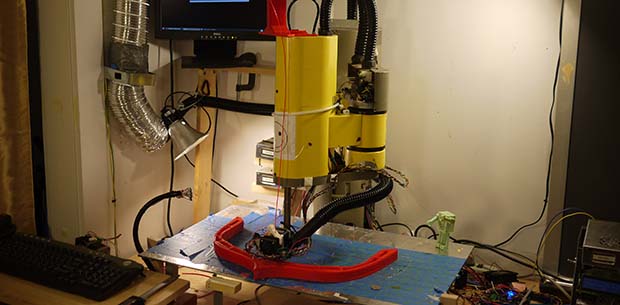
Built inside a 20-foot shipping container placed on its end, the Kamermaker – ” room maker” in Dutch – is one of the largest 3D printers we’ve ever seen. Able to print objects as big as 2 meter square and 3.5 meters high, the Kamermaker is designed to print huge objects including furniture, architectural elements, and even entire rooms.

The Kamermaker is a collaboration between Architectburo DUS and Utilimaker and the result of wanting to build the world’s largest 3D printer pavilion. Built inside a stainless steel-clad shipping container, the Kamermaker features a scaled-up version of the X, Y, and Z axes you’d find in any other 3D printer. The only change is a scaling up of current designs, allowing it to print small wind turbines covering its surface or, theoretically, a life-size TARDIS.

Because using traditional plastic filament would be prohibitively expensive, the Utilimaker team chose to extrude plastic pellets on the fly as it is used. There’s an excellent video of the filament extruder here along with a walk-through of the machine in operation after the break.

Continue reading “Turning A Shipping Container Into A 3D Printer”

3d Printer Filament Made Of Wood

Believe it or not, you can now squeeze wood through the nozzle of your 3D printer.

This new addition to the maker’s palette of 3D printer filaments comes from the mind of [Kai Parthy]. The new filament – going by the name Laywood – is a mix of recycled wood fibers and polymer binders that can be melted and extruded just like any other 3D printer filament.

Parts printed with Laywood have about the same properties as parts printed with PLA filament. One interesting feature of this material is the ability to add ‘tree rings,’ or a subtle gradation in color from a rich brown to a very nice beige. The color can be changed on the fly by setting the temperature of your printer’s hot end to 180° C for a light color, and 230° C for a darker color.

Judging from the ‘in action’ video of Laywood filament being pushed through a printer, the new wood-based filament works just the same as any other PLA or ABS plastic.

Outside eBay, there appears to be only one place to buy this filament. It’s not cheap at about €16/$20 USD per half kilogram, but hopefully that price will come down when it becomes more popular.

Video after the break.

Continue reading “3d Printer Filament Made Of Wood”

Introducing The Makerbot Replicator 2

A few short hours ago at press conference, Makerbot announced the release of their Replicator 2 3D printer.

The original Makerbot Replicator was released earlier this year at CES and regaled by the press as a quantum leap in home manufacturing (a quanta is actually very small, guys) with and option for dual extruders and a rather large build volume. The Replicator 2 takes the same formula and adds a powder coated steel frame, larger build volume (11.2″ x 6.0″ x 6.1″ or 28.5 x 15.3 x 15.5 cm) and a resolution so fine as to approach the realm of uber expensive 3D printers (100 microns or 0.004 inches).

Base price is $2200 USD for the single extruder model with no Makercare service plan. A dual-extruder Replicator 2X is slated to be released after the beginning of next year. This model will also handle ABS filament, although we can’t find anything that says the single-extruder Replicator 2 is only able to use PLA.

Even though the new Replicator 2 is rumored to be closed source, we’d really struggle to come up with a better 3D printer for a high school shop class, college CS and/or engineering department, or even a hackerspace.

This Hack Can Refill Your Stratasys 3D Printer

[Dan] has his own Stratasys Dimension SST 768 3D printer. It’s a professional grade machine which does an amazing job. But when it comes time to replace the cartridge he has to pay the piper to the tune of $260. He can buy ABS filament for about $50 per kilogram, so he set out to refill his own P400 cartridges.

Respooling the cartridge must be quite easy because he doesn’t describe the process at all. But the physical act of refilling it doesn’t mean you can keep using it. The cartridge and the printer both store usage information that prevents this type of DIY refill; there’s an EEPROM in the cartridge and a log file on the printer’s hard drive. [Dan] pulled the hard drive out and used a Live CD to make an image. He loaded the image in a virtual machine, made some changes to enable SSH and zap the log file at each boot, then loaded the image back onto the printer’s drive. A script that he wrote is able to backup and rewrite the EEPROM chip, which basically rolls back the ‘odometer’ on how much filament has been used.

[Image Source]

Making Plastic Filament At Home

There’s one problem with the popularity of plastic-extruding 3D printers such as the RepRap and Makerbot; since they’ve become so popular, the price of plastic filament has skyrocketed over the past few years. Without a way to produce filament at a hackerspace or home lab, the price of 3D printed objects will remain fairly high. Project Spaghetti hopes to rectify that by building a machine to make plastic filament for 3D printers.

The folks behind Project Spaghetti – a loose amalgamation of makers going under the title of Open Source Printing, LLC – have successfully built a machine that is able to produce short lengths of plastic filament.

Early machines used a plunger to press small pellets of ABS plastic through a heated steel pipe to produce filament. There are a few problems with this approach, especially when the temperature is set to 480F, but the team was able to make a bit of filament with this design.

Although the team is using a piston to force melted plastic out of a nozzle, they do have a screw-drive ‘plan B’ in the works. This design should allow for continuous extrusion for theoretically endless reels of plastic filament, every RepRappers dream and a neat way to win 40 grand. Continue reading “Making Plastic Filament At Home”

3D Printer Control For The Raspi

Instead of dedicating his laptop to control his RepRap all night, [Walter] is using a Raspberry Pi as an Internet-enabled front end for his 3D printer.

Before [Walter] got his hands on a Raspberry Pi, he set up his laptop next to his RepRap and let the machine do its work for hours on end. Obviously, this tied up his laptop for a while so when his Raspi was delivered he was eager to offload the responsibilities of controlling a printer to his new Linux board.

Right now, [Walter] has his Raspberry Pi set up as a web interface able to control his printer similar to Pronterface. We have to note that the Raspberry Pi isn’t driving servos or feeding filament onto the bed; those responsibilities are still handled by the RepRap electronics, but the ability to use a 3D printer over the web is still pretty cool.

[Walter] is putting the finishing touches on his 3D printer web interface, after which he’ll upload everything onto the git. Planned features for future updates include uploading gcode from the web and an option to connect a webcam for visual feedback when controlling a remote printer.

Video demo after the break.

Continue reading “3D Printer Control For The Raspi”

Eventorbot 3D Printer

Tired of 3D printers that use t-slot construction? The Eventorbot is yet another open source 3D printer,  but it’s built out of steel and 3D printable parts. The design also aims to minimize the effect of vibrations by using a single solid frame. All of the wiring runs through the steel frame, which gives the printer a professional look.

The Eventorbot page on the RepRap wiki provides details on how to build your own, along with STL files for all the printable parts. If you want to see renders of the parts, they’re all available on Thingiverse. The material cost is $300-$500, and the assembled cost is quoted at $799.

Like many of the open source printers we’ve seen, this one uses the RepRap Mega Pololu Shield (RAMPS) to control the actuators. This is attached to a Sanguinololu motherboard, which runs the RepRap firmware.

The Eventorbot Youtube channel has a collection of videos detailing the assembly of the robot. Check out a video of a test print after the break.

Via Make

Continue reading “Eventorbot 3D Printer”