Pan/Tilt Wheel Trainer Ends Up Being A Different Way To Play Quake

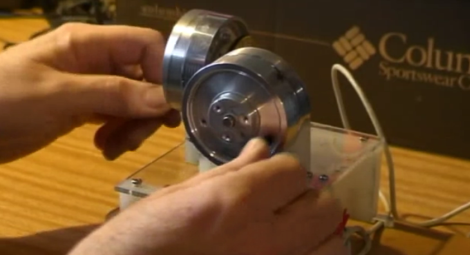
This is a special controller that [Gary Scott] built to help train camera operators. The pan and tilt controls on high-end movie cameras use wheels to pan and tilt smoothly. This rig can be built rather inexpensively and used to practice following a subject as you would with a camera. This is where the project takes a turn into familiar territory. [Gary] set up a system so that you can play the game Quake using this controller, with your feet doing the rest.

The pan/tilt controller uses two heads from an old VCR. They are mounted above the guts from an old ball-type mouse. A couple of rubber belts connect the heads to the two mouse bars that are normally rotated by the ball. This gives him control of where the Quake game is looking. But he still needed to be able to move, jump, change weapons. and shoot. So he built a second controller for his feet. It uses a CD and some switches as a joystick, and a set of buttons for the other controls. He actually rigged up solenoids to each of those foot switches to physically press keys on a keyboard. You really must see it for yourself. We’ve embedded his set of videos after the break.

Continue reading “Pan/Tilt Wheel Trainer Ends Up Being A Different Way To Play Quake”

Cryptography – Learn What It’s All About

The concept of cryptography touches our lives many times per day, and that’s probably a conservative estimate. We have a pretty good idea of how it works, having dealt with public-key cryptography for things like remote git repositories or ssh tunneling without a password. But we still enjoyed reading [Tiberiu Barbu’s] primer on the subject which he calls From 0 to Cryptography.

He begins the discussion with a definition of terms but quickly moves to the topic of key distribution. If you’re using a key to decipher data, how can you make sure that key only makes it to the person whom you want reading the data? One way is to use a Diffie-Hellman key exchange. The diagram above illustrates the trade, which uses an agreed upon value (color in this example) as a common starting point, then goes from there. After working our way through the key exchange scenario [Tiberiu] then runs the gammut of other options, include Public-Key, RSA, Hash, Digital Certificate, and a few others. It’s not a long post considering how many topics it covers. If you don’t have time today, make sure to save it for the weekend.

[via Reddit]

Personal Energy Orb Prevents Your Life From Being Swallowed By The Internets

We love the Internet, but we are definitely guilty of losing track of the time we spend traipsing around our virtual haunts. This project will not only remind you to get out and exercise, it will cripple your digital experience if you don’t heed its colorful warning.

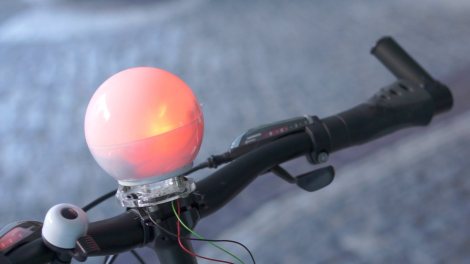
[Janko Hofmann] calls it the Personal Energy Orb. It’s really just an Arduino and an RGB LED. But as with most creations, the idea is what makes it great. The orb has a dock next to your computer. It tracks how much time you spend online, changing colors as you rack up the hours. If you don’t heed the warning signs of overuse it will even start to slow down your mouse cursor. But never fear. Full functionality can be restored by topping off your personal energy. As you can see above, there’s also a docking station on [Janko’s] bicycle. The orb monitors your mileage, moving out of the red zone so that your computer will be unencumbered the next time you sit down for a long session of flash games. Don’t miss his video presentation embedded after the break.

Continue reading “Personal Energy Orb Prevents Your Life From Being Swallowed By The Internets”

Wii Nunchuck Controlled Robot Exhibits Rock Solid Balancing

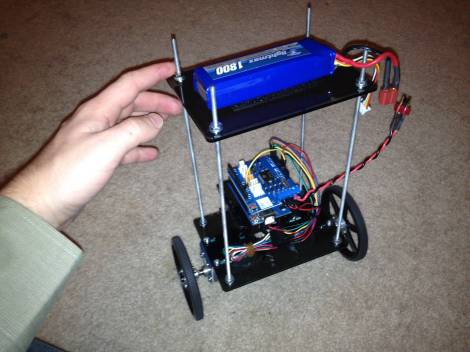
[Willy Wampa] is showing off his self-balancing robot. What strikes us about the build is how well tuned his feedback loop seems to be. In the video after the break you will see that there is absolutely no visible oscillation used to keep its balance.

The parts used are quite easy to obtain. The acrylic mounting plates are his wife’s design and were custom cut through the Pololu service. They were also the source of the gear motors. He’s using a SparkFun IMU with an Arduino and a motor shield. He first posted about the build about a month ago, but the new revision switches to a Pololu motor driver shield which he says works much better, and adds control via a wireless Wii Nunchuck.

The PID loop which gives it that remarkably solid upright stance is from a library written by [Brett Beauregard]. Once again the concept of open source lets us build great things by standing on the shoulders of others.

Continue reading “Wii Nunchuck Controlled Robot Exhibits Rock Solid Balancing”

Another Great Backyard Observatory Build

With a little help from their friends [Jeff Fisher] and his dad built this observatory in their back yard. Their use of simple building materials and techniques show that you can create a respectable home observatory without breaking the bank.

It starts with a footing for the telescope mount. This is completely separated from the building that surrounds it so there will be no issue with vibrations affecting the images it is capturing. From there a foundation made of cinder blocks was laid before placing joists and installing a sub floor. It was during this process that they trenched and placed conduit to run power to the building. With the floor in place the walls were stick built and a carefully crafted dome was assembled and hefted in place by this septet of gentlemen.

Four months was all it took to get to this point, but [Jeff] and his dad are still working on a deck to go around the observatory. They’re using a very nice telescope that they purchased, but it is also possible to build one of those yourself.

[via Reddit]

This Diy Fume Extractor Will Be A Showpiece For Your Workbench

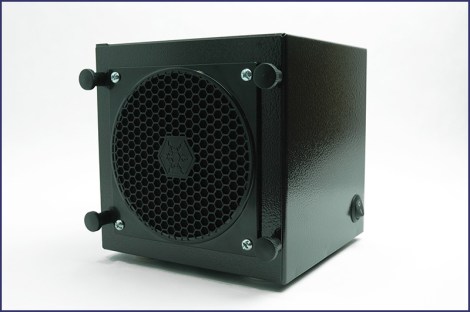
We have no idea how well this diy fume extractor works, but it sure does look great! We’ve been thinking that it’s time to stop trying to blow away the solder fumes while working on project and this might be just the kind of motivation we need. The 6″ cube doesn’t get in the way of your work, and since it includes a carbon filter it should keep the smell of burning flux to a minimum.

[Jeff’s] project basically brings together a 120mm PC cooling fan with a power source. The fan mounts inside of a steel enclosure he picked up from Digikey. The face plates that come with it were modified to accept the fan, as well as the grill hardware that goes with it. Before assembling he painted the box with some Rustoleum “Hammered” black spray paint. This gives it a texture that will hide any imperfections in your application.

We’re a bit hazy on how this is being powered. It sounds like he’s plugging the cord into mains but we don’t see any type of regulator to feed what must be a 12V DC fan. There are build instruction available but they didn’t clear up our confusion.

Tutorial Explains The Concepts Behind An IMU

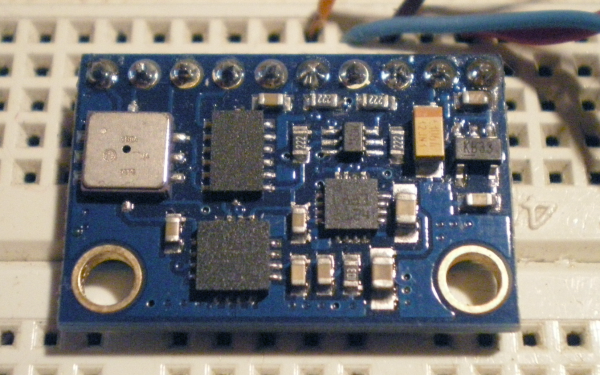
[Anilm3] wrote in to share the IMU tutorial series he is working on. An Inertial Measurement Unit is most often found in self-balancing robots and quadcopters, providing enough high-speed sensor data to keep up with the effects of gravity.  He previously used some all-in-one IMU devices in school which did most of the work for him. But he wanted to grind down and look at what each sensor spits out and how those measurements are used. The first installment deals with the accelerometer, using its data to calculate pitch and roll. For these demonstrations [Anilm3] is using this ADXL345 sensor board, an Arduino, and some processing sketches for testing.

Whenever working with sensors you need to take noise into consideration. The post shows how to implement a low-pass filter in the code which will help smooth out the readings. The filtered data is then fed to a couple of mostly-painless formulas which calculate the movement of the accelerometer in degrees. The demonstration sketch is mapped to a 3D cube to give you an idea of how accurate the accelerometer is. There’s a little bit of lag which would let a self-balancing robot have a nasty fall. The solution to this issue will be discussed in upcoming parts of the series. The next installment tackles the gyroscope sensor.