A profile view of a medical training mannequin with a tube down its "throat." A ventillation bag is in the gloved hand of a human trainee.

Making Medical Simulators Less Expensive With 3D Printing And Silicone

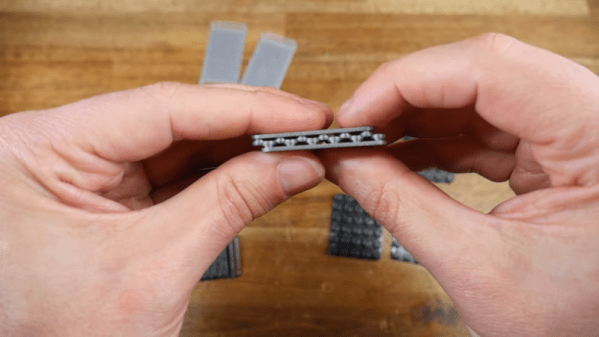
Medical training simulators are expensive, but important, pieces of equipment. [Decent Simulators] is designing simulators that can easily be replicated using Fused Deposition Modeling (FDM) printers and silicone molds to bring the costs down.

Each iteration of the simulators is sent out for testing by paramedics and doctors around the world, and feedback is integrated into the next revision. Because the trainers are designed to be easily replicated, parts can easily be replaced or repaired which can be critical to keep personnel trained, especially in remote areas.

While not open source, some models are freely available on the [Decent Simulators] website like wound packing trainers or wound prostheses which could be great if you’re trying to get a head start on next year’s Halloween costumes. More complicated models will be on sale starting in January as either just the design files or a kit containing the files and the printed and/or silicone parts.

Interested in more medical hacks? Check out this Cyberpunk Prosthetic Eye or this Arduino Hearing Test Device.

Nanoassembly With Water

Water is sometimes known as the universal solvent. But researchers at Harvard want to use water to put things together instead of taking them apart. Really small things. In the video below, you can see a simple 3D-printed machine that braids microscopic fibers.

The key appears to be surface tension and capillary action. A capillary machine uses channels that repel floating objects. By moving the channel, materials move to avoid the channel, and by shaping the channel, various manipulations can occur, including braiding. This is one of those things that is easier to understand when you see it, so if it doesn’t make sense, watch the video below. The example uses tiny Kevlar fibers.

Continue reading “Nanoassembly With Water”

3D Printer Slicing In The Manufacturing World

It is no secret that the way you build things in your garage is rarely how big companies build things at scale. But sometimes new techniques on the production floor leak over to the hobby builder and vice versa, so it pays to keep an eye on what the other side is doing. Maybe that was the idea behind [Carolyn Schwaar’s] post on All3DP entitled “Beyond Cura Slicer: 3D Printing Build Prep Software for Pros.” In it, she looks at a few programs that commercial-grade 3D printers use for slicing.

The differences in the software we typically use and those meant to work with a dedicated high-end machine are pretty marked, but maybe not in the way you would expect. While you might expect them to have tight integration with their target machine, you might not expect that they usually offer less control over parameters than a product like Cura. As a quote in the post points out, Cura has over 400 settings. Commercial 3D printers don’t have time to tweak those settings endlessly. So the emphasis is more on canned profiles that just work.

Not all of the programs are tied to machines, though. Commercial CAD offerings are becoming more capable with 3D printers and can sometimes slice and send jobs to printers directly. Regardless of software type, though, everyone needs certain functions: design, repair, simulation, build plate layout, and more.

If you are looking for a hobby-grade slicer other than Cura, we’ve been using SuperSlicer which is a fork of PrusaSlicer, which is a fork of Slic3r lately.

3D Printing Gets Small In A Big Way

If you have a 3D printer in your workshop, you probably fret more about how to get bigger objects out of it. However, the University of Amsterdam has a new technique that allows for fast large-scale printing with sub-micron resolution. The technique is a hybrid of photolithography and stereolithography.

One of the problems with printing with fine detail is that print times become very long. However, the new technique claims to have “acceptable production time.” Apparently, bioprinting applications are very much of interest to the technology’s first licensee. There is talk of printing, for example, a kidney scaffold in several hours or a full-sized heart scaffold in less than a day.

Another example application is the production of a chromatography instrument with 200 micron channels and 20 micron restrictions. This requires a printer capable of very fine detail. There are also applications in semiconductors and mechanical metamaterials. Of course, we always take note of photolithography processes because we use them to make PC boards and even integrated circuits. A desktop printer that could do photolithography might open up new ideas for producing electronic circuitry.

If you want to play with photolithography today, [Ben Krasnow] has some advice. Of course, there are several ways to produce PC boards, even with a garden-variety 3D printer.

3D Printing With A Drone Swarm?

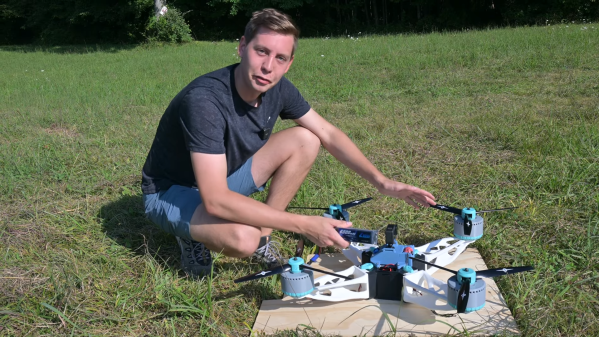
Even in technical disciplines such as engineering, there is much we can still learn from nature. After all, the endless experimentation and trials of life give rise to some of the most elegant solutions to problems. With that in mind, a large team of researchers took inspiration from the humble (if rather annoying) wasp, specifically its nest-building skills. The idea was to explore 3D printing of structures without the constraints of a framed machine, by mounting an extruder onto a drone.

As you might expect, one of the most obvious issues with this attempt is the tendency of the drone’s to drift around slightly. The solution the team came up with was to mount the effector onto a delta bot carrier hanging from the bottom of the drone, allowing it to compensate for its measured movement and cancel out the majority of the positional error.

The printing method relies upon the use of two kinds of drone. The first done operates as a scanner, measuring the print surface and any printing already completed. The second drone then approaches and lays down a single layer, before they swap places and repeat until the structure is complete.

Multiple drones can print simultaneously, by flying in formation. Prints were demonstrated using a custom cement-like material, as well as what appeared to be expanding foam, which was impressive feat to say the least.

The goal is to enable the printing of large, complex shaped structures, on any surface, using a swarm of drones, each depositing whatever material is required. It’s a bit like a swarm of wasps building a nest, into whatever little nook they come across, but on the wing.

We’ve been promised 3D printed buildings for some time now, and while we’re not sure this research is going to bring us any closer to living in an extruded house, we’re suckers for a good drone swarm here at Hackaday.

Continue reading “3D Printing With A Drone Swarm?”

PETamentor2 Is Latest To Turn Bottles Into Filament

[Ondřej Šraitr] has several videos, including the one you can watch below, about his PETamentor2 — a machine for turning PET bottles into printable filament. You can grab the files on Thingiverse, and there aren’t many parts you have to buy.

The device looks good, and from the videos, it appears to work well. A blade slices the bottle into a strip that feeds what is essentially a hot end that pushes out the filament. The blade is adjustable to set the amount of plastic fed at any given time which is important because you need enough to create a solid piece of filament but not any more than that.

Surprisingly, the bill of materials doesn’t include any sort of microcontroller. There is a PWM speed control module to drive the 7 RPM motor and a temperature controller. Of course, you need a power supply, a heater block and a heater. The nozzle is, oddly enough, a standard 0.4 mm nozzle. You drill it out to 1.5 mm and die swell takes care of getting to the final 1.75 mm size.

It takes about 45 minutes to eat up what looks like a 1-liter bottle. The filament produced looks good in the video. We aren’t sure, but we think that was a roll of solder used as a ballast weight on top of the bottle keeping it moving in a downward direction. Bottles imply wetness, of course, so after producing the filament, it needs to be dried.

This is the second version of the machine and we were a bit surprised that we never saw a video of the filament in use. But it looks like it would work and it isn’t like we haven’t seen this technique used before. In fact, we’ve seen it several times. We can’t remember any that looked as stylish as the PETamentor2, though, and we are interested to hear about anyone’s results with the resulting filament.

Continue reading “PETamentor2 Is Latest To Turn Bottles Into Filament”

Toilet Paper Tube Pulls Dissolved Resin From IPA, Cures It For Disposal

SLA 3D printing with resin typically means rinsing parts with IPA (isopropyl alcohol). That process results in cloudy, used IPA containing a high concentration of dissolved resin. The dual goals of cleaning and reusing IPA are important ones, and we have to say, [Jan Mrázek]’s unusual experiment involving a UV source and slowly-rotating paper tube to extract and cure dissolved resin might look odd, but the results are definitely intriguing.

Dissolved resin successfully pulled from IPA and cured onto a cardboard roll. This particular one rotated a bit too quickly, trapping IPA in the curing process and yielding a slightly rubbery wad instead of a hard solid.

The best way to dispose of liquid resin is to cure it into a solid, therefore making it safe to throw away. But what about resin that has been dissolved into a cleaning liquid like IPA? [Jan] felt that there was surely a way to extract the dissolved resin somehow, which would also leave the IPA clean for re-use. His solution? The device shown here, which uses a cardboard tube to pull dissolved resin from an IPA bath and a UV source to cure it onto the tube.

Here’s how it works: the tube’s bottom third sits in dirty IPA, and UV LEDs shine on the top of the tube. The IPA is agitated with a magnetic stirrer for best results. A motor slowly rotates the cardboard tube; dissolved resin gets on the tube at the bottom, UV cures it at the top, and the whole thing repeats. Thin layers of cured resin slowly build up, and after long enough, the roll of cured resin can be thrown away and the IPA should be clean enough for reuse.

So far it’s a pretty successful test of a concept, but [Jan] points out that there are still some rough edges. Results depend on turning the tube at a good rate; turning it too quickly results in IPA trapped with the cured residue. On the plus side, the UV source doesn’t need to be particularly powerful. [Jan] says that Ideally this would be a device one could run in a sealed container, cleaning it over one or two days.

Resin printing is great, but it’s a messy process, so anything that makes it less wasteful is worth checking out. Got any ideas for improving or building on this concept? If so, don’t keep ’em to yourself! Let us know in the comments.