DIY BobbleHead

Making A Bobblehead Of You

Bobbleheads, you remember them, small figures with a spring-mounted comically large head. They brought joy to millions of car drivers every day as at least 97.5% of all registered cars in the 1960’s had bobbleheads mounted to the dash. Years later bobblehead popularity has waned but [Luis] is trying to bring them back, this time not as your iconic sports hero but as YOU!

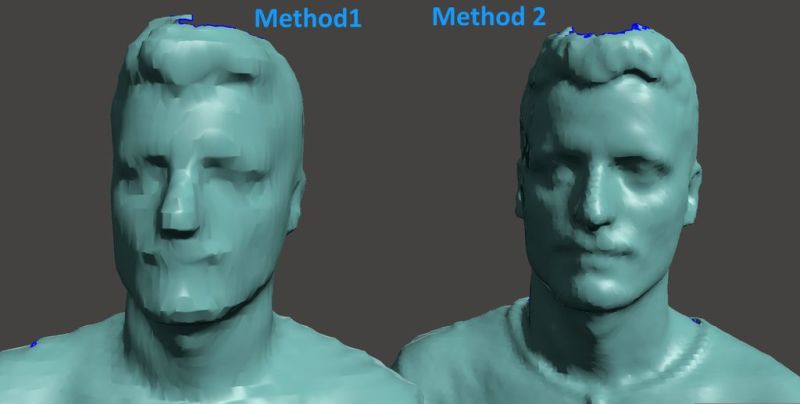
[Luis] uses software called Skanect along with his Kinect to scan a persons geometry. There is a free version of Skanect but it is limited to exporting STL files no larger than 5,000 faces. That means that 3d printed bobbleheadscans of large objects (including people) come out looking noticeably faceted. [Luis] came up with a work-around that results in a much finer detailed scan. Instead of scanning an entire person with one scan, he would do 4 separate scans. Since each individual scan can support 5,000 faces, the resulting merged model can be up to 20,000 faces. Check out the comparison, the difference between the two scanning methods is quite noticeable. MeshMixer is the software used to merge the STL files of the 4 separate scans.
Once the full body is assembled in MeshMixer, it is time to separate the head from the body. A cylindrical hole is then made in the bottom of the head and the top of the body. This hole is just slightly larger than the spring used to support the head. The parts are then printed, painted and assembled. We have to say that the end result looks pretty darn good.

Portabilizing The Kinect

Way back when the Kinect was first released, there was a realization that this device would be the future of everything 3D. It was augmented reality, it was a new computer interface, it was a cool sensor for robotics applications, and it was a 3D scanner. When the first open source driver for the Kinect was released, we were assured that this is how we would get 3D data from real objects into a computer.

Since then, not much happened. We’re not using the Kinect for a UI, potato gamers were horrified they would be forced to buy the Kinect 2 with the new Xbox, and you’d be hard pressed to find a Kinect in a robot. 3D scanning is the only field where the Kinect hasn’t been over hyped, and even there it’s still a relatively complex setup.

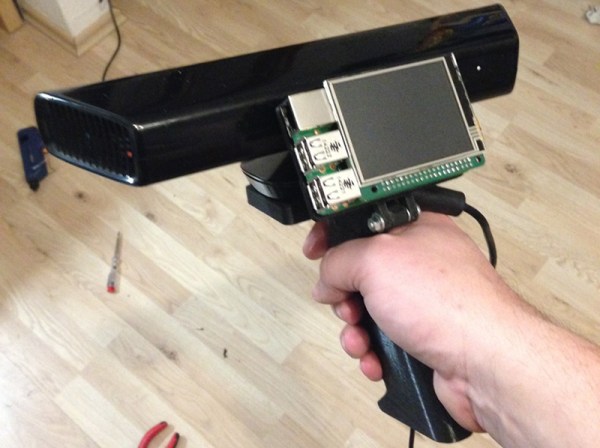
This doesn’t mean a Kinect 3D scanner isn’t an object of desire for some people, or that it’s impossible to build a portabilzed version. [Mario]’s girlfriend works as an archaeologist, and having a tool to scan objects and places in 3D would be great for her. Because of this, [Mario] is building a handheld 3D scanner with a Raspberry Pi 2 and a Kinect.

This isn’t the first time we’ve seen a portablized Kinect. Way back in 2012, the Kinect was made handheld with the help of a Gumstix board. Since then, a million tiny ARM single board computers have popped up, and battery packs are readily available. It was only a matter of time until someone stepped up to the plate, and [Mario] was the guy.

The problem facing [Mario] isn’t hardware. Anyone can pick up a Kinect at Gamestop, the Raspberry Pi 2 should be more than capable of reading the depth sensor on the Kinect, and these parts can be tied together with 3D printed parts. The real problem is the software, and so far [Mario] has Libfreenect compiling without a problem on the Pi2. The project still requires a lot of additional libraries including some OpenCV stuff, but so far [Mario] has everything working.

You can check out his video of the proof of concept below.

Continue reading “Portabilizing The Kinect”

3D Scanning Rotary Table

3D Scanning Rig And DIY Turntable

It seems almost every day 3D scanning is becoming more and more accessible to the general DIYer. The hardware required is minimal and there are several scanning softwares and workflows to choose from. However, if you have slowly walked around a subject while holding a Kinect and trying to get a good scan, you know this is not an easy task. A quick internet search will result in several DIY scanning setup solutions that have been cobbled together and lack substantial documentation…. until now! [aldricnegrier] is fighting back and has designed and documented a rotary table that will spin at a constant speed while a subject is 3D scanned, making person scanning just that much easier.

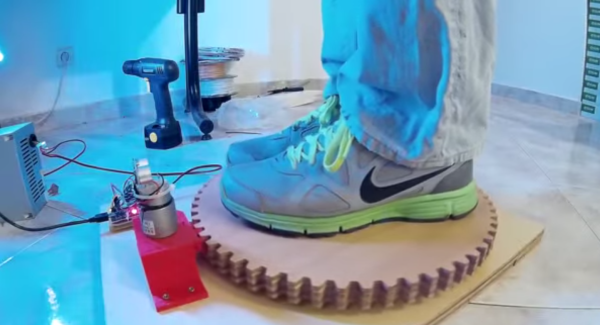
The project starts off with a plywood base with a Lazy Susan bearing assembly attached to the top. The Lazy Susan supports the rotating platform for the subject person to stand on, but it’s not just a platform, it’s also a huge gear! The platform teeth mesh with a much smaller 3D printed gear mounted on the shaft of a DC motor and reduction gearbox assembly.

Another goal of the project was to make the rotary table autonomous. There is an ultrasonic sensor mounted to the base aimed above the rotating platform. The ultrasonic sensor is connected to an Arduino and if the system senses someone or something on the platform for 3 seconds, the Arduino will command a DC motor driver to start spinning the platform.

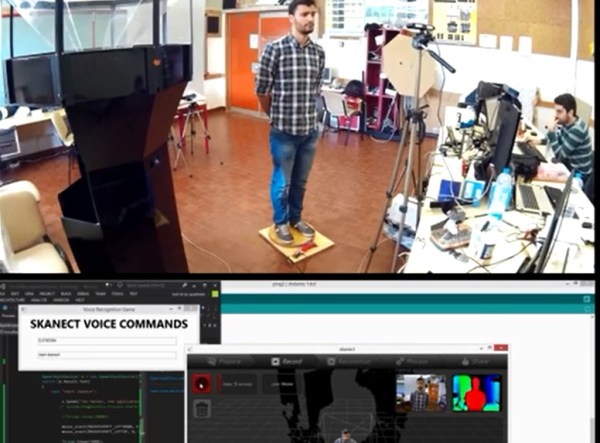
As cool as this project is so far, [aldricnegrier] wanted to make it even cooler: he added speech recognition. Using Microsoft’s Speech Toolkit, saying the words ‘Start Skanect‘ will start the scanning process on the PC. Now, a sole person can scan themselves easily and reliably.

[aldricnegrier] has made all of his CAD files, STL files and Arduino code available so anyone wanting to build this clearly capable setup can do so!

Take A Spin On This Voice-Controlled 3D Scanning Rig

[Aldric Negrier] wanted to make 3D-scanning a person streamlined and simple. To that end, he created this voice-controlled 3D-scanning rig.

[Aldric] used a variety of hacking skills to make this project, and his thorough Instructable illustrates this nicely. Everything from CNC milling to Arduino programming to 3D-printing was incorporated into the making of this rig. Plywood was used to construct the base and the large toothed gear. A 12″ Lazy Susan bearing was attached to this gear to allow smooth rotation. In order to automate the rig, a 12V DC geared motor was attached to a smaller 3D-printed gear and positioned on the base. When the motor is on, the smaller gear’s teeth take the larger gear for a spin. He used a custom dual H-bridge motor driver made by a friend, which is connected to an Arduino Nano. The Nano is also connected to a Bluetooth module and an ultrasonic range finder. When an object within 1-35cm is detected on the rig for 3 seconds, the motor starts to spin, stopping when the object is no longer detected. A typical scan takes about 60 seconds.

This alone would have been a great project, but [Aldric] did not stop there. He wanted to be able to step on the rig and issue commands while being scanned. It makes sense if you want to scan yourself – get on the rig, assume the desired position, and then initiate the scan. He used the Windows speech recognition SDK to develop an application that issues commands via Bluetooth to Skanect, a 3D-scanning software. The commands are as simple as saying “Start Skanect.” You can also tell the motor to switch on or off and change its speed or direction without breaking form. [Aldric] used an Asus Xtion for a 3D-scanner, but a Kinect will also work. Afterwards, he smoothed his scans using MeshMixer, a program featured in previous hacks.

Check out the videos of the rig after the break. Voice commands are difficult to hear due to the background music in one of the videos, but if you listen carefully, you can hear them. You can also see more of [Aldric’s] projects here or on this YouTube channel.

Continue reading “Take A Spin On This Voice-Controlled 3D Scanning Rig”

Automatic 3D Scanning On The Cheap

After hearing about a few 3D object scanners, [Will] thought one of these tools could find a place in his workshop. The price of these scanners made him reconsider simply buying one, so he just made one out of parts that were sitting around. This was the first version of his 3D scanner. It worked, but there were a few shortcomings. [Will] had to rotate the object manually. That’s a cheap way of doing it, but the method is tedious.

Now [Will] is back for round two. He’s made some improvements, and this time a few bits of electronics automate the process, allowing [Will] to hit a button, walk away, and come back to a scanned object.

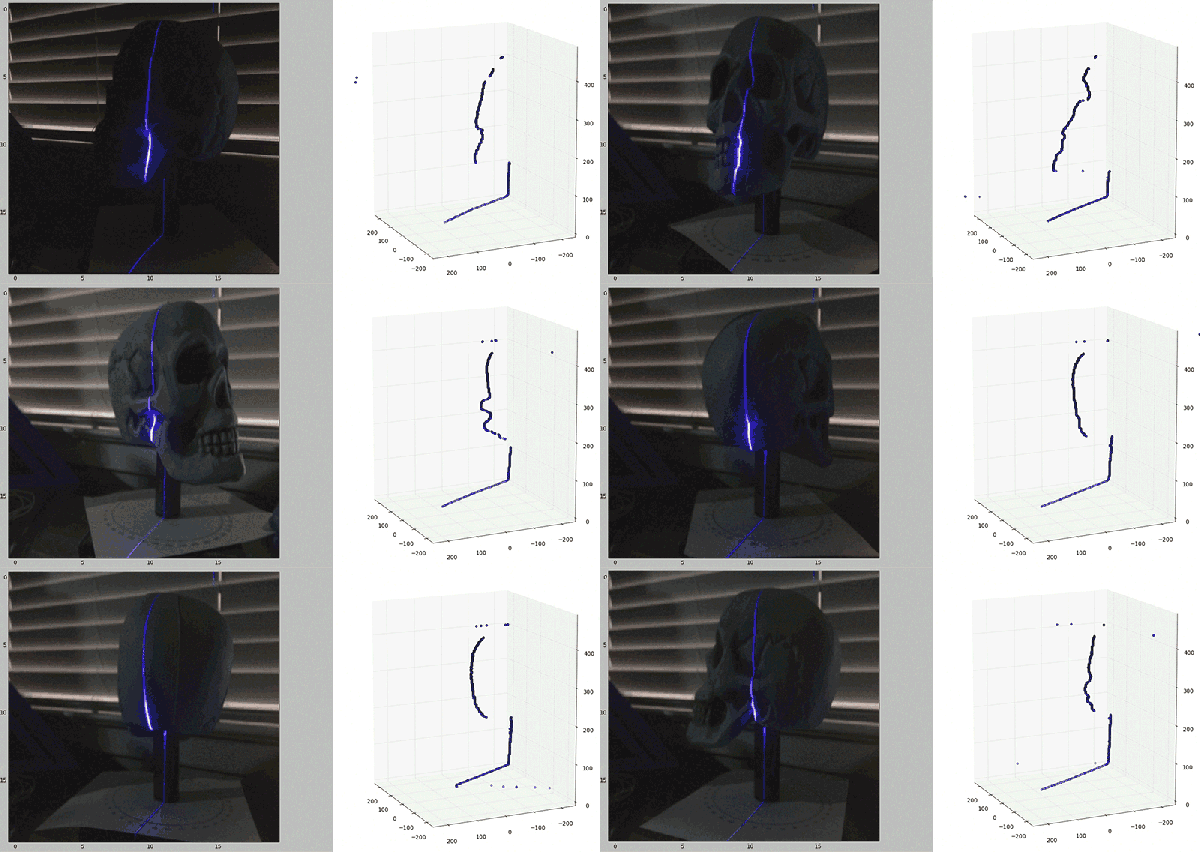
Even though [Will] has improved his setup immensely, the theory of how to scan an object remains the same. He’s projecting a straight vertical line on an object, taking a few snapshots with a webcam, and reconstructing the object with computer vision algorithms and Meshlab. The new additions include a BeagleBone Black, a stepper motor and an EasyDriver from Sparkfun, and a turntable.

[Will] wrote two scripts for this project. The first does the mechanical heavy lifting – turning the stepper motor and taking a picture, while the second converts the output from the webcam to a point cloud. From there, the point cloud is sent over to Meshlab, and an object appears on [Will]’s hard drive.

There’s about $80 in hardware invested in this setup, and considering the inspiration for this project was the $800 Makerbot Digitizer, we’re going to call [Will]’s experiments in 3D scanning a success.

Scanning On The Cheap

[Will] recently stumbled across the MakerBot Digitizer, a device that’s basically a webcam and a turntable that will turn a small object into a point cloud that can then be printed off on a MakerBotⓇ 3D printer. Or any other 3D printer, for that matter. The MakerBot Digitizer costs $800, and [Will] wondered if he could construct a cheaper 3D scanner with stuff sitting around his house. It turns out, he can get pretty close using only a computer, a webcam, and a Black and Decker line laser/level.

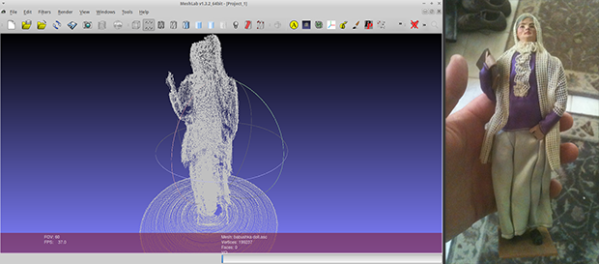
The build started off with a webcam mounted right next to the laser line level. Software consisted of Python using OpenCV, numpy, and matplotlib to grab images from the webcam. The software looks at each frame of video for the path of the laser shining against the object to be scanned. This line is then extracted into a 3D point cloud and reconstructed in MeshLab to produce a 3D object that might or might not be 3D printable.

This is only [Will]’s first attempt at creating a scanner. He’s not even using a turntable with this project – merely manually rotating the object one degree for 360 individual frames. It’s extremely tedious, and he’ll be working on incorporating a stepper motor in a future version.

This is only attempt number 1, but already [Will] has a passable scanned object created from a real-world thing.

A 3D(ollar) Scanner

Once you have a 3D printer, making copies of objects like a futuristic Xerox machine is the name of the game. There are, of course, 3D scanners available for hundreds of dollars, but [Joshua] wanted something a bit cheaper. He built his own 3D scanner for exactly $2.73 in parts, salvaging the rest from the parts bin at his local hackerspace.

[Josh]’s scanner is pretty much just a lazy suzan (that’s where he spent the money), with a stepper motor drive. A beam of laser light shines on whatever object is placed on the lazy suzan, and a USB webcam feeds the data to a computer. The build is heavily influenced from this Instructables build, but [Josh] has a few tricks up his sleeve: this is the only laser/camera 3D scanner that can solve a point cloud with the camera in any vertical position. This potentially means algorithmic calibration, and having the copied and printed object come out the same size as the original. You can check out that code on the git.

Future improvements to [Josh]’s 3D scanner include the ability to output point clouds and STLs, meaning anyone can go straight from scanning an object to slicing it for a 3D printer. That’s a lot of interesting software features for something that was basically pulled out of the trash.