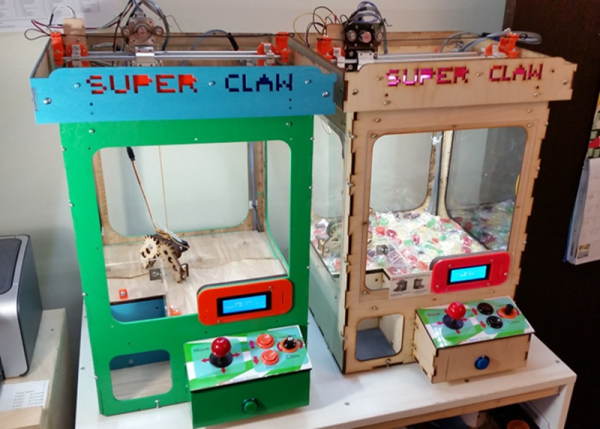
[Ryan Bates] apparently really likes building claw machines. We noticed his latest build with a new PCB, but then we scrolled down and found other incarnations of the machine going back to 2015.
The laser-cut claw is interesting looking and the brains are an Arduino. You can see the action in the video below and there are plenty of older videos on the project page.
[Paul] has put together an insanely small yet powerful tracker for monitoring all the things. The USB TinyTracker is a device that packages a 48MHz processor, 2G modem, GPS receiver, 9DOF motion sensor, barometer, microphone, and micro-SD slot for data storage. He managed to get it all to fit into a USB thumb drive enclosure, meaning that you can program it however you want in the Arduino IDE, then plug it into any USB port and let it run. This enables things like remote monitoring, asset tracking, and all kinds of spy-like activity.
One of the most unusual aspects of his project, though, is this line: “Everything came together very nicely and the height of parts and PCBs is exactly as I planned.” [Paul] had picked out an enclosure that was only supposed to fit a single PCB, but with some careful calculations, and picky component selection, he managed to fit everything onto two 2-layer boards that snap together with a connector and fit inside the enclosure.
We’ve followed [Paul’s] progress on this project with an earlier iteration of his GSM GPS Tracker, which used a Teensy and fit snugly into a handlebar, but this one is much more versatile.
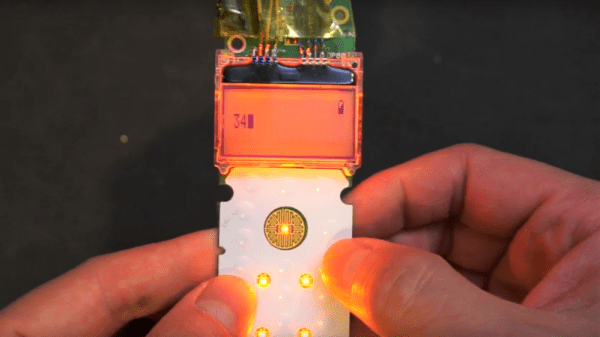
While it’s true that your parts bin might have a few parts harvested from outdated devices of recent vintage, there’s not much to glean anymore aside from wall warts. But the 3×48-character LCD from [Kerry Wong]’s old Uniden cordless landline phone was tempting enough for him to attempt a teardown and reverse engineering, and the results were instructive.
No data sheet? No problem. [Kerry] couldn’t find anything out about the nicely backlit display, so onto the logic analyzer it went. With only eight leads from the main board to the display module, it wasn’t likely to be a parallel protocol, and the video below shows that to be the case. A little fiddling with the parameters showed the protocol was Serial Peripheral Interface, but as with other standards that aren’t exactly standardized, [Kerry] was left with enough ambiguity to make the analysis interesting. Despite a mysterious header of 39 characters, he was able in the end to drive the LCD with an Arduino, and given that these phones were usually sold as a bundle with a base and several handsets, he ought to have a nice collection of displays for the parts bin.
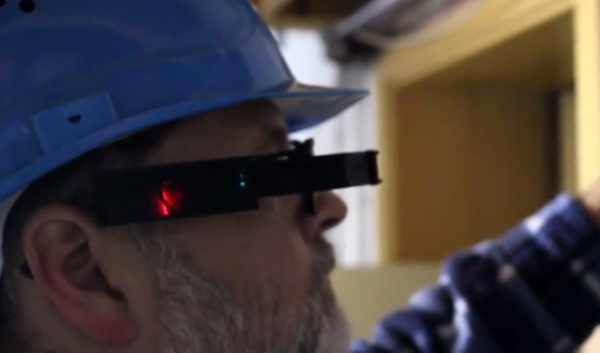
It seems like the multimeter is never easy to see during a project. Whether it’s troubleshooting a vehicle’s electrical system and awkwardly balancing the meter on some vacuum lines and the intake manifold, or installing a new solar panel and hoping the meter doesn’t fall on the ground while the leads are in both hands, it seems like there’s never a good way to see the meter while actually using it. Some meters have a small magnet and strap that can be used to hang them temporarily, but this will only get you so far.
[Alain Mauer]’s entry into the Hackaday Prize looks to solve this glaring problem. Using a heads-up Bluetooth display mounted to a pair of safety glasses, a multimeter can be connected to the device in order to display its information directly to its user. Based on his original idea which used a normal pair of prescription glasses as its foundation, [Alain]’s goal is to reduce safety hazards that might arise when using a multimeter in an awkward or dangerous manner that might not otherwise be possible.
The device uses an Arduino Pro Micro to connect to the multimeter and drive the display. [Alain] notes that the real challenge is with the optical system, however. Either way though, this would be a welcome addition to any lab, workspace, or electrician’s toolbox. Be sure to check out the video of it in action after the break.
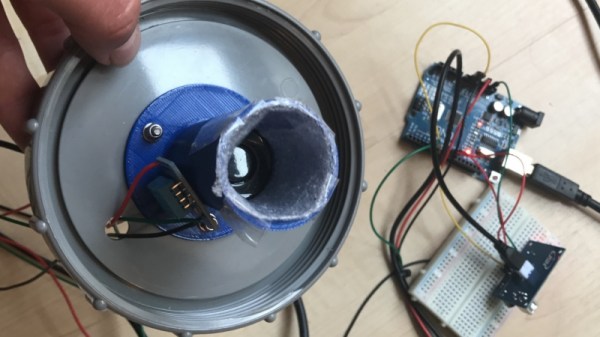
All over the world, in particular in underdeveloped countries, people die every year by the thousands because of floods. The sudden rise of water levels often come unannounced and people have no time to react before they are caught in a bad spot. Modern countries commonly have measure equipment deployed around problematic areas but they are usually expensive for third world countries to afford.
[Benne] project devises a low-cost, cloud-connected, water level measuring station to allow remote and central water level monitoring for local authorities. He hopes that by being able to monitor water levels in a more precise and timely fashion, authorities can act sooner to warn potentially affected areas and increase the chance of saving lives in case of a natural disaster.
At the moment, the project is still in an early stage as they are testing with different sensors to figure out which would work best in different scenarios. Latest version consists essentially in an Arduino UNO, an ultrasonic distance sensor, and a DHT temperature/humidity sensor to provide calibration since these characteristics affect the speed of sound. Some years ago, we covered a simple water level monitoring using a Parallax Ping sensor, but back then the IoT and the ‘cloud’ weren’t nearly as fashionable. They also tested with infrared sensors and a rotary encoder.
They made a video of the rotary encoder, which we can see below:
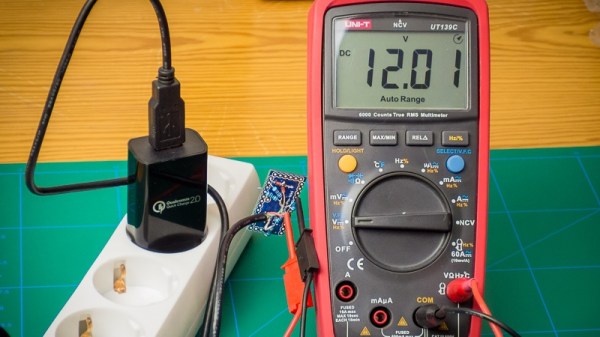
USB chargers are everywhere and it is the responsibility of every hacker to use this commonly available device to its peak potential. [Septillion] and [Hugatry] have come up with a hack to manipulate a USB charger into becoming a variable voltage source. Their project QC2Control works with chargers that employ Quick Charge 2.0 technology which includes wall warts as well as power banks.
Qualcomm’s Quick Charge is designed to deliver up to 24 watts over a micro USB connector so as to reduce the charging time of compatible devices. It requires both the charger as well as the end device to have compatible power management chips so that they may negotiate voltage limiting cycles.
In their project, [Septillion] and [Hugatry] use a 3.3 V Arduino Pro Mini to talk to the charger in question through a small circuit consisting of a few resistors and diodes. The QC2.0 device outputs voltages of 5 V, 9 V and 12 V when it sees predefined voltage levels transmitted over the D+ and D- lines, set by Arduino and voltage dividers. The code provides function calls to simplify the control of the power supply. The video below shows the hack in action.
Quick Charge has been around for a while and you can dig into the details of the inner workings as well as the design of a compatible power supply from reference designs for the TPS61088 (PDF). The patent (PDF) for the Quick Charge technology has a lot more detail for the curious.
Similar techniques have been used in the past and will prove useful for someone looking for a configurable power supply on the move. This is one for the MacGyver fans.
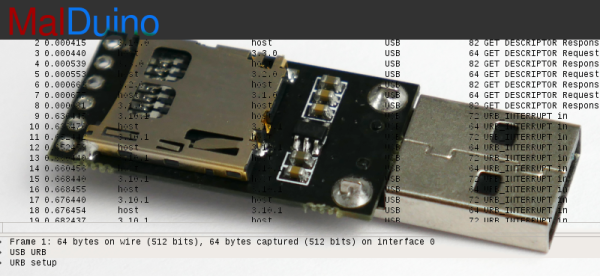
A while back, I wrote an article about Malduino, an Arduino-based, open-source BadUSB device. I found the project interesting so I signed up for an Elite version and sure enough, the friendly postman dropped it off in my mail box last Friday, which means I got to play around with it over the weekend. For those who missed the article, Malduino is USB device which is able to emulate a keyboard and inject keystrokes, among other things. When in a proper casing, it will just look like a USB flash drive. It’s like those things you see in the movies where a guy plugs in a device and it auto hacks the computer. It ships in two versions, Lite and Elite, both based on the ATmega32U4.
The Lite version is really small, besides the USB connector it only contains a switch, which allows the user to choose between running and programming mode, and a LED, which indicates when the script has finished running.
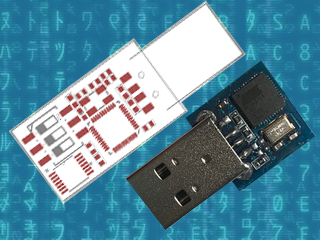
Original Malduino Elite sketch and Lite prototype
The Elite version is bigger, comes with a Micro-SD card reader and four DIP switches, which allow the user to choose which script to run from the card. It also has the LED, which indicates when a script has finished to run. This allows the user to burn the firmware only once and then program the keystroke injection scripts that stored in the Micro-SD card, in contrast to the Lite version which needs to be flashed each time a user wants to run a different script.
These are the two Malduinos and because they are programmed straight from the Arduino IDE, every feature I just mentioned can be re-programmed, re-purposed or dropped all together. You can buy one and just choose to use it like a ‘normal’ Arduino, although there are not a lot of pins to play around with. This freedom was one the first things I liked about it and actually drove me to participate in the crowd-funding campaign. Read on for the full review. Continue reading “Malduino Elite – First Impressions”→