Do Anything With The Help Of Lucid Dreaming Goggles

In the world of your dreams, you can build an entire world, an entire universe, an entire society governed by your every whim. While lucid dreaming you are a god in your own mind, free to create or destroy at will. You can train yourself to recognize when you are dreaming, but sometimes a little technological help can speed you towards the path of becoming an old testament god. [Will] over at revolt lab built a set of lucid dreaming goggles so he could take control of his own dreams.

To induce a lucid dream, [Will] took a pair of safety goggles and attached red LEDs to shine into his closed eyes. A simple circuit was constructed out of an ATtiny85 that blinks the LEDs two hours after being turned on. The idea is these LEDs will be noticed by the user during REM sleep and they will realize they’re still sleeping. After that, it’s basically Inception.

It is possible to induce lucid dreaming through psychological and not technological hacks; just asking yourself, ‘am I dreaming’ throughout the day may be enough to make a holodeck in your mind while you’re sleeping. You can check out a video of [Will] wearing his goggles after the break.

Continue reading “Do Anything With The Help Of Lucid Dreaming Goggles”

Emulating ARM On An 8-pin AVR

Falling on the heels of some fabulous ‘lets see what we can emulate on an AVR’ builds we’ve seen, [Dimitri] emulated an ARM Cortex-M0 on an 8-pin ATtiny85.

The emulator is written entirely in AVR assembly. Unfortunately, the instruction set of ATtinys don’t have a multiply instruction, so that had to emulated in a separate piece of code. Even with this addition, the emulator is very small; the core is just over 1300 instructions and small enough to fit on the Flash of the very small ‘tiny85.

Unlike the ATMega running Linux we saw last month, [Dimitri] won’t be doing anything crazy like making the tiniest and worst Linux computer ever. The Cortex-M0 doesn’t have a MMU, so Linux is out of the question. [Dimitri] could go with μCLinux, with the addition of a I2C EEPROM and RAM, but don’t expect a speed demon for an emulated ARM running at 200kHz.

[Dimitri] put all the code up on his webpage, and the installation is just running ‘make.’  It looks easy enough to get up and running very quickly, so we’re sure some bored hardware guru will come up with something interesting to do with this code.

Poking Machine

We may be showing our age here, but we have no idea what a ‘poke’ on Facebook actually means. Whether it’s the passive-aggressive manifestations of online stalkers or an extension of  the ‘like’ button, all we know is [Jasper] and [Bartholomäus] built a machine that translates virtual pokes into our analog world.

The “Poking Machine” as [Jasper] and [Bart] call it, syncs to your phone over a Bluetooth connection. The build is incredibly simple: just an ATtiny running Arduino for ATtiny, a Bluetooth controller (possibly this one from Sparkfun), and a servo. When the Facebook app on [Jasper] and [Bart]’s phone receives notification of a ‘poke’, the servo is powered and gently taps the wearer on the arm.

One thing we really like about this project is the case made of several layers of laser-cut acrylic bolted together. This case offers a very clean look even if it is a bit ungainly. We suppose the guys could have used a simple vibration/pager motor for this build, but it wouldn’t exactly be a poking machine at that point. Check out the build video after the break.

Continue reading “Poking Machine”

Monitoring Home Electricity Usage Via A Tidy Wall Display

power-meter-display

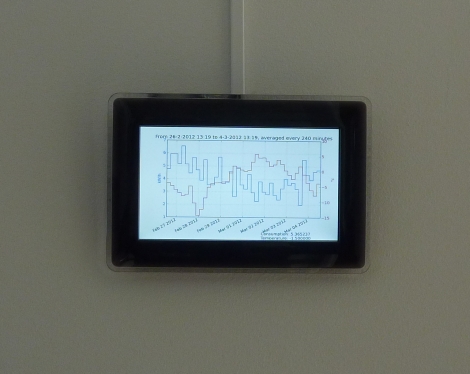
[Janne Mäntyharju] wanted to get an idea as to how much electricity he consumed in his new home, mainly to see if using his fireplace for additional heat had any effect on his bill. Luckily his power meter was mounted in the utility room of his house, making it easy to keep tabs on his usage.

His meter features a small LED that blinks a fixed number of times per consumed Kilowatt hour, so he mounted a photoresistor and ATtiny2313 above it to detect the light pulses. [Janne’s] server polls the microcontroller every 5 minutes over an XBee connection, recording the power usage in an SQL database for further analysis. From this database, he generates graphs showing both the temperature in his home as well as the average electricity usage for the specified time period.

[Janne] also wanted to make the data easily accessible, so he constructed a wall-mounted display using a Beagleboard and digital picture frame. The display not only shows his electricity usage, but it toggles between the weather, calendar events, IRC logs, and pictures from his security camera.

We’ve certainly seen this sort of electric meter monitoring before, but it serves as a quick reminder that given the right tools, watching your power usage (among other things) can be as easy as taking a quick glance over at the wall.

Learning To Use The V-USB (AVR USB Firmware) Library

The V-USB library is a pretty handy piece of code that lets you add USB connectivity to ATtiny microcontrollers (it was previously named tinyUSB). But if you’ve ever looked into adding the library to your own projects you may have been stymied by the complexity of the code. There are many examples, but there’s a lack of a concise quick-start for the uninitiated. [Joonas Pihlajamaa] has been working to correct that shortfall with his four-part V-USB tutorial series. It’s not for the absolute newbie; you should already be comfortable working with AVR chips but that’s the only real prerequisite we can see.

He starts the series with a look into the hardware considerations. USB provides a 5V power rail but the data lines expect 3.3V logic so this must be accounted for. With the test rig built on a breadboard he moves on to pick apart the code, covering various user-defined variables that you’ll need to set based on your project’s needs. We’re going to keep this on the back burner and hopefully the Troll Sniffing Rat will get a makeover (although we must say comments have been a lot nicer as of late… keep it up!).

We’ve embedded links to all four tutorial parts after the break.

Continue reading “Learning To Use The V-USB (AVR USB Firmware) Library”

WiFi Experiments With ATtiny Microcontrollers

[Quinn Dunki] got some free stuff from Element14 to evaluate, including this Mircrochip WiFi module. It’s been used as the centerpiece of an Arduino shield in the past, and she grabbed a copy of that library to see if it would play nicely with an ATtiny chip. What follows is a struggle to de-Arduino the code so that it’s portable for all AVR controllers.

This module is one of the least expensive ways to add WiFi to a project, coming in at around $23. But it’s not really an all-in-one solution as there’s still a huge software hurdle to cross. The hardware provides access to to radio functions needed to communicate with the network, but you need to supply the TCP/IP stack and everything that supports it. Hence the re-use of the Arduino library.

Battling adversity [Quinn] fought the good fight with this one. Switching from an ATtiny to the ATmega168, compiling more code, and troubleshooting the process. She used a single LED as feedback, and can get some connectivity with her hotspot. But to this point she hasn’t gotten everything up and running.

We’re hot for an AVR WiFi solution that is cheap and easy to use. But as we see here, the software is complex and perhaps best left up to beefier hardware like the ARM controllers. What do you think?

Automatic Flashlight Tag Damage Sensor

You’re out at night and playing a boisterous game of flashlight tag. But how can you tell if you’ve been mortally wounded by your opponents light beam? [Kenyer] solved this problem by building a flashlight tag damage sensor which is worn by each participant. It adds a bit of the high-tech equipment used with laser tag while keeping a low-tech price tag.

The sensor relies on a light dependent resistor to register hits when a flashlight beam passes through the round window. It will only register one hit in a three-second time period. At the end of the game, the total number of hits recorded can be flashed back using an on-board LED to see who is the victor. You can see a demo of this functionality in the clip after the break.

[Kenyer] started with a breadboard prototype using an Arduino as the driver. Obviously the cost of an Arduino for every player is a bit ridiculous. He scaled down the project, running the Arduino code on an ATtiny microcontroller. Continue reading “Automatic Flashlight Tag Damage Sensor”