THP Entry: Tinusaur AVR Platform Teaches Noobs, Plays Game Of Life

tinusaur[Neven Boyanov] says there’s nothing special about Tinusaur, the bite-sized platform for learning and teaching the joys of programming AVRs. But if you’re dying to gain a deeper understanding of your Arduino or are looking to teach someone else the basics, you may disagree with that assessment.

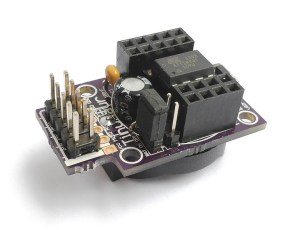
Tinusaur is easy to assemble and contains only the components necessary for ATTiny13/25/45/85 operation (the kit comes with an ’85). [Neven] saved space and memory by forgoing USB voltage regulator. An optional button cell mount and jumper are included in the kit.

[Neven] is selling boards and kits through the Tinusaur site, or you can get the board from a few 3rd party vendors. His site has some projects and useful guides for assembling and driving your Tinusaur. He recently programmed it to play Conway’s Game of Life on an 8×8 LED matrix. If you’re looking for the zero-entry side of the AVR swimming pool, you can program it from the Arduino IDE. Be warned, though; they aren’t fully compatible.


SpaceWrencherThe project featured in this post is an entry in The Hackaday Prize. Build something awesome and win a trip to space or hundreds of other prizes.

USB Keyboard Becomes An AVR Programmer

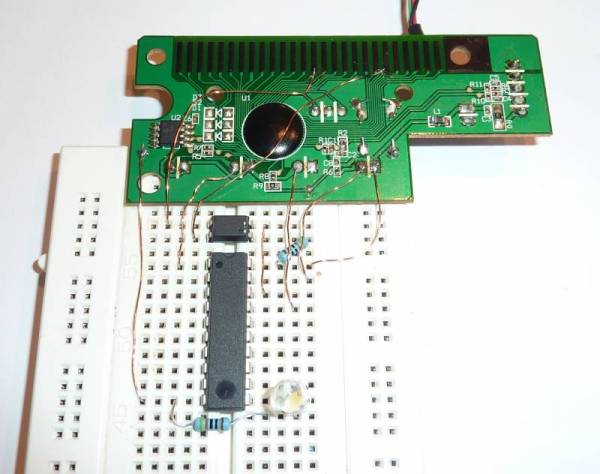
[Steve] created an AVR programmer using an old USB keyboard. We feature a bunch of AVR programmers, but this one is made from parts that many people will have lying around. There are two components: the controller PCB from a USB keyboard, and an optocoupler for emulating key presses.

In order to send data to the AVR, [Steve] used the LED outputs on the keyboard. These LEDs can easily be toggled according to the HID device specification. They provide a 5 volt output with current limiting resistors, which means they can be connected directly to the target AVR.

Reading data is a bit more complex. The optocoupler tricks the keyboard into believing that a single key has been pressed, firing off a data transfer. The MISO pin on the AVR is connected to the row and column of the shift key, which is read by the driver.

On the software side [Steve] created an avrdude interface driver. This allows the programmer to be used with avrdude, just like any other programmer. [Steve] does point out that it isn’t the fastest programmer since the keyboard tries to debounce the MISO input, greatly limiting the speed. However, since it’s made from stuff you might have in your junk bin, it’s a neat hack.

PIC 18F4550 Dev Board

[Natsfr] was looking for a single-sided PCB to host a PIC 18F4550. Not finding one he designed his own in Kicad and is sharing (translated) the spoils of his labor.

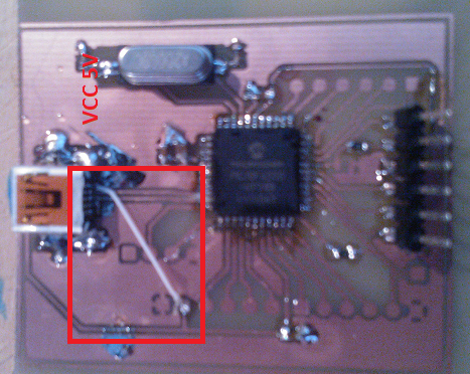
This chip has USB capabilities which is why we see it used in a ton of projects. Almost all of them (including this USB input device post) use a very large DIP package. [Natsfr] went a different route, designing for the TQFP package to keep the drilling ot a minimum. The layout includes a crystal and USB-mini port, but it also breaks out the I/O pins on the chip. The red box above shows the quick fix he used on the VCC line as the board trace was shorting on the USB jack housing.

He didn’t drill out the holes for most of the breakout pins on this prototype. There’s just one header populated for programming the PIC chip. But he does have some plans for the first board. He’s going to use [Texan’s] AVR programming firmware for PIC to turn it into a USB AVR ISP programmer.

The Complete AVR Programmer That Fits In Your Pocket

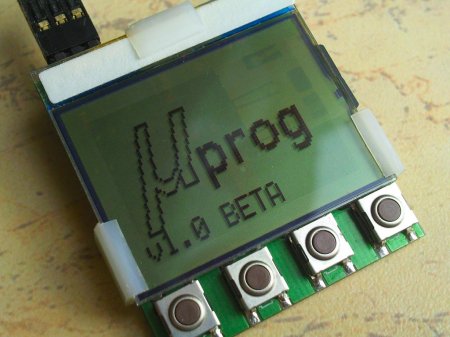
We have seen a few very nice and polished AVR based projects from [Manekinen] over the last few years. Now he has just finished his latest project, the µProg, a super tiny complete AVR programmer with a bunch of features. The µProg completely eliminates the need for a computer to program your embedded AVR chips.

The programmer fits entirely behind an LPH7779 graphics display, and accepts any FAT16/32 formatted microSD cards. Some features include, reading, writing or verifying flash, eeprom, fusebits and lockbits, it also shows amusing animations after every operation. The device is controlled with the use of 4 tactile buttons and operates on a couple of CR2032 batteries.

For an amazingly detailed write up including pictures, eagle files and firmware check out his website. The video embedded after the break has a nice demonstration of the µProg in action, showing off a few of the features and animations. You should also check out his PSU monitor and a spectrum analyser

Continue reading “The Complete AVR Programmer That Fits In Your Pocket”