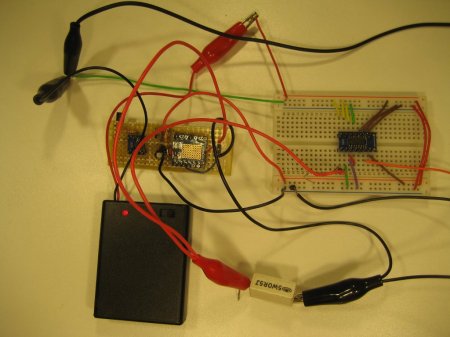
[MakingThingsWork] wanted an accurate way to keep track of the weight of his beehive, so he decided to build himself a data logging electronic scale. First he ripped the strain gauges from an old electronic scale which he then fitted to his home made beehive base. He then went about designing and building the control board which is based about the Attiny 85 (if you hadn’t guessed by the banner). An instrumentation amplifier was used to amplify the signal from the strain gauge, which is then read by the ADC on the Attiny. It looks like he had some trouble getting consistent results from the scale, so to eliminate the error caused by temperature variations he set up a fixed voltage divider for reference. With this setup the scale can produce results at +/- 0.5lb accuracy, sounds just fine for a system that cost less than $50. The V-usb project software has been used to connect the scale to his PC which he uses to collect and graph the data. All in all a very neat project and by the looks of it, some very productive bees.
Author: Nick Schulze27 Articles
Engine Hacks: Homebuilt Solid State Ignition Module
[Dan] wanted to learn a bit about solid state ignition in engines; to get started he needed a test subject, so he decided he would upgrade his old 12 horsepower lawnmower.
Originally the lawnmower engine used a magneto coil ignition system, magnetos are simple and very common in lawnmowers. The magneto is designed to produce a high voltage spike when influenced by a magnetic field. A magnet is attached to the engine’s crankshaft to time the voltage spikes, these spikes are fed directly into the spark plugs to cause ignition, this is why you don’t need a battery. [Dan] explains how the solid state ignition works on his site as he goes through the build details. Essentially it uses a hall effect sensor to detect a spinning magnet on the crankshaft for timing, and a transistor and battery to fire the spark plugs for ignition.
Once he got his circuit up and running on a breadboard, he fitted the entire system into a neat plastic box and fixed it to the front of the lawnmower, as if it was meant to be there all along.
Tree Climbing Bot Climbs Tree
To test his new skills with his Arduino, [Ben] decided that he would build a robot. With no particular need to fill other than the need to build something cool he chose to build himself a tree climbing robot. He designed the body of the robot in Google Sketchup before beginning the build. The body is made mainly from aluminium, with four motors for the gripping legs and one for the spine. [Ben] controlled the motors with the familiar L298 motor driver chip and measured their position and speed using some cleverly mounted potentiometers. The robot can climb trees of varying diameter by using the speed of the motors driving the legs to determine when the tree has been gripped.
[Ben] was then kind enough to write up a full instructable describing the build, this project includes a bit of everything, from motor control and liner drives to tips on creating a robot frame; a good read for someone wanting to get into robotics. Also check out the video after the break to see the robot in action.
The Hand-Mounted Haptic Feedback Sonar Obstacle Avoidance Asstance Device.. Or The Tacit
Here is a hack that takes the stick out of the blind mans hand. [Steve] has been working on the Tacit, a wrist mounted sonar device with haptic feedback, it’s like strapping a bat to your wrist to help you see. The Tacit uses two sonar ping sensors to measure the distance to the nearest obstacle, the relative distance to an object is then fed back to the user using two servos which apply pressure to the back of the wrist. The Tacit is sporting an Arduino pro mini to control the ping sensors and drive the servos, and runs off a 9 volt battery.
This is not an entirely new concept, haptic headbands have been around on the net for a while, but the Tacit allows the user to detect obstacles on the ground waiting to trip you up. All in all a neat hack that may have a future in helping the blind. Check out the video after the break to see it in action.
MilliOhm Measurement Made Easy
When [Kerry] wanted to measure some very small resistances very accurately he did not want to fork out the big bucks for a high end multimeter or a mico-ohmmeter, so he decided to build one himself. Measuring resistance is a simple enough concept, it directly implements Ohms law (V=IR). The problem with very small resistances is that when you apply a sensibly sized constant current to the load, the voltage to be measured is too small for conventional multimeter.
To overcome the problem [Kerry] designed a constant current source of very high accuracy using the AD8276 unity gain difference amplifier and the AD8603 high precision opamp. Then to boost the voltage across the load he used the LMP8358 programmable gain precision opamp, this allowed him to easily change the gain for different magnitude resistance, the circuit diagrams are all available on his site. Finally he used four point probes to eliminate probe wire resistance errors, ending up with the ability to measure small resistances with very high accuracy.
Eye See You.
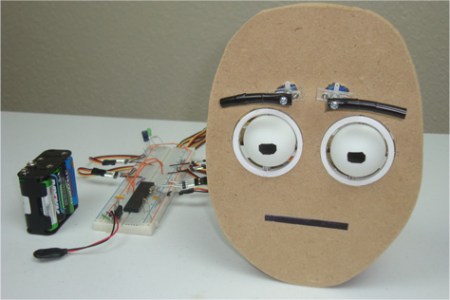
So you want to add animated eyes to your next robot? Now you can.. Using ping-pong balls, some scrap plastic and 6 servo motors [Chris] has created these animatronic eyes along with some nifty animated eyebrows. To get motion emulating realism [Chris] created a 2 axis gimbal using plastic rings and some nuts and bolts. The eyes (ping-pong balls) are held in the gimbal and actuated using two servos each. The eyebrows use another pair of servos and some tubing covered in electrical tape as the actual eyebrow.
[Chris] Kindly goes through the entire build process including information for beginners such as servo motor control. The whole thing is controlled using a PIC 18F452 and circuit diagrams and code are all available on the site. Check out the video after the break to see the eyes in action, you will also find more videos describing the build process if you follow through the tutorial.
Quit Monkeying About!
This friendly little monkey is the latest creation from [Jan Sieber] and [Ralph Kistler]. Yes it’s another Kinect Hack, the Kinect tracks the users stance using the OpenNI Framework and OSCeleton. The information is sent to an Arduino crammed inside the monkey, also inside the poor little monkey are 10 servo motors and a nightmarish wire skeleton. The monkey is left dangling from the Kinect sensor by several cables, ready to follow your every move. The monkey seems fairly sprightly for someone who has had all their insides removed, it is able to copy a multitude of stances quite swiftly.
The video after the break shows the monkey in action for about 1 minute. Then the team go through the build and application of the clever little monkey in a musical/documentary style video. There is also a creepy section where the monkey draws its own skeleton then freaks out.. Enjoy..


