Bike-Powered Everything

It’s hard to argue that bicycles aren’t super handy. They get you from point A to B in a jiffy with little effort. Since these machines are so simple and convenient, why not use them for things other than transportation? Well, [Job] set out to do just that.

[Job’s] starts with a standard single speed bike and adds a few parts. First, a stand is installed to the back axle. When in the down position, it lifts the rear wheel off of the ground and provides support so the bike does not tip over. When flipped up into the ‘up’ position the stand creates a rack for holding goods and the bike can be pedaled around in a normal manner.

dualpurposebike-midNext, a jack shaft made from a bike bottom bracket and crank is installed up front in between the top tube and down tube of the frame. On one side of the jack shaft is a sprocket and the other side is a large pulley. When converting to what [Job] calls ‘power production mode’, the chain going to the rear wheel is removed from the crank sprocket and replaced with a chain connected to the jack shaft.

With the rear stand down supporting the bike and the pedals now powering the jack shaft and large pulley, it is time to connect the bike to any sort of machine. A belt is slung around the pulley and connected to a matching pulley on a power-hungry machine. This dual-purpose bike has powered a rice thresher, peanut sheller, water pump, table saw and even a wood lathe!

[Job] set out to create a simple and inexpensive way to make a bike even more useful than just riding around town. We think he did just that. For more bike-powered stuff, check out this generator.

DiY Bike Roller

DIY Bicycle Roller Helps Cure The Winter Blues

Winter’s a-brewing and that is a downer for the everyday cycling enthusiast. There are certainly ‘bike trainers’ out on the market that will let you ride in your living room but they clamp to (or require replacing the) the rear axle. These bike trainers hold the bike in an upright position so that the rider can’t tip the bike and might feel a little boring for some. There is another indoor biking solution called a bicycle roller which is, just as it sounds, a few rollers on the ground that the bike wheels rest on and is not attached to the bike by any mechanical means. When the rider pedals the bike, the bike wheels spin the rollers. Even with the lack of forward momentum the spinning of the wheels is enough for the rider to stay upright.

[Sky-Monkey] wanted to bike during inclement weather and felt that a bike roller was simple enough for him to try building one. He likes building things and already had all the necessary parts kicking around his shop. The rollers are standard 3″ PVC pipe with plywood discs pressed into each end. The discs are counter-bored to accept standard skate bearings. Off the shelf steel rod make up the axles. The 3 rollers and axle assemblies are mounted in a wood frame made from dimensional lumber. It’s important that the front bike wheel also spins so [Sky-Monkey] made a power transmission belt out of cloth strap that spins the front roller with the rear.

The result is a fully functional bike roller that only cost a few hours of time to make. Video of this puppy in action after the break….

Continue reading “DIY Bicycle Roller Helps Cure The Winter Blues”

Edge Lit Plastic Bike

Edge-Lit Clear Plastic Bike Combines Nighttime Riding Safety With Aurora Borealis Flair

Several years ago [dan] saw some plastic frame bikes designed by MIT students. Ever since he saw those bikes he thought it would be cool to make an edge-lit plastic framed bike.

The frame is made from 1/8″ and 3/8″ thick polycarbonate sheet. The parts were designed with tongue and grooves so they fit together nicely. The joints were glued to hold everything together. Holes were drilled in the edge of the plastic large enough to fit an LED. Once the LED was inserted in the hole, it was wired up and secured with hot glue. There are about 200 LEDs on the bike, powered by a constant current LED driver circuit that [dan] designed specifically for this project.

The build process was certainly not flawless. For example, the plastic holding the bottom bracket (where the crank and pedals attach) broke. This can be avoided by increasing the amount of material in that area prior to cutting out the pieces. [dan] was able to fiberglass his broken parts back together.

[dan] admits that the bike is heavy and a little wobbly, but is definitely ride-able. He did us a favor and made all his CAD files available to anyone that wants to make one themselves. If polycarbonate is too expensive for your blood, check out this bike make from cardboard.

Forkless Motorcycle Tears Up The Track

The bike above may look like a pristine Yamaha prototype, but it’s actually the work of [Julian Farnam], a motorcycle hacker of the highest level. We caught his Yamaha A-N-D FFE 350 on OddBike, and you can read [Julian’s] own description of the bike on his Slideshare link.

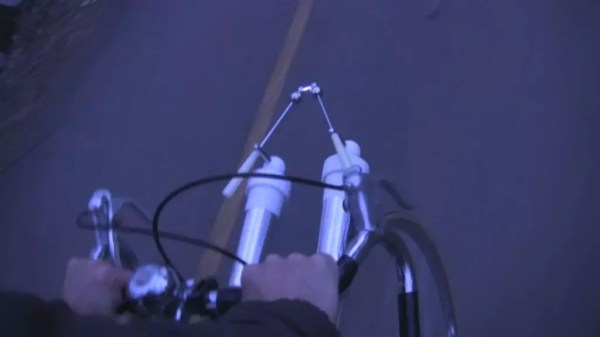
The FFE 350 started life as a Yamaha 1990’s RZ350 two-stroke racer. From there, [Julian] gave it his own Forkless Front End (FFE) treatment. Gone is the front fork, which while common in motorcycle and bicycle design, has some problems. Fore-aft flex is one – two thin tubes will never make for a rigid front end. Changing geometry is another issue. Since forks are angled forward, the front wheel moves up and to the rear as the shocks compress. This changes the motorcycle’s trail, as well.

Forkless designs may not have these issues, but they bring in a set of their own. A forkless design must have linkages and bellcranks which are often the source of slop and vibration. [Julian’s] design uses two sets of linkages in tension. The tension between the two linkages removes most of the slop and provides that directly connected feel riders associate with forks.

The FFE 350 wasn’t just a garage queen either – it laid down some serious laps at local tracks in Southern California. Unfortunately, the forkless design was too radical to catch on as a commercial venture, and the FFE has spent the last few years in storage. [Julian] is hard at work bringing it back to its 1998 glory, as can be seen on his restoration thread over on the Custom Fighters forum.

Auto Bike Light: On When Moving Off When Not

If you’re plagued by perpetually dead bike light batteries you’ll like this one. It’ll also fix the problem of remembering to turn the lights on in the first place. This hack uses an accelerometer to switch the light when the bike is in motion.

In this case the bike light was chosen for its ability to fit the control board inside the case. But with this proof-of-concept you can easily spin a tiny board with uC and accelerometer to replicate the functionality (the Bluetooth module shown above is going unused in this application). Many accelerometer chips have low-power mode that can be used to was a uC so we could easily see this having very little impact on the normally battery life of your light. The one caveat being the need to regulate the voltage as many of these lights take a 12V cell.

The other alternative is to make sure your battery is always charging during the day. This solar setup is one way, but then you won’t want to leave the thing unattended.


DIY Bike Turn Signals

DIY Bike Brake Light And Turn Signals

If you ever take your bike out and share the road with large automobiles, you know that sometimes it can get a little hairy. As a biker, you will stand no chance in a collision with a vehicle. Communicating your intentions, i.e. turning and braking, can certainly reduce your risk of getting in an accident. [Mike] didn’t like the traditional idea of taking a hand off the handlebars in order to signal to traffic so he did something about it, he built turn signals and a brake light for his bike.

The business end of this project is the rear-facing light bar mounted under the rider’s seat. It is made from Radio Shack project boxes and mounted to an off-the-shelf L bracket. A bunch of LEDs were installed in the project boxes, the yellow turn signal LEDs are arranged in the shape of arrows and the red brake light LEDs are in an oval. Inside the project boxes you will find the 9v battery that powers the circuit and also a breadboard that is home to the circuits responsible for blinking the turn signals.

DIY Bike Turn Signals

Check out the switch assembly that is mounted to the handle bars. It was built using an old reflector bracket which was already the correct size to mount to handle bars. As you would expect, there is a toggle switch for turning the turn signals on and off. A little bit more interesting is the brake switch. It is a hinge-lever style limit switch and positioned in a manner such that it is activated when the brake lever is pulled. There is no additional thought or effort required on the cyclist’s part!

Something that is certainly not expected on the switch assembly is the headphone jack. [Mike] likes to listen to music while he rides and a cord dangling around from a backpack or bike bag gets in the way. On the rear light bar, there is a headphone jack that allows an MP3 player to be plugged into. The audio signals travel up the same CAT5 cord used for the turn and brake signals. This allows only a short run of headphone cable from the handlebars to [Mike’s] ears.

DIY Cargo Bike Made From Many Bikes

Many Gave Their Lives For This Cargo Bike To Be Re-Born

Cargo bikes are very specialized and you don’t see too many of them out on the streets because of that fact. Being uncommon also means they’re rather expensive if you wanted to buy a new one. Like any hardcore bike DIYer, [Mike] got around this issue by building his own out of a couple old bikes. His goal is to show car-dependent people that you can get away with biking most of the time, even if you need to move some stuff from place to place. The build process for this monster was so involved that it required two pages of documentation; Part 1 and Part 2!

There are a few types of cargo bikes. There is the trike (seen often in regular or reverse trike varieties) with a bin between the 2 adjacent wheels. Two-wheeled options are usually either front loaders (the storage area between the rider and the front wheel) or those with rear racks. Mike’s bike is the latter.

He started with a 26″ wheeled bike that was already a Frankenbike of sorts, even the frame alone was a conglomeration of two separate bikes! To start, the rear wheel and chain was discarded. A kid’s mountain bike with 20″ wheels was disassembled and the head tube was cut off. The top and down tubes of the smaller bike were notched so that they fit nicely with the seat tube of the larger bicycle. The two frames were then welded together along with several pieces of support to make sure the bike stayed together through the rigors of riding. The rear rack is made up of some old bike frame tubes and some metal from the frame of a sofa that was being thrown out. Nothing goes to waste at Mike’s place! The 20″ kids bike rear wheel already had a 5 speed cassette so that was a no brainner to re-install. In the end, Mike has a bike that cost him zero dollars and shows the world it is possible to build a utilitarian bike and reduce your dependence on automobiles.

If cargo bikes are your thing, you may be interested in this up-cycled cargo bike, this one with a huge front bucket or maybe even this nifty bike trailer.