3D Printer Tuning: An Engineering Approach

[MirageC] is a bit of a contrarian. Instead of taking pictures of 3D printed objects that show them in their best light, he takes pictures that show them at their worst. The reason? He wanted to figure out why he was seeing a strange artifact in his printer when using a direct extruder. Just at a quick glance, you might think the problem was Z wobble, but, in this case, it was something else. You can see the fine detective work in the video below.

There were a few odd things about the problem. First, it scaled with the part size. Secondly, the problem got better when he switched to a Bowden tube setup. We don’t want to give away the ending, but you can guess from that clue that the problem had something to do with the extrusion system.

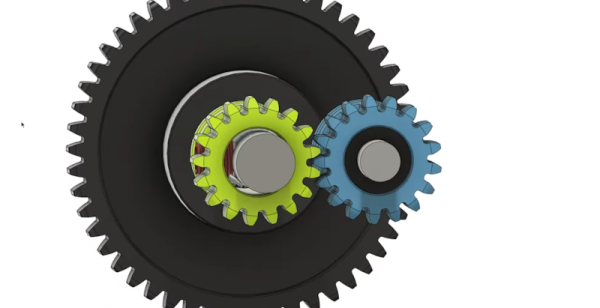
The resulting analysis led [MirageC] to work with BMG to create a special gear which — surprisingly, didn’t help as much as he thought it would. However, it did help point the way to the correct solution.

Along the way, you can learn a lot from following along, and maybe you’ll even improve the quality of your prints. We always enjoy these detailed analyses of printer issues, like the ones from [Stefan], for example. If you want to go hardcore engineering on your 3D prints, you can always do finite element analysis on your infill.

Continue reading “3D Printer Tuning: An Engineering Approach”

Feeding Both Filament And Electrons Through A Custom D-Sub Connector

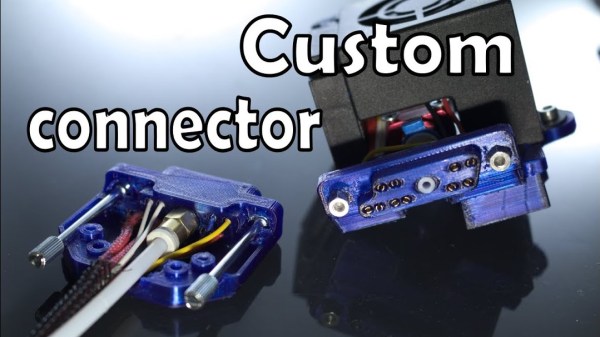
We sometimes forget that 3D printers are just CNC platforms with a hotend attached, and there a whole range of alternative tool heads to use. [Jón Schone] has been doing exactly that, and needed a way to quickly disconnect his hotend completely from his printer, so he 3D printed his own custom D-sub connector for both filament and wires. (Video, embedded below.)

[Jon] has added a number of upgrades for his Creality CR10 3D printer, including a quick change tool mount to allow him to also use a laser engraver and even a small spindle. When the hotend is removed there’s no way to quickly disconnect the wiring , so the print head is usually left connected and placed to one side of the printer. For a quick detach solution for both wiring and the Bowden tube, he first modified an off-the-shelf D-sub connector. The connector was relatively expensive, and the tube had a tendency to pop out, which led to some failed prints.

[Jon] wanted to use proper Bowden tube fittings inside the connector, so he designed and printed his own D-sub connector and bought loose contacts. Pushing the contacts into the housing turned out to be quite difficult to do without breaking them, so he’s working on making that process simpler. This is just one of many examples of 3D printing 3D printer upgrades, which has been a core feature of the RepRap project right from the beginning. Check out the video after the break

We have no shortage of 3D printer hacks and there will be many more to come. Some cool recent ones includes the Jubilee CNC that was built from the start with automatic tool changing in mind, and a printer that fits in your backpack. Continue reading “Feeding Both Filament And Electrons Through A Custom D-Sub Connector”

Prusa Unveils New Mini 3D Printer, Shakes Up The Competition

For the last couple of years, consumer desktop 3D printer choices in the under $1,000 USD range have fallen into two broad categories: everything bellow $500 USD, and the latest Prusa i3. There are plenty of respectable printers made by companies such as Monoprice and Creality to choose from on that lower end of the scale. It wasn’t a luxury everyone could justify, but if you had the budget to swing the $749 for Prusa’s i3 kit, the choice became obvious.

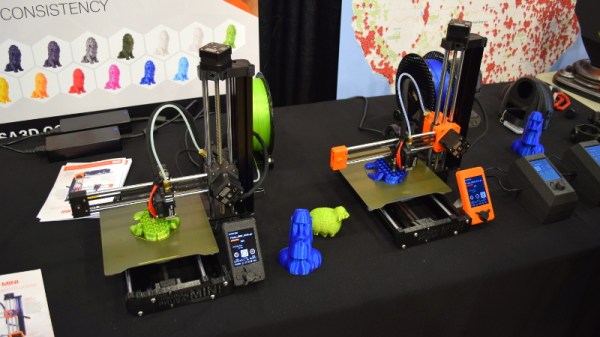
Of course, that was before the Prusa Mini. Available as a kit for just $349, it’s far and away the cheapest printer that Prusa Research has ever offered. But this isn’t just some rebranded hardware, and it doesn’t compromise on the ideals that have made the company’s flagship machine the de facto open source FDM printer. For less than half the cost of the i3 MK3S, you’re not only getting most of the larger printer’s best features and Prusa’s renowned customer support, but even capabilities that presumably won’t make it to the i3 line until the MK4 is released.

Josef Průša was on hand to officially unveil his latest printer at the 2019 East Coast Reprap Festival, where I got the chance to get up close and personal with the diminutive machine. While it might be awhile before we can do a full review on the Mini, it’s safe to say that this small printer is going to have a big impact on the entry-level market.

Continue reading “Prusa Unveils New Mini 3D Printer, Shakes Up The Competition”

Multicolor RepRap Prints The Really, Really Hard Way

[Adrian Bowyer] just posted his progress with multicolored printing to the RepRap blog.

The new developments are a continuation of [Adrian]’s experiments with a mixer extruder that squirts four different colored filaments out of the same nozzle. [Myles Corbett] took this idea and ran with it producing the two-color print seen above. To squirt two different colored filaments out of the nozzle, [Myles] used two Bowden extruders mounted near the apex of the RepRap with tubes leading to the nozzle. Right now, the color of a print is controlled by loosening the grip screws of the extruder, but there are plans for moving that task over to electronic control of the extruders.

While it may be only black and white now, it’ll be a very interesting development once five extruders are loaded up with cyan, magenta, yellow, black, and white filament. Yes, it is now theoretically possible to print full-color 3D objects on a RepRap. While we’re not looking forward towards having to upgrade our one-motor extruder to a four- or five-motor model, the possibilities for desktop fabrication are becoming amazing.