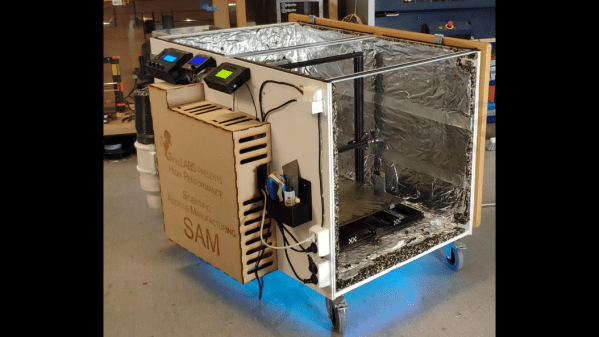
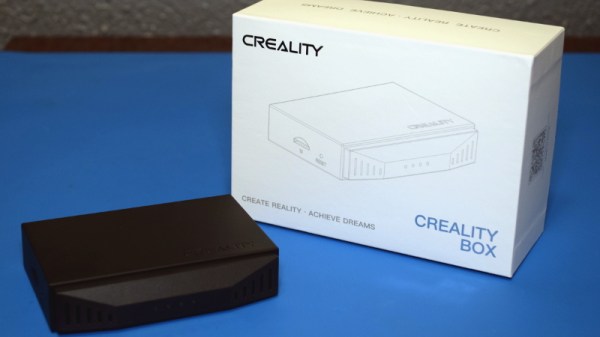
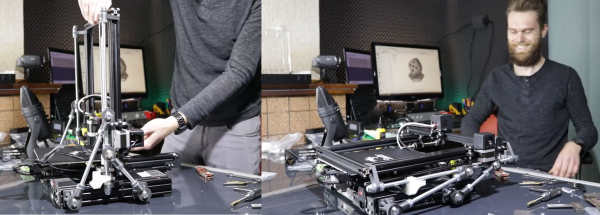
High temperature 3D printer

Extreme Thermal Mods For 3D Printing Exotic Materials

For general everyday use, there’s nothing wrong with the standard selection of plastics that most 3D printer filaments are available in. PLA, ABS, PETG — they’ve all got their place, and they’re all pretty easy to work with. But if you need to work with more exotic materials, you might need to go to extremes and modify an off-the-shelf printer for high-temperature work.

For the team led by [Andreas Hagerup Birkelid] at the Norwegian University of Science and Technology, the standard menu of printer chow wasn’t up to the jobs they had in mind. They wanted to print using polyether ether ketone, or PEEK, a high-performance thermoplastic with useful mechanical and thermal properties, in addition to chemical resistance. Trouble is, the melting point of PEEK is a whopping 343°C (649°F), making it necessary to turn up the heat — a lot. A standard Creality CR-10 printer was upgraded to withstand not only the 500°C max temperature of the new hot end and 200° printed bed, but also to survive operating in what amounts to an oven — a balmy 135° in a chamber made from IKEA cabinets. That entailed replacing plastic parts with metal ones, upgrading belts, pulleys, and wires, and moving all the electronics outside the enclosure. Even the steppers got special treatment, with water cooling to keep their magnets from reaching the Curie point.

The mods seemed to do the trick, because a Benchy printed in a carbon-fiber PEEK filament came out pretty good. It seems like a long way to go and kind of pricey — $1,700 for the printer and all the mods — but if you have a need to print exotic materials, it’s way cheaper than a commercial high-temp printer.

[via 3D Printing Industry]

Teardown: Creality Wi-Fi Box

Creality, makers of the Ender series of 3D printers, have released a product called Wi-Fi Box meant to cheaply add network control to your printer. Naturally I had to order one so we could take a peek, but this is certainly not a product review. If you’re looking to control your 3D printer over the network, get yourself a Raspberry Pi and install Gina Häußge’s phenomenal OctoPrint on it. Despite what Creality might want you to believe, their product is little more than a poor imitation of this incredible open source project.

Even if you manage to get it working with your printer, which judging by early indications is a pretty big if, it won’t give you anywhere near the same experience. At best it’ll save you a few dollars compared to going the DIY route, but at the cost of missing out on the vibrant community of plugin developers that have helped establish OctoPrint as the defacto remote 3D printing solution.

That being said, the hardware itself seems pretty interesting. For just $20 USD you get a palm-sized Linux computer with WiFi, Ethernet, a micro SD slot, and a pair of USB ports; all wrapped up in a fairly rugged enclosure. There’s no video output, but that will hardly scare off the veteran penguin wrangler. Tucked in a corner and sipping down only a few watts, one can imagine plenty of tasks this little gadget would be well suited to. Perhaps it could act as a small MQTT broker for all your smart home devices, or a low-power remote weather station. The possibilities are nearly limitless, assuming we can get into the thing anyway.

So what’s inside the Creality Wi-Fi Box, and how hard will it be to bend it to our will? Let’s take one apart and find out.

Continue reading “Teardown: Creality Wi-Fi Box”

Creality WiFi Takes On Octoprint

A very common hack to a 3D printer is to connect a Raspberry Pi to your printer and then load Octoprint or a similar program and send your files to the printer via the network. [Teaching Tech] noticed that Creality now has an inexpensive WiFi interface that promises to replace Octoprint and decided to give it a quick review.

You might wonder why you’d want this system when Octoprint exists? Mainly, the value proposition is the price. You can buy the Creality box for about $20. A Raspberry Pi with a similar case would be at least twice that price. In addition, the box integrates with a Thingiverse-like library and does cloud slicing, which is attractive when you have a very small computer connected to your printer.

However, [Teaching Tech] found some issues. The box was pretty picky about connecting to printers and there were many other problems. The 3D model library wasn’t very comprehensive, although that could change if the thing got very popular. Worse, the slicer didn’t really produce stellar results.

We have to admit, an attractive network interface for $20 would be of interest. But it is hard to see how this would be a better value than Octoprint unless you were very short on cash and had no Raspberry Pi surplus laying around. You still need an SD card and a power supply, so those extras are a wash.

On the other hand, if Creality fixes the problems and expands the 3D model library, we’d buy one. But it remains to be seen if either of those things will happen, much less both of them. We do wish [Teaching Tech] had opened the thing up for us. Maybe next time.

Continue reading “Creality WiFi Takes On Octoprint”

A Little Rewiring Teaches A Creality Ender 3 New Tricks

The Creality Ender 3 is part of the new wave of budget 3D printers, available for less than $250 from many online retailers. For the money, it’s hard to complain about the machine, and it’s more than suitable for anyone looking to get make their first steps into the world of FDM printing. But there’s certainly room for improvement, and as [Simon] shows in a recent blog post, a little effort can go a long way towards pushing this entry-level printer to the next level.

The first step was to replace the printer’s stepper drivers with something a bit more modern. Normally the Ender 3 uses common A4988 drivers, but [Simon] wanted to replace them with newer Trinamic drivers that offer quieter operation. Luckily, Trinamic makes a drop-in replacement for the A4988 that makes installation relatively easy. You’ll need to change out a few caps and remove some resistors from the board to make everyone play nice, but that shouldn’t pose a challenge to anyone who knows their way around a soldering iron.

Beyond quieter running steppers, the Trinamic TMC2208 drivers also offer direct UART control mode. Of course the Ender’s board was never designed for this, so the MCU doesn’t have enough free pins to establish serial communications with the three drivers (for the X, Y, and Z axes). But [Simon] realized if he sacrificed the SD card slot on the board, the six pins that would free on the controller could be cut and rewired to the driver’s UART pins.

Combined with the Klipper firmware, these relatively minor modifications allows him to experiment with printing at speeds far greater than what was possible before. Considering the kind of headaches that a ~$200 printer would have given you only a few years ago, it’s impressive what these new machines are capable of; even if it takes a few tweaks.

Folding An Off-The-Shelf 3D Printer

Most 3D printers don’t take up a lot of space, but they can be pretty bulky and awkward to travel with. [Jón Schone] needed a compact folding 3D printer for a secret project on his YouTube channel ProperPrinting, so he decided to modify a Creality Ender 3 Pro to achieve this.

Starting with a brand new Ender 3 Pro, and his first steps were to move the display and power supply unit into the bottom frame to make space for the folding top frame. For the folding mechanism, he settled on a four bar linkage that allows the vertical frame to translate to the front of the printer as it folds down, which lets it become a really compact package with minimal wasted space. The joints consist of fitting 3D printed in carbon fibre reinforced nylon, with bolts for shafts. The entire mechanism is made adjustable for fine-tuning by using threaded rod and sliding mounting points on the extruded frame. Small brackets on each side of the frame allows the printer to snap securely into both its upright and folded positions.

All in all we think this is well-designed and beautifully executed hack, enough to make us really want to build one for ourselves. It will remain to be seen if any slop develops with repeated folding and use, especially at the snap-in end stops, but that should still be an easy fix if it happens.

We’ve previously featured [Jón]’s custom 3D printed D-sub connectors, also for his Ender 3. Also check out another folding printer, the X-printer.

Continue reading “Folding An Off-The-Shelf 3D Printer”

Feeding Both Filament And Electrons Through A Custom D-Sub Connector

We sometimes forget that 3D printers are just CNC platforms with a hotend attached, and there a whole range of alternative tool heads to use. [Jón Schone] has been doing exactly that, and needed a way to quickly disconnect his hotend completely from his printer, so he 3D printed his own custom D-sub connector for both filament and wires. (Video, embedded below.)

[Jon] has added a number of upgrades for his Creality CR10 3D printer, including a quick change tool mount to allow him to also use a laser engraver and even a small spindle. When the hotend is removed there’s no way to quickly disconnect the wiring , so the print head is usually left connected and placed to one side of the printer. For a quick detach solution for both wiring and the Bowden tube, he first modified an off-the-shelf D-sub connector. The connector was relatively expensive, and the tube had a tendency to pop out, which led to some failed prints.

[Jon] wanted to use proper Bowden tube fittings inside the connector, so he designed and printed his own D-sub connector and bought loose contacts. Pushing the contacts into the housing turned out to be quite difficult to do without breaking them, so he’s working on making that process simpler. This is just one of many examples of 3D printing 3D printer upgrades, which has been a core feature of the RepRap project right from the beginning. Check out the video after the break

We have no shortage of 3D printer hacks and there will be many more to come. Some cool recent ones includes the Jubilee CNC that was built from the start with automatic tool changing in mind, and a printer that fits in your backpack. Continue reading “Feeding Both Filament And Electrons Through A Custom D-Sub Connector”

Add A Microscope To Your 3D Printer

There are many ways to keep an eye on your 3D printer as it churns out the layers of your print. Most of us take a peek every now and then to ensure we’re not making plastic vermicelli, and some of us will go further with a Raspberry Pi camera or similar. [Uri Shaked] has taken this a step further, by adding a USB microscope on a custom bracket next to the hot end of his Creality Ender 3.

The bracket is not in itself anything other than a run-of-the-mill piece of 3D printing, but the interest comes in what can be done with it. The Ender 3 has a resolution of 12.5μm on X/Y axes, and 2.5μm on Z axes, meaning that the ‘scope can be positioned to within a hair’s-breadth of any minute object. Of course this achieves the primary aim of examining the integrity of 3D prints, but it also allows any object to be tracked or scanned with the microscope.

For example while examining a basil leaf, [Uri] noticed a tiny insect on its surface and was able to follow it with some hastily entered G-code. Better still, he took a video of the chase, which you can see below the break. From automated PCB quality control to artistic endeavours, we’re absolutely fascinated by the possibilities of a low-cost robotic microscope platform.

[Uri] is a perennial among Hackaday-featured projects, and has produced some excellent work over the years. Most recently we followed him through the production of an event badge.

Continue reading “Add A Microscope To Your 3D Printer”