A Very Fast Camera Slider For The Glam Shot

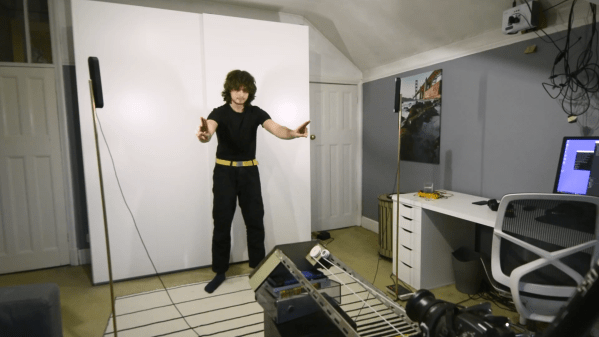
High-speed photography with the camera on a fast-moving robot arm has become all the rage at red-carpet events, but this GlamBOT setup comes with a hefty price tag. To get similar visual effects on a much lower budget [Henry Kidman] built a large, very fast camera slider. As is usually the case with such projects, it’s harder than it seems.

The original GlamBOT has a full 6 degrees of freedom, but many of the shots it’s famous for are just a slightly curved path between two points. That curve adds a few zeros to the required budget, so a straight slider was deemed good enough for [Henry]’s purposes. The first remaining challenge is speed. V1 one used linear rails made from shower curtain rails, with 3D printed sliders driven by a large stepper motor via a belt. The stepper motor wasn’t powerful enough to achieve the desired acceleration, so [Henry] upgraded to a more powerful 6 hp servo motor.

Unfortunately, the MDF and 3D-printed frame components were not rigid enough for the upgraded torque. It caused several crashes into the ends of the frame as the belt slipped and failed to stop the camera platform. The frame was rebuilt from steel, with square tubing for the rails and steel plates for the brackets. It provided the required rigidity, but the welding had warped the rails which led to a bumpy ride for the camera so he had to use active stabilization on the gimbal and camera. This project was filled with setback and challenges, but in the end the results look very promising with great slow motion shots on a mock red carpet.

We’ve seen DIY camera sliders of all shapes and sizes, including ones made from skateboard trucks and wood, and even a measuring tape.

Continue reading “A Very Fast Camera Slider For The Glam Shot”

Designing A Quality Camera Slider Can Be Remarkably Satisfying

Camera sliders are great creative tools, letting you get smooth controlled shots that can class up any production. [Anthony Kouttron] decided to build one for an engineering class, and he ended up mighty satisfied with what he and his team accomplished.

As an engineering class project, this wasn’t a build done on a whim. Instead, [Anthony] and his fellow students spent plenty of time hashing out what they needed this thing to do, and how it should be built. An Arduino was selected as the brains of the operation, as a capable and accessible microcontroller platform. Stepper motors and a toothed belt drive were used to move the slider in a controllable fashion. The slider’s control interface was an HD44780-based character LCD, along with a thumbstick and two pushbuttons. The slider relied on steel tubes for a frame, which was heavy, but cost-effective and easy to fabricate. Much of the parts were salvaged from legendary e-waste bins on the university grounds.

The final product was stout and practical. It may not have been light, but the steel frame and strong stepper motor meant the slider could easily handle even heavy DSLR cameras. That’s something that lighter builds can struggle with.

Ultimately, it was an excellent learning experience for [Anthony] and his team. As a bonus, he got some great timelapses out of it, too. Video after the break.

Continue reading “Designing A Quality Camera Slider Can Be Remarkably Satisfying”

Gesture Controlled Filming Gear Works Super Intuitively

Shooting good video can be an arduous task if you’re working all by yourself. [Pave Workshop] developed a series of gesture-responsive tools to help out, with a focus on creating a simple intuitive interface.

The system is based around using a Kinect V2 to perceive gestures made by the user, which can then control various objects in the scene. For instance, a beckoning motion can instruct a camera slider to dolly forward or backwards, and a halting gesture will tell it to stop. Bringing the two hands together or apart in special gestures indicate that the camera should zoom in or out. Lights can also be controlled by pulling a fist towards or away from them to change their brightness.

The devil is in the details with a project that works this smoothly. [Pave Workshop] lays out the details on how everything Node.JS was used to knit together everything from the custom camera slider to Philips Hue bulbs and other Arduino components.

The project looks really impressive in the demo video on YouTube. We’ve seen some other impressive automated filming rigs before, too.

Continue reading “Gesture Controlled Filming Gear Works Super Intuitively”

A Hacky Automatic Camera Slider Using No Motors

Camera sliders are a great way to get smooth, continuous panning shots. You can buy off the shelf or build yourself a motorized model pretty easily these days. However, [Shivam Dehinwal] came up with a hack that’s even simpler again.

The design uses a 3D-printed base which mounts the camera on top. Four wheels are installed underneath to allow the base to roll on smooth surfaces.

Inside the base, there’s a slot to install a Komelon Touch Lock measuring tape, with the tape’s auto-retract mechanism used to create the sliding function. Pressing the center disc on the measuring tape brakes the tape retract mechanism. The harder you press, the more it slows down.

In the slider, this is achieved with a screw-in puck that contacts the tape measure’s brake. Tighten the puck down, and the tape measure retracts very slowly, moving the slider at a crawl. Leave the puck loose, and the tape measure retracts more quickly for faster panning shots.

It’s a neat way to build a camera slider, of which we’ve seen many before in the past. It never needs batteries and adjustment is as easy as turning a screw. Sometimes the simple ways have their charms. Video after the break.

Continue reading “A Hacky Automatic Camera Slider Using No Motors”

ESP32 Camera Slider Build Keeps Things In Perspective

We’ve seen a lot of camera slider builds here at Hackaday, and for good reason: having one really lets you take your project documentation, especially videos, to the next level. It’s one of those force multiplier builds — after you’ve completed it, it can help you make all your future projects just that much better. But we’re also no strangers to seeing these projects become overly complex, which can often make it difficult for others to replicate.

But that’s not the case here. The motorized camera slider that [Sasa Karanovic] recently sent our way does exactly what you’d expect, and little else. That’s not meant as a dig — sometimes the best approach is to keep it simple. Unless you’re a professional photographer or videographer, it’s unlikely you need a complicated motion rig. This design is perfect for the hacker or maker who wants to spruce up their project videos, but doesn’t want to spend months fiddling with the design. Continue reading “ESP32 Camera Slider Build Keeps Things In Perspective”

A camera slider made from wood and recycled parts

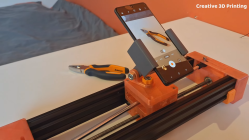
Turning Old Plotter Parts Into A Smooth Camera Slider

Taking apart old stuff and re-using the parts to make something new is how many hackers first got started in the world of mechanical and electronic engineering. But even after years working in industry we still get that tinge of excitement whenever someone offers us an old device “for parts”, and immediately begin to imagine the things we could build with the components inside.

A GoPro mounted on a moving platform made from recycled partsSo when [Victor Frost] was offered an old Cricut cutting plotter, he realized he could use its parts to create the camera slider he’d been planning to build. The plotter’s X stage, controlled by a stepper motor, was ideal for moving a camera platform back and forth. [Victor] wanted to build the entire thing in a “freehand” way, without making a detailed design or purchasing any new parts. So he dived into his parts bin and dug up an Arduino, a 16×2 LCD, some wires and buttons, and a few pieces of MDF.

The camera mount is simply a piece of steel that a GoPro’s magnetic mount can latch onto, but [Victor] keeps open the possibility of mounting a proper tripod ball head. The Arduino drives the stepper motor through an Adafruit Motor Shield, with a simple user interface running on the LCD. The user can set the desired end points and speed, and then run the camera back and forth as often as needed. In this way, the software follows the same “keep it simple” philosophy as the hardware design.

If you’re planning to build your own camera slider, [Victor]’s design should be easy to copy, if you happen to have an old cutting plotter. If not, you can try this simple yet well-engineered model. Want even more? Then check out this fancy multi-axis camera motion control rig.

Continue reading “Turning Old Plotter Parts Into A Smooth Camera Slider”

Super Simple Camera Slider With A Neat Twist

When you get into making videos of products or your own cool hacks, at some point you’re going to start wondering how those neat panning and rotating shots are achieved. The answer is quite often some kind of mechanical slider which sends the camera along a predefined path. Buying one can be an expensive outlay, so many people opt to build one. [Rahel zahir Ali] was no different, and designed and built a very simple slide, but with a neat twist.

This design uses a geared DC motor, taken from a car windscreen wiper. That’s a cost effective way to get your hands on a nice high-torque motor with an integral reduction gearbox. The added twist is that the camera mount is pivoted and slides on a third, central smooth rod. The ends of this guide rod can be offset at either end, allowing the camera to rotate up to thirty degrees as the slide progresses from one end to the other. With a few tweaks, the slider can be vertically mounted, to give those up-and-over shots. Super simple, low tech and not an Arduino in sight.

The CAD modelling was done with Fusion 360, with all the models downloadable with source, in case someone needs to adapt the design further. We were just expecting a pile of STLs, so seeing the full source was a nice surprise, given how many open source projects like this (especially on Thingiverse) do often seem to neglect this.

Electronics consist of a simple DC motor controller (although [Rahel] doesn’t mention a specific product, it should not be hard to source) which deals with the speed control, and a DPDT latching rocker switch handles the motor direction. A pair of microswitches are used to stop the motor at the end of its travel. Other than a 3D printer, there is nothing at all special needed to make yourself quite a useful little slider!

We’ve seen a few slider designs, since this is a common problem for content creators. Here’s a more complicated one, and another one.

Continue reading “Super Simple Camera Slider With A Neat Twist”