Measuring SMD Parts With A Home Brew Version Of Smart Tweezers

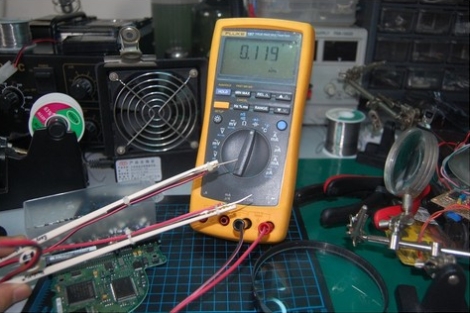
SMD parts are great; they allow you to pack more parts on a board, do away with drilling dozens of PCBs, and when done correctly can produce a factory-quality board made in a home lab. There’s one problem with SMD parts; troubleshooting and measuring them. The ideal solution would be something akin to the Smart Tweezers we’ve seen before, but this fabulous tool costs three hundred bones. [Kai] came up with a much cheaper solution: home brew smart tweezers that can be built for a tenth of the cost as the professional model.

What [Kai] built is an LCR meter, basically a tool that measures inductance, capacitance, and resistance in a very, very small form factor. The technique of measuring a part’s properties involves feeding a set frequency into the device and measuring the phase, voltage and current coming out. It’s all wonderfully explained by [Dave] over at EEVblog in one of his earlier videos.

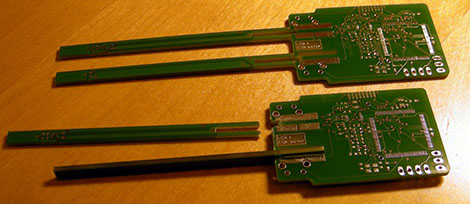
The hardware [Kai] is using includes an LCD display from a Nokia phone, an MSP430-based microcontroller, a very tiny opamp near the tip of one of the points of the tweezer, and a programmable gain amplifier used to measure the components. In testing, [Kai] can measure very low-value components with a +/- 2% accuracy, and larger, more realistic components with +/- 0.25% accuracy. An awesome accomplishment, and much better than the common Chinese meters that can’t measure in the nH/pF/mΩ range.

[Kai] hasn’t gotten his pair of smart tweezers working yet – he still needs to get the circuit up and running and write some software. We’ll keep our readers apprised of [Kai]’s progress, though, and gently convince him to work with Seeed Studio or someone similar to get his version of Smart Tweezers onto maker’s workbenches the world over.

Hackaday Links: October 18, 2012

Capacitive touch plants

Here’s a proof of concept for using plants as a capacitive touch sensor. The sensor is simply a hunk of double-sided copper clad board attached to a microcontroller. But it seems to be able to sense what part of the plant is being touched. [Thanks Fabien]

Adding wireless charging to a Nokia N900

This hack is quite common, but it’s still fun to see what hardware is being outfitted with an inductive charger. This time it’s a Nokia N900 that’s ditching the charging cables.

Wii carrying suitcase from a plastic tackle box

This Wii carrying case (translated) looks great and cost just a few bucks. It started as a tackle box for carrying around your fishing lures. But a bit of creative cutting and there’s a place for everything.

Browser based schematic and board layout

There’s a new kid on the block when it comes to circuit design. Circuits.io offers in-brower schematic design and board artwork layout. [Thanks ADIDAIllinie (and a few others)]

Bender-o-lantern

Halloween rapidly approaches and we hope that [Tim’s] carving of Bender in a pumpkin will inspire you to send in your own Halloween projects.

NES Controller Uses Capacitive Touch Instead Of Buttons

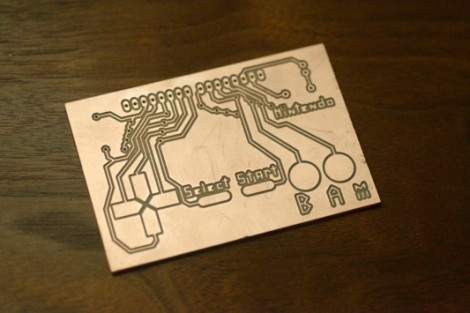
Here’s one way to really keep the component count low. [David] developed an NES controller that doesn’t use any buttons. The copper clad has been milled to provide a pad which registers a button push based on capacitance. The board has a SIL header at the top, making it easy to plug into the Arduino board that reads the inputs.

[David] had trouble getting the Arduino pin read functions to respond fast enough for he NES console’s expectations. He ended up using commands to access the ATmega’s peripherals directly in order to achieve the target timing. Speaking of, he did his own sniffing of the communication scheme using a logic analyzer. The results of that work, as well as the board files and code are available at the site linked above. And there’s a demo of the controller used to play Super Mario Bros. in the clip after the break.

This is actually a tangential project using a PCB mill which he’s developing through Kickstarter. This certainly shows that the mills works as designed.  Continue reading “NES Controller Uses Capacitive Touch Instead Of Buttons”

PIC LC Meter Improvements Add Li-Ion Battery And Charging Circuitry

[Trax] needed an LC meter and decided to use a tried-and-true design to build his own. The only problem was that he didn’t want to be tied to a bench supply or power outlet, which meant a bit of auxiliary design was in order. What he came up with is the battery-powered LC meter you see above.

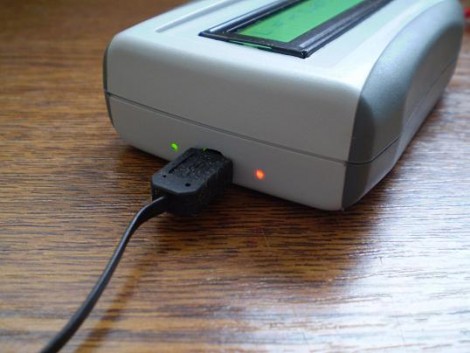
The core of the original [Phil Rice] design remains the same, with slight modifications to drive a different model of character LCD. The code is mostly unchanged, but some calibration routines became necessary after [Marko] noticed bugs in the behavior after power cycling. Now the device will perform what amounts to a hardware reset about 700ms after powering on or changing between inductance and capacitance measuring functions. The project box is quite small, and to get everything to fit [Marko] sourced the Lithium Ion battery from a Bluetooth headset. He needs 5V for the LCD screen so he used a TPS61222 boost converter. To top off the battery he’s included a MAX1811 single-cell Li-ion charger, which has a couple of status LEDs visible through the case as seen above.

[Thanks Marko]

DIY Smart Tweezers Make SMD Work A Cinch

diy_smd_smart_tweezers

[Noel] does a lot of SMD work and wanted a pair of “smart” tweezers that could be used to place components as well as for reading their capacitance and resistance values on the fly. As we have seen, these things can be somewhat costly, and not really necessary if you already have a good multimeter. With that in mind, he figured he could build his own for almost nothing.

He started off with a pair of kids’ “training” chopsticks which are durable, but more importantly, non-conductive. He took a second pair of tweezers, this time made of metal, and split them in two. He soldered wire to a set of ring terminals, mounting one on each leg of his broken tweezers. The final bit of assembly involved using zipties to mount everything on the plastic chopsticks along with the addition of banana plugs to the end of his probes.

[Noel] says that the tweezers work quite well, and with such a low price tag, we can’t argue.

Keypad Uses A PIC’s Built In Capacitance Functionality

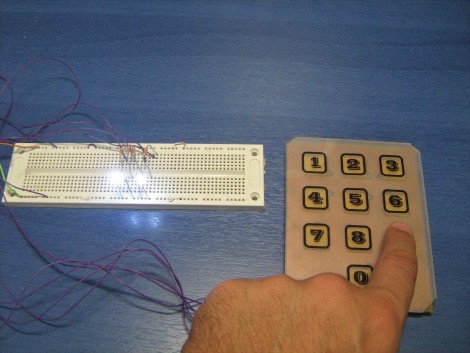
[Giorgos Lazaridis’] most recent project was to build a capacitive touch pad. Since he’s using a PIC 16F1937 it will be relatively easy. That’s because it has a 16 channel capacitance sensing module built right in. But there are still some design considerations that make the development a bit touching.

This isn’t the first time he’s worked with capacitance sensing. Through past experience he has found that it is very important to position the microcontroller as close to the button pads as possible. Because of this, the chip is soldered on the back of the PCB used for the keypad itself. Because he’s hand soldering vias, he also used some foam tape to raise the button pads just a bit. This way they will be flush with the acrylic overlay, which cannot sit flat on the board due the via solder joints.

Check out the video after the break to hear [Giorgos] walk us through the project.

Continue reading “Keypad Uses A PIC’s Built In Capacitance Functionality”

Variable Capacitance/reistance Switch Box Has You Covered

variable_cap_resistor_box

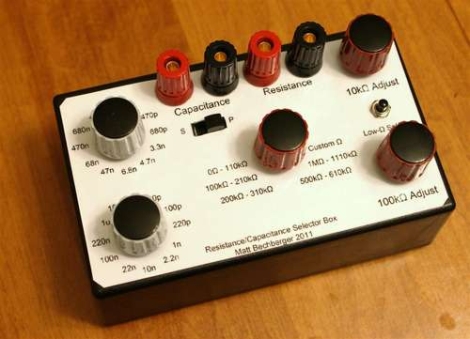
While working on electronics projects, it’s often necessary to test out different capacitance or resistance values as things are moving along. Depending on what you are testing, this can be a tedious process even when using a breadboard. Instructables user [mattthegamer463] recently built a very useful device that would help out in these situations, and would likely be a welcome addition to any Hackaday reader’s workbench.

His variable resistor/capacitor box makes it easy to test out any number of different resistance or capacitance values with a simple turn of a knob. He wired up a pair of pots to provide a wide range of resistance values, being sure to add a low-resistance safety as well as safety override switch for those of you who like to have things blow up in your face live dangerously. A set of 22 capacitors were wired up on a piece of perfboard, each of which can be selected using a pair of knobs. He added a simple switch to allow the capacitors to be toggled between parallel and series orientations as well.

[Matt] did a wonderful job here – this is a great project that can be customized in a multitude of ways to fit almost anyone’s specific needs.