Getting To Know The TP223 Capacitive Touch Sensor

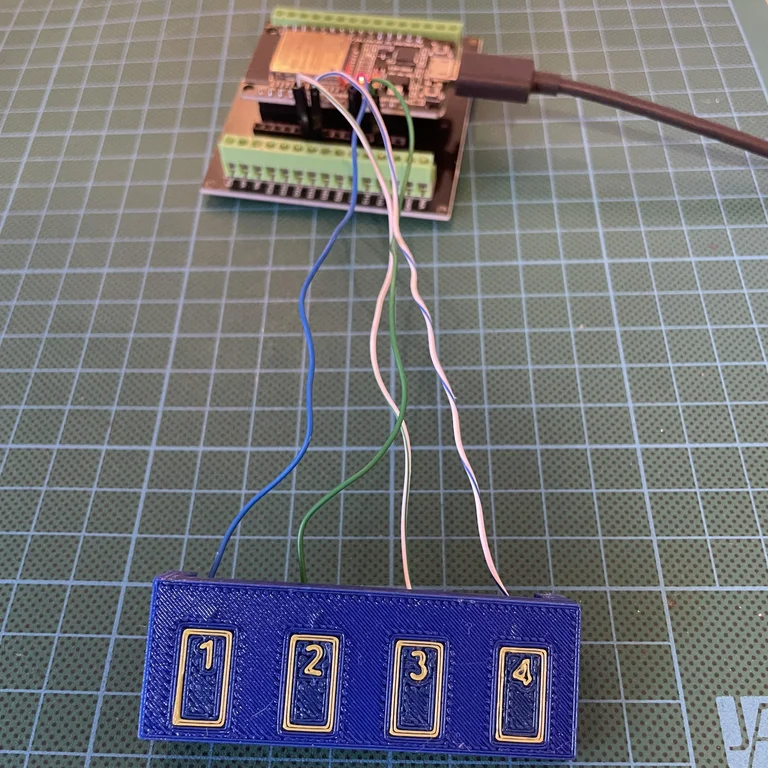
Mechanical and prone to failure, switches can seem quaint these days. Plus, everyone is used to having touch screens on their phones and other devices. So why not use touch sensors on your next project? [Tarantula3] has details on using the TP223 instead of ordinary switches.

These inexpensive modules work through plastic, glass, or wood, opening up many interesting possibilities for building a front panel. Of course, the thicker the surface above the module, the less sensitive the switch is, but that’s not always a bad thing. In particular, you may want to reduce sensitivity anyway. Thicker panels, reducing the size of the touch pad, or adding an external capacitor can reduce the sensor’s range.

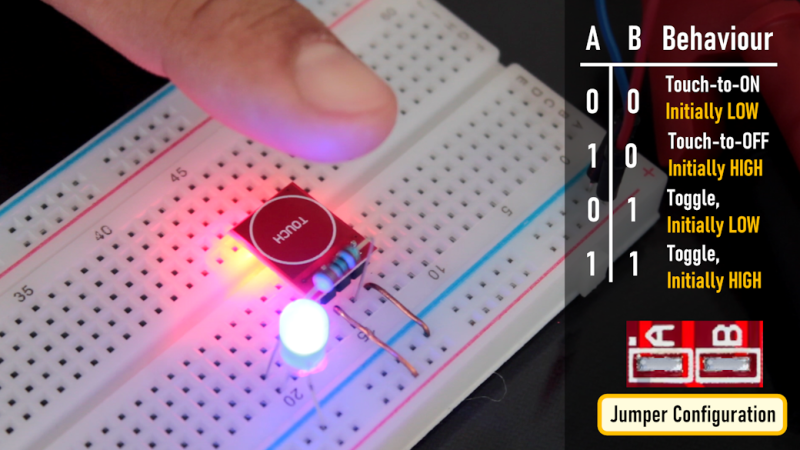
You may be worried about eating up batteries with a bunch of electronic switches. But according to [Tarantula3], the modules consume less than 2 microamps at rest. You can configure the modules with our favorite scripting language: solder. There are two jumpers, initially unsoldered, and this results in four possible states. By default, the output goes high when someone is touching the sensor and stays high until they release.

However, you can solder jumper A to invert the output. Jumper B causes the switch output to toggle on each press. Of course, you can also do both jumpers, which toggles but has the opposite default state. If you get false triggers, consider adding a small capacitor to filter the power supply to the module.

These would be great “drop ins” for 3D printing to add switches to your designs. You might even be able to use these as power switches with a little work.
Hide Capacitive Touch Buttons In Your Next 3D Print

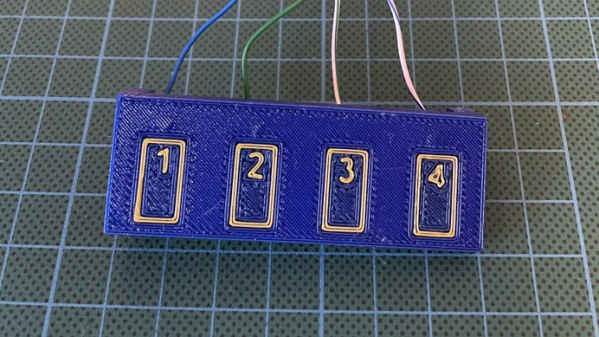
Capacitive touch sensors are entirely in the domain of DIY, requiring little more than a carefully-chosen conductive surface and a microcontroller. This led [John Phillips] to ask why not embed such touch buttons directly into a 3D print?

Button locations and labels can be made as part of the 3D print, which is handy.

The process is not much different from that of embedding hardware like magnets or fasteners into 3D prints: one pauses the print at convenient spot, drops in the necessary hardware, then resumes printing. It’s more or less the same for embedding a touch-sensitive button, but [John] has a few tips to make things easier.

[John] suggests using a strip of copper tape, one per touch pad, and embedding it into the print near the surface. His preference is three layers in, putting the copper tape behind 0.6 mm of plastic when using standard 0.20 mm layer heights.

Copper tape makes a good capacitive touch sensor, and the adhesive on the tape helps ensure it stays in place as the 3D printer seals it in on subsequent passes.

Copper tape is also easy to solder to, so [John] leaves a small hole over the copper — enough to stick in a wire and tack it down with the tip of a soldering iron and a blob of solder after the print is complete. It might not be ideal soldering conditions, but if things get a little melty on the back side it’s not the end of the world.

On the software side capacitive touch sensors can be as simple as using an Arduino library for the purpose but [John] rolled his own code, so give it a peek.

This reminds us a bit of another way to get a capacitive touch sensor right up against some plastic: a simple spring can do the trick.

Using A Spring As A Capacitive Touch Button

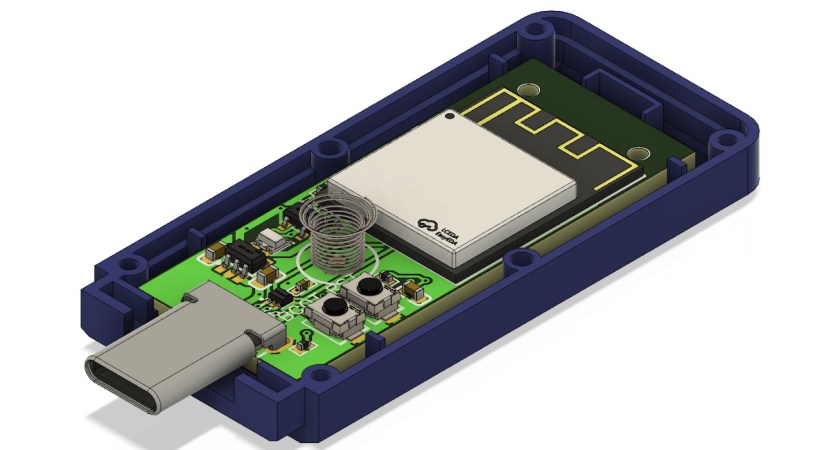
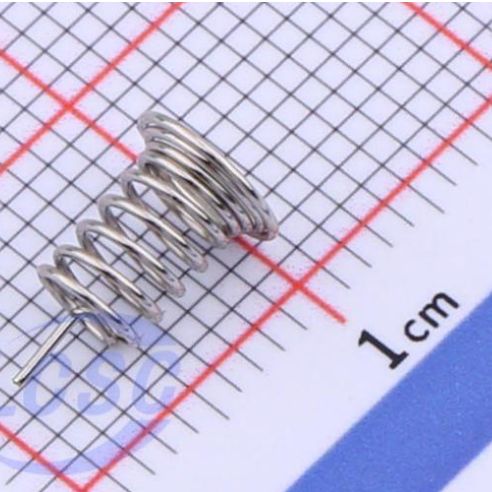
When [Daniel Eichhorn] designed the Pendrive S3 project, he wanted to use an off-the-shelf USB enclosure but also add a button for the user to start certain actions. Drilling a hole into the enclosure would be an option, but decided a touch sensor on the top of the enclosure would be much more elegant — not to mention better at keeping dirt and moisture out. To bridge the 6.3 mm spacing between the PCB and the top of the enclosure [Daniel] used a small, 7 mm PCB-mounted spring.

The spring used to create a capacitive touch sensor. (Source: JLCPCB parts)

Although capacitive sensing works with just about  anything that’s electrically conductive, it’s important to get the conductive element as close to the user’s digits as possible. Using a spring here has the advantage that when the enclosure is closed up, the lid will push down onto the spring, which will not only compress slightly, but also provide the best capacitive sensing experience when e.g. the enclosure flexes or warps over time on account of always being pressed against the inside of the lid.

While hardly world-changing, this is another neat design tip when you’re looking to turn more surfaces into touch controls. Just keep in mind that capacitive sensing is notoriously fussy and any trace and spring are also excellent antennae for stray EMI. Nobody likes random capacitive button inputs, after all.

Get To Know Touch With This Dev Board

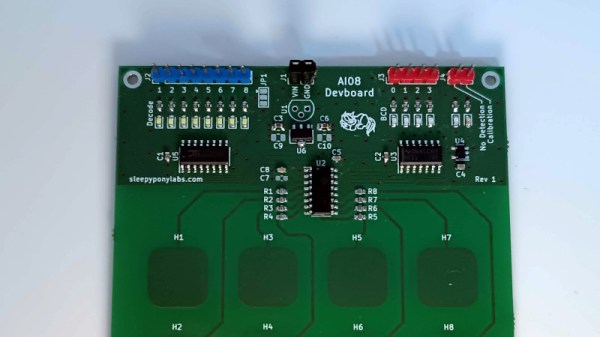
In the catalogue of the Chinese parts supplier LCSC can be found many parts not available from American or European suppliers, and thus anyone who wants to evaluate them can find themselves at a disadvantage. [Sleepy Pony Labs] had just such a part catch their eye, the Sam&Wing AI08 8 channel capacitive touch controller. How to evaluate a chip with little information? Design a dev board, of course!

The chip tested is part of a family all providing similar functionality, but with a variety of interface options. The part tested has eight touch inputs and a BCD output. Said output is used to feed a 74 series decoder chip and drive some LEDs. The touch pads were designed with reference to a Microchip application note which incidentally makes for fascinating reading on the subject as it covers far more than just simple touch buttons.

Whether or not you’ll need this touch chip is a matter for your own designs, however, what this project demonstrates is that with the ready availability of cheap custom PCBs and unexpected parts it’s not beyond reason to create boards just for evaluation purposes.

Perhaps the subject of a previous Hackaday piece would have found this board useful.

Touch-Typing On Fingertips? Prototype Says It Could Work

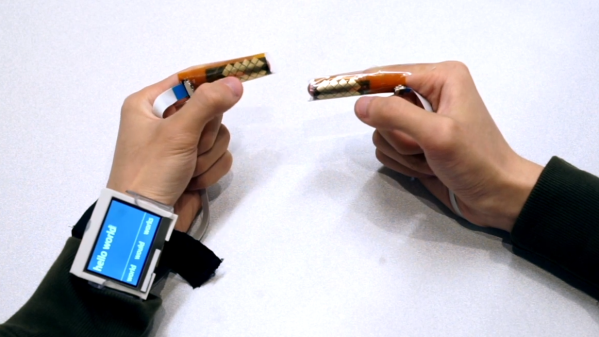
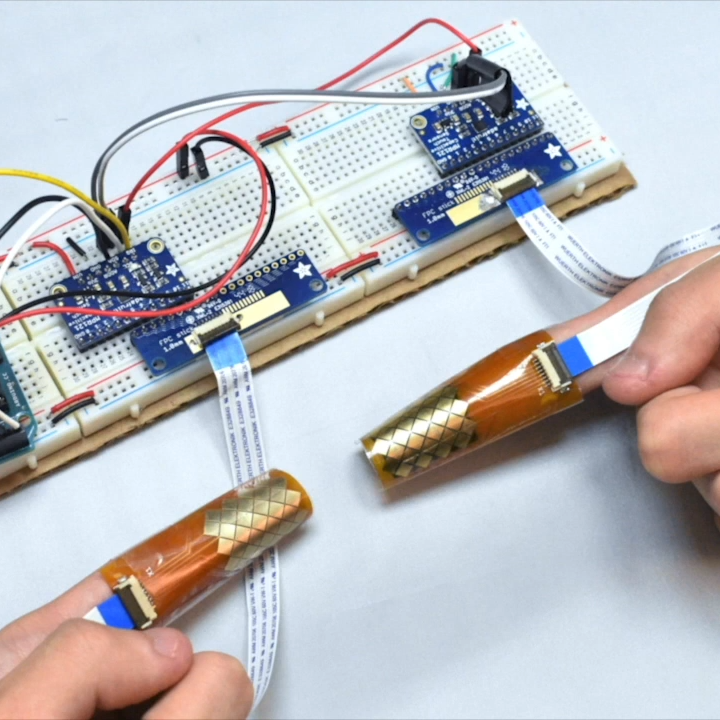
The fingertips are covered in touch sensors, each intended to be tapped by the thumbtip of the same hand.

Touch-typing with thumbs on a mobile phone keyboard is a pretty familiar way to input text, and that is part of what led to BiTipText, a method of allowing bimanual text input using fingertips. The idea is to treat the first segments of the index fingers as halves of a tiny keyboard, whose small imaginary keys are tapped with the thumbs. The prototype shown here was created to see how well the concept could work.

The prototype hardware uses touch sensors that can detect tap position with a high degree of accuracy, but the software side is where the real magic happens. Instead of hardcoding a QWERTY layout and training people to use it, the team instead ran tests to understand users’ natural expectations of which keys should be on which finger, and how exactly they should be laid out. This data led to an optimized layout, and when combined with predictive features, test participants could achieve an average text entry speed of 23.4 words per minute.

Judging by the prototype hardware, it’s understandable if one thinks the idea of fingertip keyboards may be a bit ahead of its time. But considering the increasingly “always on, always with you” nature of personal technology, the goal of the project was more about investigating ways for users to provide input in fast and subtle ways. It seems that the idea has some merit in principle. The project’s paper can be viewed online, and the video demonstration is embedded below.

Continue reading “Touch-Typing On Fingertips? Prototype Says It Could Work” →

Robot Joints Go Modular With This Actuator Project

[John Lauer] has been hard at work re-thinking robot arms. His project to create modular, open source actuators that can be connected to one another to form an arm is inspiring, and boasts an impressively low parts cost as well. The actuators are each self-contained, with an ESP32 and a design that takes advantage of the form factors of inexpensive modules and parts from vendors like Aliexpress.

Flex spline in action, for reducing backlash

Each module has 3D printed gears (with an anti-backlash flex spline), an RGB LED for feedback, integrated homing, active cooling, a slip ring made from copper tape, and a touch sensor dial on the back for jogging and training input. The result is a low backlash, low cost actuator that keeps external wiring to an absolute minimum.

Originally inspired by a design named WE-R2.4, [John] has added his own twist in numerous ways, which are best summarized in the video embedded below. That video is number three in a series, and covers the most interesting developments and design changes while giving an excellent overview of the parts and operation (the video for part one is a basic overview and part two shows the prototyping process, during which [John] 3D printed the structural parts and gears and mills out a custom PCB.)

Continue reading “Robot Joints Go Modular With This Actuator Project” →

Hack My Wired Heart

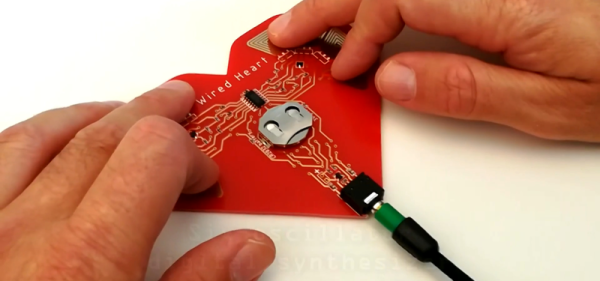
Liner notes? Passé. In Berlin, the release of a special edition synth-wave record came with an accompanying experimental synthesizer called Wired Heart.

At the core of this adorable heart-shaped synth, designed by music technology enthusiast [tobi tubbutec], is the classic 74HCT14 chip with six Schmitt trigger oscillators. The bright red PCB has eight gold touch and humidity sensing pads that activate and modulate these oscillators. As well as changing the sounds by playing with pressure and conductive liquids you can use the six sets of header pins on board to plug in your own components for noisy experimentation. Wired Heart ships with LEDs, photoresistors and a potentiometer, but we’ve also plugged our own DIY fabric pressure sensors into this synth to make some excellent electronic sounds.

In the Hackaday.io post linked above, [tobi tubbutec] walks us through a number of the circuit design decisions he made while prototyping his “cardiotronic human-touch hexoscillatric stereo esoteric snythespacer”. We enjoyed his creative and sometimes unconventional designs, from his inclusion of non-functioning traces for aesthetic reasons to his chosen method of hard syncing — injecting a small pulse of one oscillator into the other. If you want to examine his layout in more detail, [tobi tubbutec] has helpfully included the KiCad schematic file in his write up.

This adorable, hackable synth caught our eye at this year’s SuperBooth — an annual indie electronic music conference in Berlin that’s well worth checking out if odd noises and handmade electronics are your thing —  but it’s recently been listed on Tindie too. To listen to the upbeat synth-wave record Wired Heart originally shipped with, visit the artist Hyboid’s bandcamp.

If you’re interested in experimental musical instruments and synthy chip tune you’ll also love [jarek319]’s Sega Genesis synthesiser.

Check out a demo of the Wired Heart synth in the video after the break.

Continue reading “Hack My Wired Heart” →