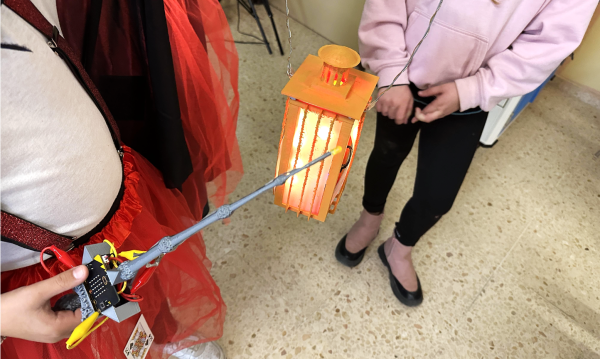
3D printed Hagrid's lantern with a magic wand

Micro:bit Brings 3D Printed Magic Lanterns To Life

[Elenavercher] loves engaging her primary school students, inspiring their imagination as well as teaching them the design thinking process. She has found that the very accessible rapid prototyping culture of 3D printing, micro:bit, and the like are perfect for teaching her students problem-solving and teamwork, and is always coming up with new lessons that will catch their attention. That brings us to her latest design, an interactive lantern and wand, which you could say is of the wizarding variety.

The lantern and the wand each have an integrated micro:bit serving as their brains. When the user shakes the wand, releasing a spell, the micro:bit in the wand, sends a user-defined number to the micro:bit in the lantern. The lantern has NeoPixels built-in, which then turn on, illuminating the lantern. When the user presses a button on the micro:bit instead of shaking it, the wand sends a signal to the lantern that tells it to “turn off.” Pretty simple, right?

The design itself is something any seasoned hacker could recreate; however, the magic in this build is how [Elenavercher] beautifully engages her elementary-aged students in the engineering design process. She starts off by encouraging her students to prototype the lantern and wand using paper which is a very inexpensive way to help them visualize the final product before investing too much time into the 3D design, a critical engineering design step — prototype fast and cheap with whatever you have on hand.

She then helps them design the lantern and wand in Tinkercad, a very beginner-friendly, yet increasingly capable CAD program. We really appreciate her detailed steps for the design as well as for navigating Tinkercad, both of which will help teach any tiny tikes in your life how to recreate the design. What’s really handy about Tinkercad is you can do mechanical CAD as well as write code for the micro:bit all within the same program. But [Elenavercher] also provides the final .hex file if you’d rather just get the build up and running.

Continue reading “Micro:bit Brings 3D Printed Magic Lanterns To Life”

Hack Together Your Own Bat Signal

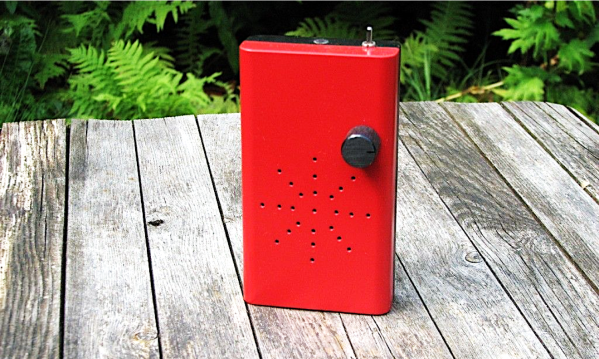
Bats use echolocation to see objects in front of them. They emit an ultrasonic pulse around 20 kHz (and up to 100 kHz) and then sense the pulses as they reflect off an object and back to the bat. It’s the same type of mechanism used by ultrasonic proximity sensors for object-avoidance. Humans (except perhaps the very young ones) can’t hear the ultrasonic pulses since the frequency is too high, but an inexpensive microphone in a simple bat detector could. As it turns out bat detectors are available off the shelf, but where’s the fun in that? So, like any good hacker, [WilkoL] decided to build his own.

[WilkoL’s] design is composed primarily of an electret microphone, microphone preamplifier, CD4040 binary counter, LM386 audio amplifier, and a speaker. Audio signals are analog and their amplitudes vary based on how close the sound is to the microphone. [WilkoL] wanted to pick up bat sounds as far away as possible, so he cranked up the gain of the microphone preamplifier by quite a bit, essentially railing the amplifiers. Since he mostly cares about the frequency of the sound and not the amplitude, he wasn’t concerned about saturating the transistor output.

The CD4040 then divides the signal by a factor of 16, generating an output signal within the audible frequency range of the human ear. A bat signal of 20 kHz divides down to 1.25 kHz and a bat signal of up to 100 kHz divides down to 6.25 kHz.

He was able to test his bat detector with an ultrasonic range finder and by the noise generated from jingling his keychain (apparently there are some pretty non-audible high-frequency components from jingling keys). He hasn’t yet been able to get a recording of his device picking up bats. It has detected bats on a number of occasions, but he was a bit too late to get it on video.

Anyway, we’re definitely looking forward to seeing the bat detector in action! Who knows, maybe he’ll find Batman.

Continue reading “Hack Together Your Own Bat Signal”

3D Printed DIY Neuralyzer

We agree with you. We can never have enough cosplay hacks. And the ones that include some electronics element definitely have a special place in our hearts. That’s why when we ran across [Maddogg0’s] 3D printed Neuralyzer on Instructables, we knew we had to share.

You may recall [How to make’s] DIY Neuralyzer that we featured a few weeks ago which required more of a metal-working approach. [Maddogg0’s] design might be a bit more convenient for those of you that have a 3D printer, but no machine shop.

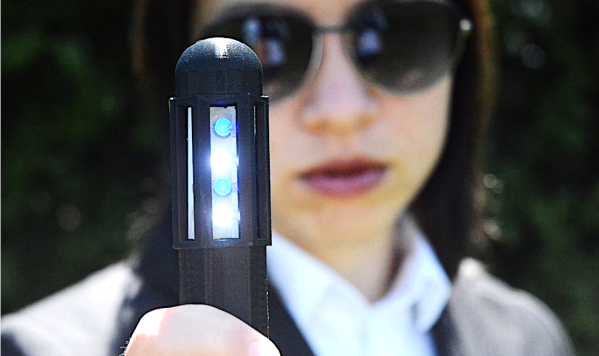
We love the elegant simplicity of [Maddogg0’s] design. The entire enclosure is printed in two halves that are held together by magnets. One half of the enclosure houses a single coin cell battery and a tiny circuit board for holding the LEDs in place, really giving the Neuralyzer some shine. In true maker fashion, [Maddogg0] released the necessary design files on TinkerCAD so anyone can reuse, remix, and reshare.

Whichever design you fancy, [Maddogg0’s] or [How to make’s], be careful not to point the Neuralyzer at yourself and always remember to wear your sunglasses!


DIY Neuralyzer From Scrap Parts

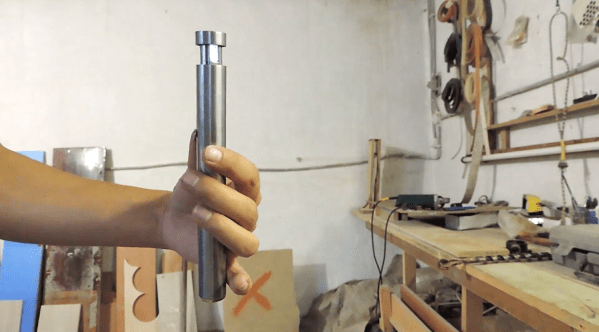
Cosplay and prop making are near and dear to our hearts here at Hackaday. That’s why whenever we see sci-fi tech brought to life, we can’t help but pay close attention. Enter [How to make’s] DIY Neuralyzer, from the Men-in-Black franchise. Unfortunately, this won’t wipe your memories as the real-life Neuralyzer would, but it will make for a cool prop at your next cosplay event.

What makes this project worth sharing is its use of very simple home tools and a bit of scrap metal, some PVC, a single LED, a switch, and maybe a few more miscellaneous bits. The base of the design is composed of two pieces of hollow, rod-shaped scrap metal and a single spring that mechanizes the entire setup.

The video is a few months old at this point. It took a recent post on Reddit to send this across our feed, but we’re glad we came across it.

Great project [How to make]! May we suggest a few more LEDs?

Continue reading “DIY Neuralyzer From Scrap Parts”