Simplest Speaker Oscillator, Now Even Simpler

It never fails. Lay down some kind of superlative — fastest, cheapest, smallest — around this place and someone out there says, “Hold my beer” and gets to work. In this case, it’s another, even simpler audio oscillator, this time with just a loudspeaker and a battery.

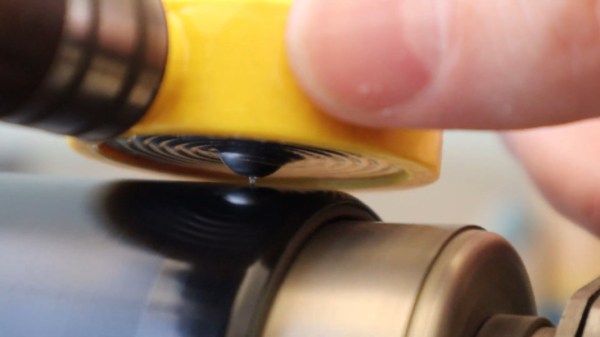
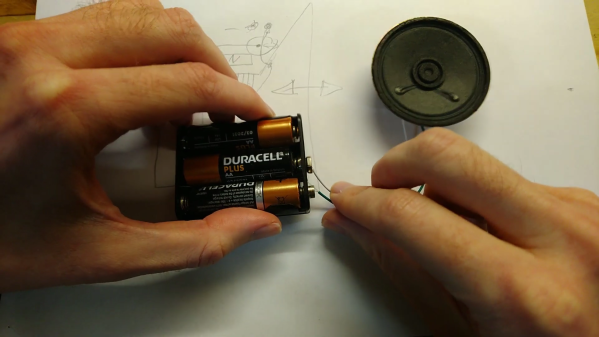
Attentive readers will recall the previous title holder was indeed pretty simple, consisting only of the mic and speaker from an old landline telephone handset wired in series with a battery. Seeing this reminded [Hydrogen Time] of a lucky childhood accident while experimenting with a loudspeaker, which he recreates in the video below. The BOM for this one is even smaller than the previous one — just a small speaker and a battery, plus a small scrap of solid hookup wire. The wire is the key; rather than connecting directly to the speaker terminal, it connects to the speaker frame on one end while the other is carefully adjusted to just barely touch the flexible wire penetrating the speaker cone on its way to the voice coil.

When power is applied with the correct polarity, current flows through the wire into the voice coil, which moves the cone and breaks the circuit. The speaker’s diaphragm resets the cone, completing the circuit and repeating the whole process. The loudspeaker makes a little click with each cycle, leading to a very rough-sounding oscillator. [Hydrogen Time] doesn’t put a scope on it, but we suspect the waveform would be a ragged square wave whose frequency depends on the voltage, the spring constant of the diaphragm, and the spacing between the fixed wire and the voice coil lead.

Yes, we realize this is stretching the definition of an audio oscillator somewhat, but you’ve got to admit it’s simple. Can you get it even simpler?

Continue reading “Simplest Speaker Oscillator, Now Even Simpler”

Reproducing A Reproducer: Servicing A Cylinder Phonograph In The Year 2021

[Jan Derogee] pulled out his phonograph the other day to hear the 100+ year old wax cylinder warble of “It’s a Long Way to Tipperary”, but couldn’t locate the reproducer — this is the small circular bit that holds the stylus and transfers the groove-driven vibrations to the center of a thin diaphragm, which vibrates into the sound horn. It’s easily the most important part of a cylinder phonograph. What do you do when you lose your reproducer? You could search ebay for a replacement, but that wouldn’t be nearly as fun as reproducing your reproducer yourself.

Traditionally, diaphragms were made from mica or celluloid, and the Edison disk phonograph used seven layers of shellac-soaked rice paper. Reproducers typically have a Dagwood sandwich of gaskets surrounding the membrane, but they don’t have to be so convoluted to work — a single strong membrane will do just fine. Just ask [Jan], who made a new reproducer with a 3D-printed case, a hand-pulled glass stylus, and a disposable aluminum foil pan for the diaphragm.

It’s difficult for us to say which part looks more fun — stretching the glass shard over a gas kitchen stove with the flame focused by a stack of wrench sockets, or cutting up a bicycle inner tube and using a car jack to press the aluminum into shape against a 3D-printed mold. The whole video is awesome and you can check it out after the break.

As [Jan] notes in the video and on the project site, the glass stylus should really be made from borosilicate because it’s harder than regular soda lime glass (that’s why they often make vaccine vials out of it). Regular glass will work and takes much less time and gas to reach the pull-able stage, so that’s what [Jan] used in the video, but it will wear out much more quickly. Fortunately, this was a temporary solution, because as soon as [Jan] made a replacement, the missing reproducer showed up.

Continue reading “Reproducing A Reproducer: Servicing A Cylinder Phonograph In The Year 2021”

Brass And Nickel Work Together In This Magnetostrictive Earphone

When you go by a handle like [Simplifier], you’ve made a mission statement about your projects: that you’ll take complex processes and boil them down to their essence. So tackling the rebuilding of the humble speaker, a device he himself admits is “both simplified and optimized already,” would seem a bit off-topic. But as it turns out, the principle of magnetostriction can make the lowly speaker even simpler.

Most of us are familiar with the operation of a speaker. A powerful magnet sits at the center of a coil of wire, which is attached to a thin diaphragm. Current passing through the coil builds a magnetic field that moves the diaphragm, creating sound waves. Magnetostriction, on the other hand, is the phenomenon whereby ferromagnetic materials change shape in a magnetic field. To take advantage of this, [Simplifier] wound a coil of fine copper wire around a paper form, through which a nickel TIG electrode welding filler rod is passed. The nickel rod is anchored on one end and fixed to a thin brass disc on the other. Passing a current through the coil causes the rod to change length, vibrating the disc to make sound. Give it a listen in the video below; it sounds pretty good, and we love the old-time look of the turned oak handpiece and brass accouterments.

You may recall [Simplifier]’s recent attempt at a carbon rod microphone; while that worked well enough, it was unable to drive this earphone directly. If you need to understand a little more about magnetostriction, [Ben Krasnow] explained its use in anti-theft tags a couple of years back.

Continue reading “Brass And Nickel Work Together In This Magnetostrictive Earphone”