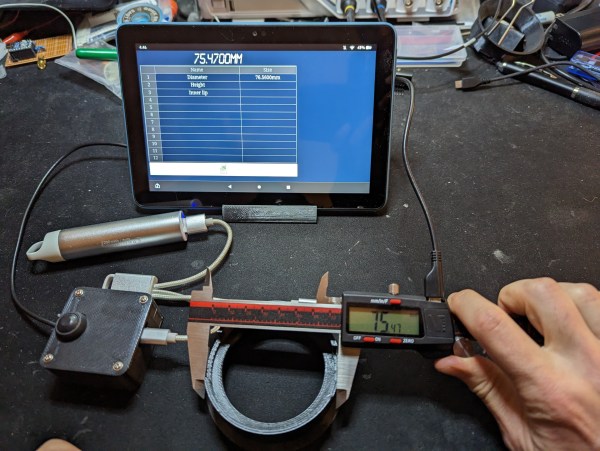
A digital caliper connected to a tablet computer

Custom Interface Adds USB And Wi-Fi To Digital Calipers

Although old-school machinists typically prefer the mechanical vernier scale on their trusty calipers, many users nowadays buy calipers with a digital readout. These models often come with additional features like differential measurements, or a “hold” function for those situations where you have to maneuver the instrument somewhere deep inside a machine. Another useful feature is a data link that lets you log your measurements on a computer directly instead of manually entering all the values.

The VINCA-branded caliper that [Liba2k] bought has such a data link feature, which requires a USB adapter that’s sold separately. There is a micro-USB connector on the tool itself, but instead of implementing a USB interface, this is used to carry a proprietary serial protocol — a design decision that ought to be classified as a felony if you ask us. Rather than buying the official USB adapter, [Liba2k] decoded the protocol and built his own interface called VINCA Reader that can connect through either USB or Wi-Fi.

The serial format turned out to be a simple serial bus that clocks out 24 bits at a time. In order to adapt its 1.2 V signal level to the 3.3 V used by an ESP32, [Liba2k] designed a simple level shifter circuit using a handful of discrete components. The ESP can communicate with the computer through its Wi-Fi interface, for which [Liba2k] wrote a spreadsheet-like application; alternatively, an ordinary USB cable can be connected to emulate a keyboard for use with any other software.

With its added Wi-Fi feature, the VINCA Reader is actually more complete than the official USB adapter, and will probably be cheaper as well. The serial interface appears to be common to all caliper manufacturers, although many went for a more sensible connector than micro-USB. An automated readout system is particularly handy if you have to make thousands of similar measurements.

A USB interface connected to a Psion Organiser II

Arduino Nano Adds USB Interface To The Psion Organiser II

Introduced in 1984, the Psion Organiser series defined the first generation of electronic organizers or PDAs (personal digital assistants). Even though these devices are now over 30 years old, the Psion Organiser scene is alive and well: with new hardware and software is still being developed by enthusiasts the world over.

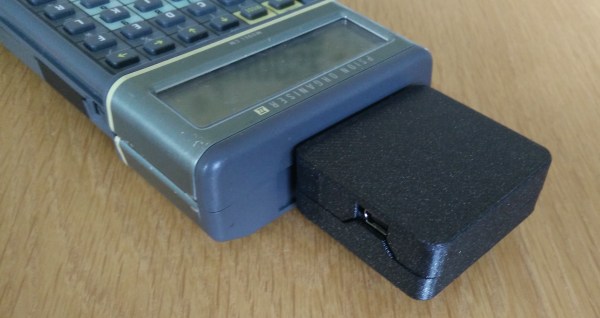
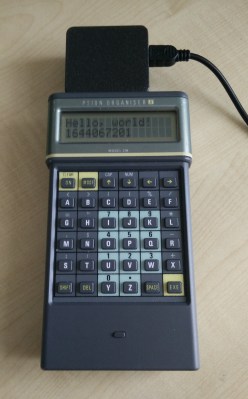
A USB interface connected to a Psion Organiser II
The Organiser II, with its brand-new USB interface

One of those enthusiasts is [James Stanley], who designed and built a USB interface for the Psion Organiser II. Although a “CommsLink” module providing an RS-232 port was available back in the day, it’s become hard to find, inspiring [James] to design a completely new module based on an Arduino Nano. Hooking it up to the Psion’s data bus was a simple matter of wiring up the eight data lines to the Nano’s GPIO ports. A set of series resistors served to prevent bus contention without having to add glue logic.

Getting the software working was a bit more difficult: the Organiser’s native OPL programming language doesn’t allow the user to directly access the expansion port’s memory address, so [James] had to write a routine in HD6303 machine code to perform the read, then call that routine from OPL to display the result on the screen. Currently, the routine only supports reading data from the Arduino, but extending it to a bidirectional interface should be possible too.

Finally, [James] designed and 3D printed a neat enclosure for the Arduino-USB interface, which makes it look almost as sleek as the original CommsLink module. Perhaps with a bit of further development, this could turn into another way to connect old Psions to the internet. We’ve also featured a new type of Datapak to enhance the Organiser’s memory. Continue reading “Arduino Nano Adds USB Interface To The Psion Organiser II”

Sim Panel Proves You Can Always Use More Buttons

Many people enjoy playing flight simulators or making the occasional orbit in Kerbal Space Program, but most are stuck controlling the onscreen action with nothing more exotic than a keyboard and mouse. A nice compromise for those that don’t have the space (or NASA-sized budget) to build a full simulator cockpit is a USB “button box” that you can plug in whenever you need a couple dozen extra knobs, switches, and lights.

If you’ve been considering building one for yourself, this incredible build by [nexprime] should prove quite inspirational. Now at this point, a box of buttons hooked up to a microcontroller isn’t exactly newsworthy. But there are a few features that [nexprime] packed in which we think make this particular build worth taking a closer look at.

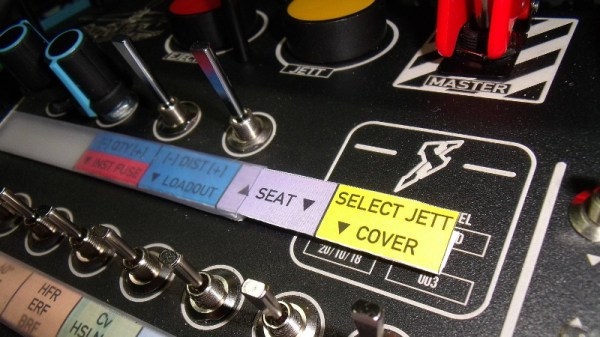
For one, the powder coated 8.5” x 10” enclosure is absolutely gorgeous. The console itself was purchased from a company called Hammond Manufacturing, but of course it still took some work to turn it into the object you’re currently drooling over. A CNC machine was used to accurately cut out all the necessary openings, and the labels were laser etched into the powder coat.

But not all the labels. One of the things we like best about this build is that [nexprime] thought ahead and didn’t just design it for one game. Many of the labels are printed on strips of paper which slide into translucent plastic channels built into the front of the box. Not only does this allow you to change out the overlays for different games, but the paper labels look fantastic when lit with the LED strips placed behind the channels.

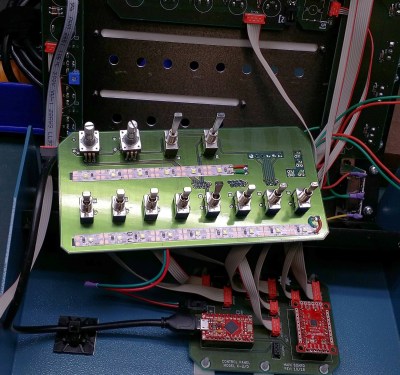
Internally, [nexprime] used a SparkFun Pro Micro paired with a SX1509 I/O expander. The electronics are all housed on professionally manufactured PCBs, which gives the final build an incredibly neat look despite packing in 68 separate inputs for your gaming pleasure. On the software side this box appears as a normal USB game controller, albeit one with a crazy number of buttons.

If this build doesn’t have enough switches and buttons for you, don’t worry. This Kerbal Space Program cockpit has banks of switches below and above the player, so one can more realistically scramble for the correct onet to flip when things start going sideways. On the other hand, we’ve seen slightly less intense builds if you’re not quite ready to take out a loan just to get into orbit.

Finally, Someone Has Found The Any Key


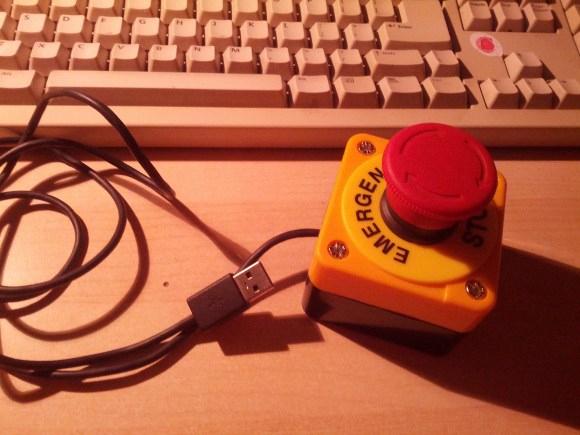
keyboard and any key device

“Where’s the any key?” Well, it’s right here. After running into trouble with the STM platform, [lukasz.iwaszkiewicz] went with the Texas Instrument C Series Launchpad to construct his “Any Key” HID device. He was able to make use of the TI TM4C123G LaunchPad’s extensive USB library which is laid out into four tiers – the very top tier being Device Class API. This gives the programmer the ability to implement simple devices with just a few lines of code. [lukasz.iwaszkiewicz] points out that ST does not have this option available.

The Any Key uses a host PC program that allows the user to enter keystrokes into a virtual keyboard. This information is then passed to the Any Key device. When it is pressed, it will push the recorded keystrokes back to the host PC. Simple, but effective!

The project is completely open source, and all files and code are available. Be sure to check out the video after the break demonstrating the Any Key in action.

Continue reading “Finally, Someone Has Found The Any Key”

Adding USB To A Cheap Linux Router


[sprite_tm] usually sends this stuff in, but I discovered that he took some time to hack on a Sweex router. The CPU happens to have an on-board usb host controller, so he added a few components. Now the router can support memory sticks, or possibly become a USB print server. (I can’t say for sure since I haven’t checked out the software myself)
Update: the project was linked in a comment a while back, but we never gave it the attention it deserved. Enjoy.