The 3D-printed adapter shown assembled, with the USB cable's wires going into cable channels on the adapter and magnets slotted into the adapter's openings

Use Your Thinkpad X1 Tablet’s Keyboard Standalone

Some hacks are implemented well enough that they can imitate involved and bespoke parts with barely any tools. [CodeName X]’s Thinkpad X1 Tablet Keyboard to USB adapter is one such hack – it let’s one reuse, with nothing more than a 3D printed part and a spare USB cable, a keyboard intended for the Thinkpad X1 Tablet (2016 or 2017).

The issue is, this keyboard connects through pogo pins and holds onto the tablet by magnets, so naturally, you’d expect reusing it to involve a custom PCB. Do not fret – our hacker’s take on this only needs aluminum foil and two small circular magnets, pressing the foil into the pins with the help of the printed part, having the USB cable pins make contact with the foil pads thanks to nicely laid out wire channels in the adapter. If you want to learn more, just watch the video embedded below.

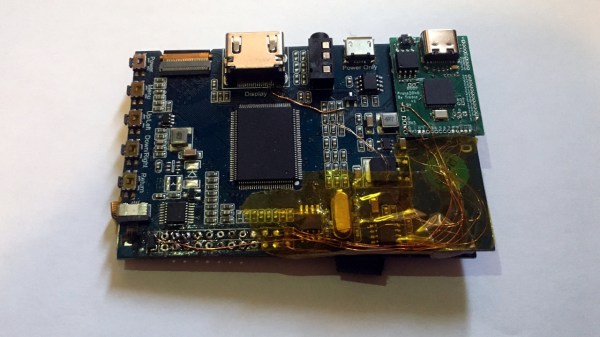
Of course, this kind of adapter will apply to other similar keyboards too — there’s no shortage of tablets from last decade that had snap-on magnetic keyboards. But watch out; some will need 3.3V, and quite a few of them will use I2C-HID, which would require a MCU-equipped adapter like this wonderful Wacom rebuild did. Not to worry, as we’ve shown you the ropes of I2C-HID hacking.

Continue reading “Use Your Thinkpad X1 Tablet’s Keyboard Standalone”

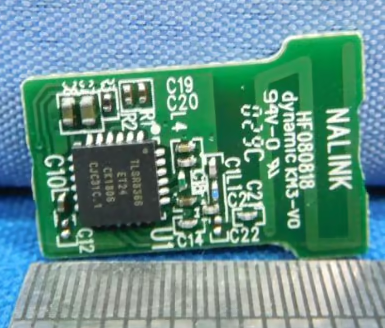
the Logitech receiver in question next to the mouse it's paired to

Uncovering Secrets Of Logitech M185’s Dongle

[endes0] has been hacking with USB HID recently, and a Logitech M185 mouse’s USB receiver has fallen into their hands. Unlike many Logitech mice, this one doesn’t include a Unifying receiver, though it’s capable of pairing to one. Instead, it comes with a pre-paired CU0019 receiver that, it turns out, is based on a fairly obscure TC32 chipset by Telink, the kind we’ve seen in cheap smart wristbands. If you’re dealing with a similarly obscure MCU, how do you even proceed?

In this case, GitHub had a good few tools developed by other hackers earlier — a Ghidra integration, and a tool for working with the MCU using a USB-UART and a single resistor. Unfortunately, dumping memory through the MCU’s interface was unreliable and frustrating. So it was time to celebrate when fuzzing the HID endpoints uncovered a memory dump exploit, with the memory dumper code helpfully shared in the blog post.

From a memory dump, the exploration truly began — [endes0] uncovers a fair bit of dongle’s inner workings, including a guess on which project it was based on, and even a command putting the dongle into a debug mode where a TC32-compatible debugger puts this dongle fully under your control.

Yet another hands-on course on Ghidra, and a wonderful primer on mouse dongle hacking – after all, if you treat your mouse’s dongle as a development platform, you can easily do things like controlling a small quadcopter, or pair the dongle with a SNES gamepad, or build a nifty wearable.

We thank [adistuder] for sharing this with us!

A screenshot of the release page, showing the headline and a crop of the release notes

MicroPython 1.23 Brings Custom USB Devices, OpenAMP, Much More

MicroPython is a wonderful Python interpreter that runs on many higher-end microcontrollers, from ESP8266 to STM32 to the RP2040. MicroPython lets you build devices quickly, and its latest release, 1.23, brings a number of improvements you should be aware of.

The first one is custom USB device support, and it’s a big one. Do you want to build HID devices, or play with MIDI, or do multiple serial streams with help of PIO? Now MicroPython lets you easily create USB devices on a variety of levels, from friendly wrappers for creating HID or MIDI devices, to low-level hooks to let you define your own USB descriptors, with user-friendly libraries to help all the way through. Currently, SAMD and RP2040 ports are supported in this part of code, but you can expect more in the future.

Hooray to 10 years of MicroPython!

There’s more – support for OpenAMP, an inter-core communication protocol, has received a ton of improvements for systems where MicroPython reigns supreme on some of the CPU cores but also communicates with different systems on other cores. A number of improvements have made their way through the codebase, highlighting things we didn’t know MicroPython could do – for instance, did you know that there’s a WebAssembly port in the interpreter, letting you run MicroPython in your browser?

Well, it’s got a significant overhaul in this release, so there’s no better time to check it out than now! Library structure has been refactored to improve CPython compatibility, the RP2040 port receives a 10% performance boost thanks to core improvements, and touches upon areas like PIO and SPI interfaces.

We applaud all contributors involved on this release. MicroPython is now a decade old as of May 3rd, and it keeps trucking on, having firmly earned its place in the hacker ecosystem. If you’ve been playing with MicroPython, remember that there are multiple IDEs, graphics libraries, and you can bring your C code with you!

USB HID And Run Exposes Yet Another BadUSB Surface

You might think you understand the concept of BadUSB attacks and know how to defend it, because all you’ve seen is opening a terminal window. Turns out there’s still more attack surface to cover, as [piraija] tells us in their USB-HID-and-run publication. If your system doesn’t do scrupulous HID device filtering, you might just be vulnerable to a kind of BadUSB attack you haven’t seen yet, rumoured to have been the pathway a few ATMs got hacked – simply closing the usual BadUSB routes won’t do.

The culprit is the Consumer Control specification – an obscure part of HID standard that defines media buttons, specifically, the “launch browser” and “open calculator” kinds of buttons you see on some keyboards, that operating systems, surprisingly, tend to support. If the underlying OS you’re using for kiosk purposes isn’t configured to ignore these buttons, they provide any attacker with unexpected pathways to bypass your kiosk environment, and it works astonishingly well.

[piraija] tells us that this attack provides us with plenty of opportunities, having tested it on a number of devices in the wild. For your own tests, the writeup has Arduino example code you can upload onto any USB-enabled microcontroller, and for better equipped hackers out there, we’re even getting a Flipper Zero application you can employ instead. While we’ve seen some doubts that USB devices can be a proper attack vector, modern operating systems are more complex and bloated than even meets the eye, often for hardly any reason – for example, if you’re on Windows 10 or 11, press Ctrl+Shift+Alt+Win+L and behold. And, of course, you can make a hostile USB implant small enough that you can build them into a charger or a USB-C dock.

USB image: Inductiveload, Public domain.

Human-Interfacing Devices: Packing For The Descriptor Heist

We started with figuring out HID descriptors a week ago, and I’ve shown you how to send raw HID packets using a MicroPython fork. We do still have the task in front of us – making a touchscreen device. For that, let’s give you the tools to capture an existing descriptor from a touchscreen, then show you how to tweak it and how it turns out in the end.

Packing For The Heist

When it comes to this kind of adventure, we can’t go without tools and weapons – it could be dangerous! Without them, you could even abandon your project halfway! Here’s enough high-precision tools and ammunition to last you through whatever obstacles you might encounter. Except for the web-based tools, these tools are for Linux, but please remember that you can always use a virtual machine or a Raspberry Pi. Nobody would use Windows for a heist anyway, what’s with all the telemetry and such.

The first tool is for reading descriptors – we need one to learn from, it’s just like a keycard you can flash to a security guard and scan at the vault entry. Of course, with RFID, you want to have enough examples, compare bits between a few cards and all. For now, HID descriptors don’t have authenticity checks, but it looks like that might just change in the future. Leave it to Apple and Microsoft to add them, as usual. On Linux, seeing descriptors is simple – as root, go into /sys/bus/usb/devices/, find your device by its lsusb device tree path, then follow the directory with the VID/PID in it. That directory will contain a report_descriptor file – hexdump it. The entire command could look like this:

sudo hexdump -v -e '/1 "%02X "' /sys/bus/usb/devices/3-6.2/3-6.2\:1.1/0003\:0C40\:8000.0022/report_descriptor

Again, you might need root to even find this path, so use sudo -i if you must. The format string in the hexdump command gives you parser-friendly output. Specifically, for parsing, I use this webpage – it’s wonderful, even adding tabs that delineate different sections of the descriptor, making its output all that more readable! You can also save this webpage locally, it’s a very neat tool. Other than that, you can try other local tools like this one!

Continue reading “Human-Interfacing Devices: Packing For The Descriptor Heist”

Human-Interfacing Devices: The Descriptor Heist

Today, we’ll build our own input devices. And they will be easy to create and write firmware for, they will work perfectly, and they will be cross-platform. We can do that with help of the Human Interface Device (HID) standard, and by way of introduction, so that you never get confused by what a “descriptor” means, and we’ll build our own HID device — a Human Interface Device device. The way we build them won’t require reading specifications – instead, I’ll teach your how to steal HID descriptors from existing devices, tweak them for our purposes, and use them in our devices to harness the power of HID.

For decades now, it’s been possible to build a HID mouse or keyboard by using a library or two, and it’s been a godsend for hackers all around the world. However, these libraries are typically confined to a certain template and inflexible, and we hackers often go outside of what’s expected. HID allows for much more than a simple keyboard or a mouse. That’s why today we’re building a touchscreen – something not yet covered online or by libraries.

HID lets you build devices that are friendly. They don’t need drivers, they are plug and play, and they do what you expect them to do. At its core, the HID standard is as simple as is ubiquitous. You can tunnel HID over USB, Bluetooth, I2C, and modern-day operating systems support all three of these. Today, let’s go through the basics of HID, and then build a USB touchscreen out of a SPI-connected resistive touchscreen, with help of the usual RP2040+MicroPython combo. I will also give you a toolkit for how to debug a Human Interface Device device as thoroughly as possible – specifically on Linux, showing all the HID debug and introspection capabilities that Linux gives you. But it’ll work on Windows too through the beauty of standardization.

Continue reading “Human-Interfacing Devices: The Descriptor Heist”

Shot of CubeTouch, a six sided cube built out of PCBs with each of the top PCB allowing for diffusion of the LEDs on the inside to shine through

Keyboard Shortcuts At The Touch Of A Planetary Cube

[Noteolvides] creates the CubeTouch, a cube made of six PCBs soldered together that creates a functional and interactive piece of art through its inlaid LEDs and capacitive touch sensors.

The device itself is connected through a USB-C connector that powers the device and allows it to send custom keyboard shortcuts, depending on which face is touched.

Finger touching the top of a CubeTouch device

The CubeTouch is illuminated on the inside with six WS2812 LEDs that take advantage of the diffusion properties of the underlying FR4 material to shine through the PCBs. The central microprocessor is a CH552 that has native USB support and is Arduino compatible. Each “planet” on the the five outward facing sides acts as a capacitive touch sensor that can be programmed to produce a custom key combination.

Assembling the device involves soldering the connections at two joints for each edge connecting the faces.

We’re no strangers to building enclosures from FR4, nor are we strangers to merging art and functionality. The CubeTouch offers a further exploration of these ideas in a sweet package.

The CubeTouch is Open Source Hardware Certified with all documentation, source code and other relevant digital artifacts available under a libre/free license.

Continue reading “Keyboard Shortcuts At The Touch Of A Planetary Cube”