Microcontroller Gives You More Control Of Your Camera Lens

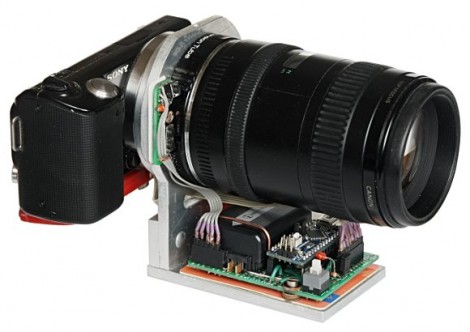
Here’s one way to get more control of your camera lenses. [Vladimir] built an Arduino-based pass-through ring (translated) which intercepts automatic lens controls. It’s meant for use with the Canon EOS lenses which have their own electronics allowing control of things like focus and zoom.

It seems like part of the motivation here was to uses the lenses with other brands of cameras. But [Vladimir] does also talk about the possibility of improving on some of the sensors that don’t perform well in certain climate conditions (think of how crystal oscillators will drift as temperature changes).

The machine translation is a bit rough to follow, but it seems the adapter ring still uses the settings sent in from the camera but has the Arduino clone to translate them into a format that the lens is expecting. In addition to this there is a set of buttons on that small PCB beside the lens which allow for fine tuning the aperture.

This is a lengthy writeup, but there’s two more on the way that will help fill in the gaps of how this hack works with different lens models, and some more tips on how to use it.

[Thanks Vasily]

DSLR Focus Stacking Assistant Takes The Hard Work Out Of Macro Photography

canon_dslr_focus_stacking_assistant

Focus stacking makes for fantastic macro images, but the process can be tedious without the right tools. While some focus stacking rigs require the camera to be moved away from the subject in small increments, others choose to keep the camera stationary while focusing the lens before each shot.

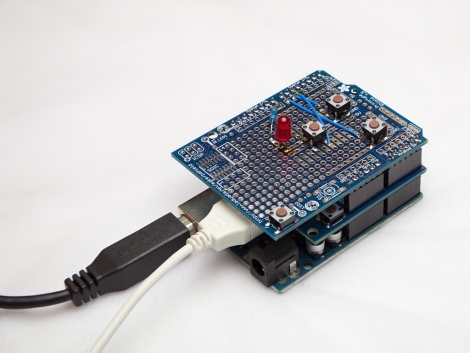
Both methods produce great results, but you need a steady hand and a lot of patience to get the job done. [Oleg] uses the focus stacking technique relatively frequently, so he decided to automate the process in order to save himself some time. Using an Arduino and a USB host shield from Adafruit, he put together a focus stacking assistant for his Canon EOS camera.

The assistant allows him to set two focal points, leaving the Arduino and his camera with the task of taking pictures. The Arduino commands the camera to tweak the focal point ever so slightly between each image, resulting in an array of images ready for stacking.

He says that the process is a bit slow at the moment, but he’ll be cleaning up the code and building a Nikon-compatible unit in the weeks to come.

Robust Wireless DSLR Control Over Bluetooth

yanis_android_bluetooth_camera_controller

[Manishi] wrote in to share his latest project, a Bluetooth DSLR controller that works with Android. More than a mere Bluetooth shutter trigger, his device lets you control a wide array of other settings such as aperture, shutter speed, ISO, white balance, focus position and live view.

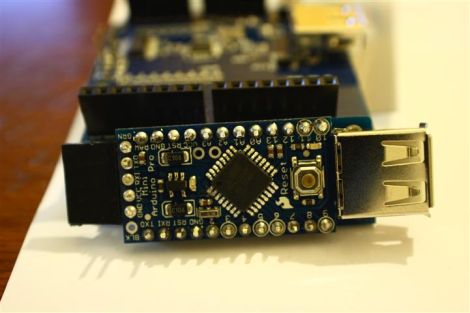
His “YaNis” control system was built using an Arduino Pro Mini, along with a USB host shield and a Bluetooth module he picked up from SparkFun. Obviously any other Arduino and SPP compatible Bluetooth board can be used, though component size is definitely a consideration for this project, and his selections are pretty well-suited to the job. The Arduino half of the software relies heavily on [Oleg Maruzov’s] PTP/USB libraries to get things done, but the free Android control app is all [Manishi’s] creation.

The Bluetooth dongle connects to the camera via USB, and once it’s paired with his Android phone, [Manishi] has total control at his fingertips. He has plenty of improvements planned for the near future including additional camera support, so we expect that we’ll see an even more robust control application before too long.

Continue reading to see a quick video demo of YaNis in action.

Continue reading “Robust Wireless DSLR Control Over Bluetooth”

TI-83 Intervalometer


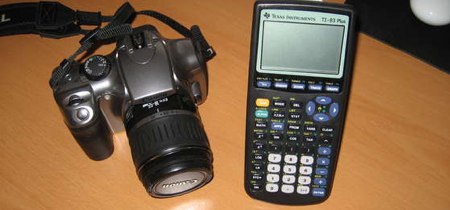
The headline How to Make Time Lapse Video With Your DSLR didn’t really grab us. Honestly, you pay that much for a camera and it can’t do time lapse out of the box? Well, we nearly missed the real story: [Chris Martino] was using a TI-83 to act as the intervalometer for the camera. The calculator has a 2.5mm audio jack for it’s data port and the camera has an identical port for the shutter trigger. The TI-83 runs a program with a FOR loop to act as the timer. When the loop completes it sends data to the port, and the voltage triggers the shutter. The rate isn’t very exact and varies depending on the charge left in the batteries. [Chris] estimated 10000 program iterations ends up being about 26 seconds between pictures. This technique has been tested on 84, 86, and 89 series calculators too. There are a couple example time lapse videos embedded after the break.

Continue reading “TI-83 Intervalometer”