Laser Surgery: Expanding The Bed Of A Cheap Chinese Laser Cutter

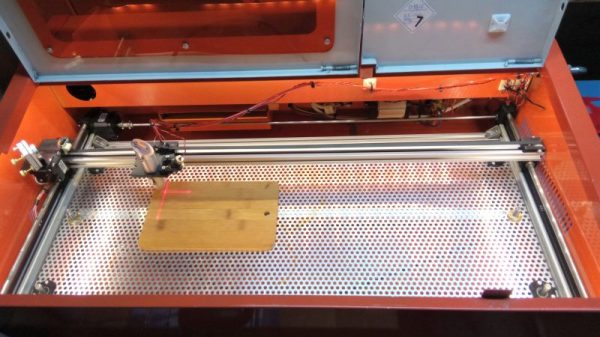
Don’t you just hate it when you spend less than $400 on a 40-watt laser cutter and it turns out to have a work area the size of a sheet of copy paper? [Kostas Filosofou] sure did, but rather than stick with that limited work envelope, he modified his cheap K40 laser cutter so it has almost five times the original space.

The K40 doesn’t make any pretenses — it’s a cheap laser cutter and engraver from China. But with new units going for $344 on eBay now, it’s almost a no-brainer. Even with its limitations, you’re still getting a 40-watt CO2 laser and decent motion control hardware to play with. [Kostas] began the embiggening by removing the high-voltage power supply from its original space-hogging home to the right of the work area. With that living in a new outboard enclosure, a new X-Y gantry of extruded aluminum rails and 3D-printed parts was built, and a better exhaust fan was installed. Custom mirror assemblies were turned, better fans were added to the radiator, and oh yeah — he added a Z-axis to the bed too.

We’re sure [Kostas] ran the tab up a little on this build, but when you’re spending so little to start with, it’s easy to get carried away. Speaking of which, if you feel the need for an even bigger cutter, an enormous 100-watt unit might be more your style.

Continue reading “Laser Surgery: Expanding The Bed Of A Cheap Chinese Laser Cutter”

Bachelor Builds Enormous Laser Cutter, Nobody Complains

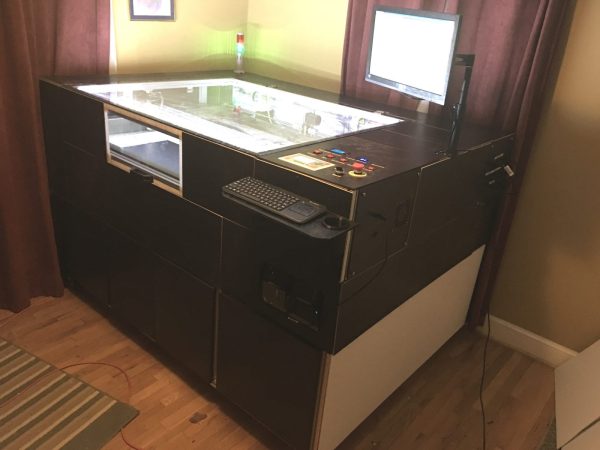
Nothing says swinging 21st-century bachelor pad better than a laser cutter. To really make a statement, you want a custom-built, 100 Watt, 1200mm x 900mm laser cutter.

The bachelor in question, [drandolph], rightly points out that a $6,000 build that takes up a significant fraction of the floor space in one’s apartment is better attempted without the benefit of spousal oversight. Still, what spouse couldn’t love the finished product? With a custom aluminum extrusion frame (which barely made the trip from China intact) it’s a sturdy affair, and who could deny the appeal of the soft glow of an LED-illuminated work chamber? A custom exhaust system with sound-deadening, a water chiller for laser cooling, an Arduino-controlled status beacon – there’s even a 3-D printed beer holder on the control panel! And think of all the goodies that will come off the enormous bed of this thing. Note to self: make sure wife sees this post.

There are cheaper and smaller laser cutters, but what’s the point if you have the freedom to go big?

[via r/DIY]

Converting From Clutter Closet To Dreamy Datacenter

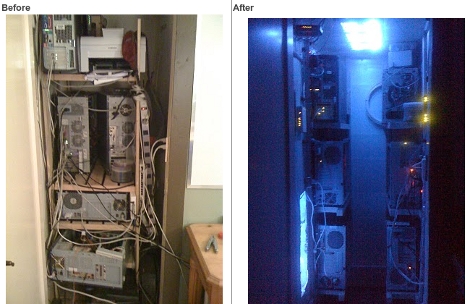
[DocDawning] had a nice home network up and running, but the messy pit housing the hardware made him avoid that part of the house. In an effort to cut down on noise, and clean up the clutter, he built himself a very nice data center inside a small closet.

One of the biggest changes in the setup provides adequate cooling. He cut a vent hole into a wall shared between the closet and a hallway. This was just the right size for a few large cooling fans which suck air into the enclosed space. But cool-air intake must be accompanied by hot-air outflow so he added an exhaust vent in the ceiling. This also received a trio of big fans, and as you can see above, the integrated LEDs act as a light source for the server farm.

The final part of the plan involved machine-specific brackets mounted to the walls of the enclosure. These racks were built out of 1×1 white wood. They hold the hardware in place leaving plenty of room to run cables. The new setup even opened up enough wall space to mount power and networking hardware. Now everything has its place, and [DocDawning] can finally close the door on his noisy servers.

DIY Aluminum Heat Sink Casting

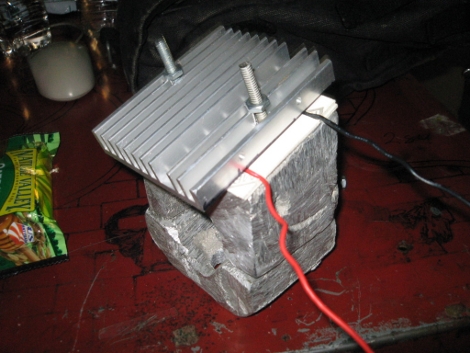
[Peter Wirasnik] has been casting his own aluminum heat sinks. He’s working on capturing the heat from a car’s exhaust system and turning it into electricity, kind of like the candle generator. In the photo above a standard heat sink is bolted to one side of a Peltier cooler with [Peter’s] own casting on the bottom. That casting will connect to the exhaust pipe and transfer heat to the Peltier while the other heat sink keeps the opposite side relatively cool. What results is a voltage between 600mV and 1V.

We’re not quite sure what the end product will be but the casting process is fascinating. He carves the shape of the piece he wants to cast from Styrofoam and embeds it in a box of sand. He then melts salvaged aluminum in a cast iron frying pan using what looks like a propane torch. Once molten, he pours the aluminum into the mold and it burns away the Styrofoam as it fills the void. A little cleanup and he’s got the heat conductive mounting bracket he was after.