Hacklet 45 – Reverse Engineering Projects

Sooner or later, all of us end up putting on our reverse engineering hats and digging in to a device. It might be that you’re trying to keep an old piece of equipment running – the manufacturer is long defunct, and parts are no longer available. It might be that sweet new router with locked down firmware. Or, it might just be that you’re curious. Whatever the reason, reverse engineering is a rewarding endeavor. Some of our favorite reverse engineering projects read like spy novels. Instead of cloak and dagger, it’s encryption and soldering iron. This week’s Hacklet focuses on some of the best reverse engineering projects on Hackday.io!

c02We start with [Henryk Plötz] and Reverse-Engineering a low-cost USB CO₂ monitor. Carbon monoxide detection and measurement devices are household safety items these days, and have become rather cheap. Carbon dioxide measuring devices are less common, and as expected, more expensive. [Henryk] found a device for around 80€ which did what he needed. The included USB connector was supposedly just for power, but when plugging it in, the device enumerated on his Linux box. The accompanying windows software displayed live data from the detector, but there wasn’t much information on the protocol. Time to bust out Ida pro, and go to town on that software! [Henryk] did battle with his CO₂ monitor”s software and was justly rewarded.

mavrickNext up is [Bob Blake] and Reverse Engineering the Maverick ET-732. [Bob] loves barbecue, but hates to babysit his smoker. Thankfully there are wireless temperature sensors out there built just for that purpose, but they have limited range and you can’t have multiple receivers around the house. [Bob] aimed to fix all of that by sending his Maverick wireless thermometer data to the web, so he could check in on his cooking from anywhere. First he had to reverse engineer the protocol used by the sensor. A spectrum analyzer told [Bob] that the sensor transmit frequency was  433.92 MHz, which is common for low-cost transmitters like this. [Bob] actually had some compatible receivers at his office, so he was quickly able to capture some data with his Saleae logic analyzer. The real fun came in figuring out exactly how the data was organized!
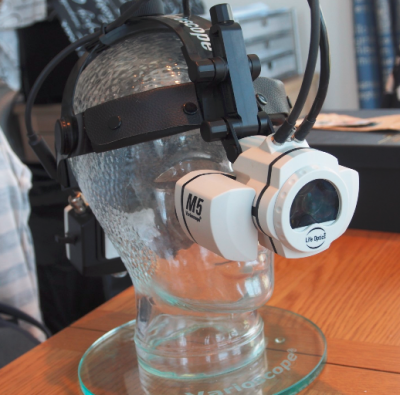
hmdA chance Ebay sale netted [Technics] a sweet head mounted magnifier, but no way to control it. Reverse engineering a Life Optics M5 documents [Technics] efforts to get his new headgear working. The Life Optics M5 is actually a re-branded version of the Leica HM500 head mounted zoom microscope. These devices were originally designed for medical use. They provide a stereo view to the surgeon or dentist using them, as well as sending a video feed to be displayed for the rest of the team to use or record. Cracking open the M5’s head-mounted box revealed several modules, but no obvious means of controlling zoom or focus. Scoping out a few of the mystery wires did reveal what looks to be a 9600 baud serial data stream though. This is a brand new project, and we’re waiting for [Technics] next update to see if he gets to do some soldering with his new toy!
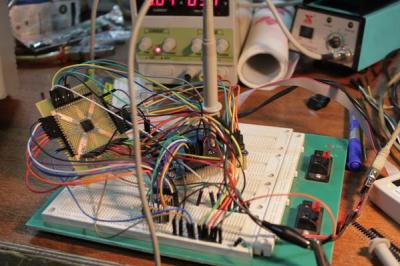
 

biosBIOS password protection – it’s the bane of any used laptop buyer’s existence. Sometimes removing these passwords are as easy as popping out the CMOS battery, other times, not so much. [q3k] found themselves in the latter situation with a bundle of Toshiba R100 laptops. and no way to start them up. [q3k] didn’t give up though – they broke out the soldering iron and started Reverse engineering Toshiba R100 BIOS. The R100 is a Pentium M era machine – old but still usable for many hacking purposes. Dumping the ROM BIOS of the laptop didn’t yield the information [q3k] needed, so they moved on to the TLCS-870 controller, and built a really nice board with a Xilinx Spartan6 FPGA to help with the effort. It turns out that the 870 is just used for power management. – [q3k] has now turned their attention to a Renesas microcontroller which might be just the droid they are looking for!

We think that reverse engineering projects are pretty darn cool, so we’ve created a Reverse Engineering List to keep them all organized.

That’s it for this Hacklet, As always, see you next week. Same hack time, same hack channel, bringing you the best of Hackaday.io!

Hacklet 44 – Teardowns

Just about every hacker, maker and tinkerer out there received their early education the same way: A screwdriver in one and a discarded bit of electronics in the other. There is no better way to find out how something works than cracking it open and examining each piece.  In recent years, teardown videos have become popular on YouTube, with some of the great examples coming from users like [EEVblog], [mikeselectricstuff], and [The Geek Group]. This week’s Hacklet is all about the best teardown projects on Hackaday.io!

copierWe start with [zakqwy] and his Savin C2020 Teardown. Photocopiers (and multifunction machines) are the workhorses of the modern office. This means there are plenty of used, abused, and outdated photocopiers available to hackers. [Zakqwy] got this monster when it started misbehaving at his office. Copiers are a venerable cornucopia of motors, gears, sensors (lots and lots of breakbeam sensors) and optics. The downside is toner: it’s messy, really bad to breathe, and if you don’t wear gloves it gets down into the pores of your skin, which takes forever to get out. [Zakqwy] persevered and found some awesome parts in his copier – like an  Archimedes’ screw used to transport black toner.

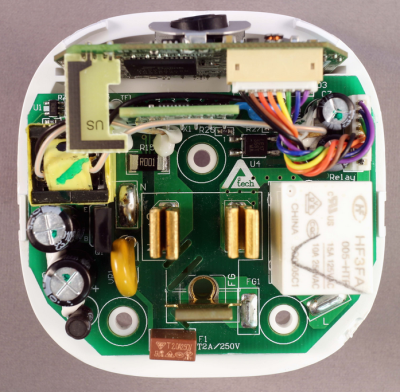
wemoNext up is [Bob Blake] with Belkin WeMo Insight Teardown. [Bob] wanted a WiFi outlet, but wasn’t about to plug something in to both his power grid and his network without taking it apart first. [Bob] did an awesome job of documenting his teardown with lots of great high resolution photos – we love this stuff! He found a rather well thought out hardware design. The Insight has 3 interconnected PCBs inside. The power switching and supply circuits are all on one board. It includes slots and the proper creep distances one would expect in a design that will be carrying 120V AC mains power. A small daughter board holds an unknown chip – [Bob] is guessing it is the power sensing circuitry. A third board a tucked in at the top of the module holds the main CPU, a Ralink/MediaTek RT5350F SoC, RAM, and the all important WiFi antenna.


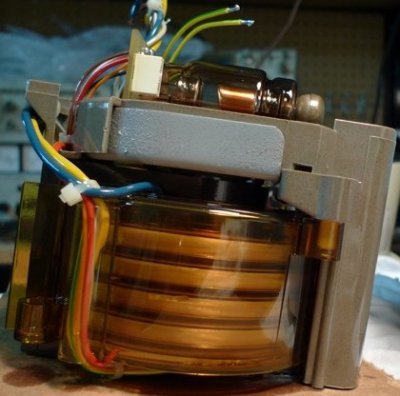
x-ray[Drhatch] took things into the danger zone with an X-ray Head Teardown. We’re not sure if [Drhatch] is a real doctor, but he does have a Heliodent MD dental X-ray head. Modern X-ray machines are generally radiation safe if they’re not powered up. Radiation isn’t the only dangers to worry about though – there are latent charged capacitors and cooling oils which may contain nasty chemicals like PCBs, among other things. [Drhatch] found some pretty interesting design decisions in his X-ray head. The tube actually fires through the cylindrical high voltage transformer. This means the transformer acts as a beam collimator, focusing the X-ray beam down like a lens. He also found plenty of lead shielding. Interestingly there are two thickness of lead in the housing. Shielding close to the tube is 1 mm thick, while shielding a bit further away is only 0.7 mm thick.


3phaseFinally, we have [danielmiester] with Inside a 3ph AC Motor Controller(VFD). [Daniel] tore down a Hitachi Variable-Frequency Drive (VFD) with the hopes of creating a frequency converter for a project. These high voltage, high power devices have quite a bit going on inside, so the conversion became a teardown project all its own. VFDs such as this one are used in industry to drive high power AC motors at varying speeds efficiently. As [Daniel] says, the cheaper ones are ” just really fancy PWM modules”. Handling 1.5 kW is no joke though. This VFD had a large brick of power transistors potted into its heat sink. The controller board was directly soldered to the transistors, as well as the rectifier diodes for the DC power supply. [Daniel] was doing some testing with the unit powered up, so he built a custom capacitor discharge unit from 3 C7 Christmas lights. Not only did they keep the capacitors discharged, they provided an indication that the unit was safe. No light means no charge.

Not satisfied? Want more teardown goodness? Check out our freshly minted Teardown List!

That’s about all the time we have for this week’s Hacklet. As always, see you next week. Same hack time, same hack channel, bringing you the best of Hackaday.io!

Hacklet 43 – Flashlight Projects

Mankind has always looked for ways to light up the night as they walk around. Fires are great for this, but they aren’t very safe or portable. Even kept safe in a lantern, an open flame is still dangerous – especially around cows.  Enter the flashlight, or torch if you’re from the other side of the pond. Since its invention in 1899, the flashlight has become a vital tool in modern society. From patrolling the dark corners of the city, to reading a book under the covers, flashlights enable us to beat back the night. The last decade or so has seen the everyday flashlight change from incandescent bulbs to LEDs as a light source. Hackers and makers were some of the first people to try out LED flashlights, and they’re still tinkering and improving them today. This weeks Hacklet focuses on some of the best flashlight projects on Hackaday.io!

light1We start with [Norman], and the LED Flashlight V2. Norman built a flashlight around a 100 Watt LED. These LEDs used to be quite expensive, but thanks to mass production, they’ve gotten down to around $6 USD or so. Norman mounted his LED a custom aluminum case. At this power level, even LEDs get hot. An extruded aluminum heatsink and fan keeps things cool. Power is from a 6 cell LiPo battery, which powers the LED through a boost converter. It goes without saying that this flashing is incredibly bright. Even if the low-cost LEDs aren’t quite 100 Watts, they still put many automotive headlights to shame! Nice work, [Norman].

light2A tip of the fedora to [Terrence Kayne] and his Grain-Of-Light LED LIGHT. [Terrence] loves LED flashlights, be he wanted one that had a bit of old school elegance. Anyone familiar with LEDs knows CREE is one of the biggest names in the industry. [Terrence] used a CREE XM-L2 emitter for his flashlight. He coupled the LED to a reflector package from Carlco Optics. The power source is an 18650 Lithium cell, which powers a multi-mode LED driver. [Terrence] spent much of his time turning down the wooden shell and aluminum tube frame of the flashlight. His workmanship shows! Our only suggestion would be to go with a lower profile switch. The toggle [Terrence] used would have us constantly checking our pockets to make sure the flashlight hadn’t accidentally been activated.

light3Harbor Freight’s flashlights are a lot like their multimeters: They generally work, but you wouldn’t want to trust your life to them. That wasn’t a problem for [Steel_9] since he needed a strobe/party light. [Steel_9] hacked a $5 “27 LED” light into a stylish strobe light. He started by cutting the power traces running to the LED array. He then added in an adjustable oscillator circuit: two BJTs and a handful of discrete components make up an astable multivibrator. A third transistor switches the LEDs. Switching a load like this with a 2N3906 probably isn’t the most efficient way to do things, but it works, and the magic smoke is still safely inside the semiconductors.  [Steel_9] built the circuit dead bug style, and was able to fit everything inside the original plastic case.  Rave on, [Steel_9]!

If you want to see more flashlight projects, check out our new list on Hackaday.io! That’s about all the time we have for this week’s Hacklet. As always, see you next week. Same hack time, same hack channel, bringing you the best of Hackaday.io!
Hacklet 42 – Mouse Projects

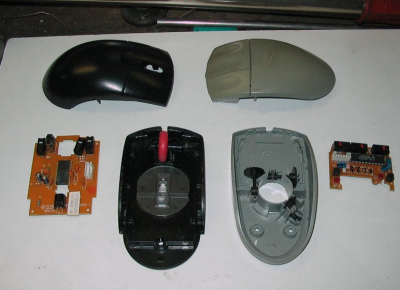
Ever since [Douglas Engelbart] and his team came up with the computer mouse, hackers, makers, and engineers have been creating ways to change and improve the design. Even the original mouse was something of a hack, built form a block of wood, a button, and two encoder wheels. The wire exited toward the user’s wrist, making the device look like it had a tail. Even after all these years, folks are still working to make the perfect pointing device. This week’s Hacklet highlights some of the best mouse projects on Hackaday.io!

mouseballzWe start with [s_sudhar] and ORB – A 3D gaming mouse. Orb uses accelerometers and gyros to track its location in 3D space. The popular MPU-6050 chip provides all the sensors to create an Inertial Measurement Unit (IMU). The controller is an Arduino Micro, which provides the USB interface to a PC with the help of Arduino’s MouseKeyboard library. Two micro switches handle button duties. The original Orb was built up in a cardboard box. [S_sudhar] created a more advanced version housed in a 3D printed sphere with two buttons. The translucent joint between the two halves of the sphere is just begging for some RGB LEDs. We can already see them flashing red when you’re getting shot in Team Fortress 2!

mouse-wheelAnyone who has used X-Windows with a three button mouse knows how maddening the modern clickable center scroll wheel can be. You can’t click the wheel without it rolling, and causing all sorts of mayhem. There are plenty of software solutions and window manager mods to work around this, but [mclien] wanted a real three button mouse with a side scroll wheel. He didn’t want just any mouse though – it had to be a Silicon Graphics International (SGI) 3 button unit. His project 3-buttonmouse with seperate wheel used a dremel, drill press, and glue to transplant the electronics of a 3 button scrolling mouse into the classic SGI plastics. The final wheel placement did work – but it didn’t quite fit [mclien’s] hand. It did fit one of his friends hands perfectly though. So well in fact that the friend borrowed [mclien’s] creation. Neither the mouse nor the friend have been seen since!

jimmy[Jay-t] decided that mice are for more than pointing, so he built Jimmy the mouse bot. Jimmy is a robot built from an old Commodore Amiga two button mouse. His brain is a Parallax Propeller processor. Two outrigger mounted gear motors help Jimmy drive around. Jimmy has plenty of sensors, including infrared object detectors, switches, and a GPS module from Adafruit. Jimmy may be the world’s first homing mousebot. [Jay-t] does all his interactive testing with Tachyon Forth on the Prop. The great thing about having an 8 core processor is that there is plenty of room for expansion. Even with all these sensors, Jimmy is still only using 3 cores!


clovis

Finally we at [Clovis Fritzen] and the Wireless Batteryless Mouse. This is our favorite type of project – the kind that has just been uploaded. [Clovis] plans to use a movement based system to charge up a supercapacitor – eliminating the need for batteries or wires. He’s also hoping to use an accelerometer to detect the mouse’s position rather than a power-hungry optical system. The details are still sparse, because he’s just started the project! These are exactly the type of projects that get us thinking. How will [Clovis] translate movement to energy? Will it be weights, like a self-winding watch? Maybe pizeo elements in the buttons. Will people mind having to jiggle their mouse to get it working once that capacitor is discharged? One thing we’re sure of, [Clovis] has a proven track record of implementing projects like his weather station. Get in there and help with your own ideas, or simply follow along with us and see how this one turns out.

Not satisfied? Want more mousy goodness? Check out our freshly minted mouse and pointer projects list!

That’s about all the time we have for this week’s Hacklet. As always, see you next week. Same hack time, same hack channel, bringing you the best of Hackaday.io! 
Hacklet 41 – Prosthetics Projects

Throughout human history, mankind has worked to enable those with disabilities. This applies especially to those who have missing limbs, either from injury or since birth. Every time technology improves, prosthetics improve along with the way. Unfortunately this now means prosthetics have become expensive systems. Hackers, makers, and engineers are working to make prosthetics more affordable, and more available to everyone. This week’s Hacklet focuses on some of the best prosthetics projects on Hackaday.io!

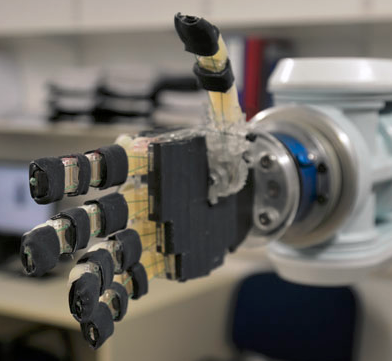
bionic1We start with [Open Bionics] and Affordable Bionic Hands For Amputees. The [Open Bionics] team are using 3D printers to bring the cost of a prosthetic arm and hand down from up to $100,000 USD to just $1000 USD. They’ve also reduced the time to create a custom device from weeks to just 5 days. The team’s current hand has five degrees of freedom, uses electromyography (EMG) for control, and weighs just 268 grams. [Open Bionics] discovered that many amputees are willing to trade off functions for a lighter weight device. Having a sensor and motor studded hand won’t help much if the wearer is worn out after just a couple of hours!

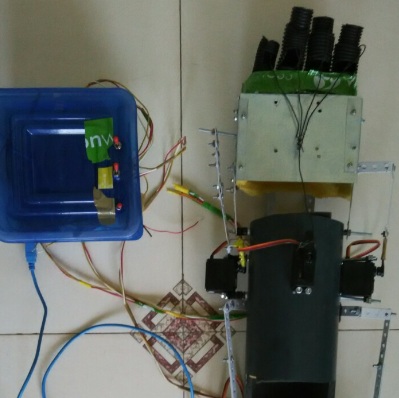
bionic2Next up is [yash.gajra56] and RE-ARM. RE-ARM is a prosthetic arm project which aims to help both those who have lost limbs, and those with full or partial paralysis of a limb. Movement is provided by radio control style servos. Control is via voice commands and Bluetooth from a cell phone. [Yash] has incorporated feedback into RE-ARM by using flex sensors. Processing is handled by an Arduino. We like the low-cost, low tech approach RE-ARM uses. We’d love to see everyone have access to a 3D printer, but unfortunately the world isn’t there quite yet. RE-ARM uses readily available components to build a functional prosthetic. Nice work [yash]!

bionic3[OpenBionics] brings us  Affordable Prosthetic Hands. No, you didn’t read that name wrong. There are two “Open Bionics” on Hackaday.io! This [OpenBionics] team has no space, and is based in Athens, Greece. The other [Open Bionics] team does have a space between the words, and is based in Bristol in the United Kingdom. We’re hoping the two groups can come together and collaborate now that they’re both using Hackaday.io. This [OpenBionics] team is working on prosthetic hands, in the sub $200 USD price range. The team has come up with a novel thumb design which provides nearly full functionality with only one rotating joint. [OpenBionics] also allows their users to selectively lock digits, which allows for up to 144 different grasping postures.


bionic4

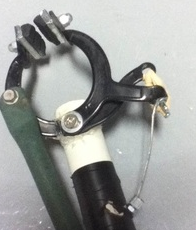
Finally we have [Daniel Mead] with Third World Medical Equipment (Arm). [Daniel] created this project as an independent study back in high school. The idea is create a simple arm with a gripper out of cheap or freely available items. The gripper is fashioned from a bicycle brake. The fitting system is especially novel. [Daniel] used an old soda bottle to create a custom mold for the amputee’s residual limb. Plastic bottles are generally made of polyethylene terephthalate, or PET, a thermoplastic. [Daniel] placed a wet sock over his arm, and a plastic bottle over the sock. Holding the plastic bottle above a fire created enough heat to shrink the bottle to his arm. the sock provided room for padding, and insulated him from getting burned during the molding process.

Not satisfied? Want more prosthetics? Check out the Prosthetics list over on Hackaday.io! If any of these projects inspire you, don’t forget that prosthetics are a great starting point for an entry in The Hackaday Prize!

That’s about all the time we have for this week’s Hacklet. As always, see you next week. Same hack time, same hack channel, bringing you the best of Hackaday.io!

Hacklet 39: Battery Power

3296371398740598106[robin] has a Red Camera (lucky!), an absurdly expensive digital video camera. As you would expect the batteries are also absurdly expensive. What’s the solution? Battery packs from cordless drills.

Cordless drills are interesting pieces of tech that can be easily repurposed; there are huge battery packs in them, big, beefy motors, and enough hardware to build an Automatic Cat Feeder or a motorized bicycle.

What if those old Makita batteries don’t charge? That usually means only one or two cells are dead, not the whole pack. Free LiIon cells, but you need to charge them. Here’s a single cell charger/boost converter that will do the trick.

Z

A problem faced by amateur radio operators around the world is the lack of commercial power. Plugging a portable shack into a wall will work, but for uninterrupted power car batteries are everywhere. How do you combine wall power and car batteries for the best of both worlds? With an In-line battery backup module.

9k=All of the projects above rely on charging a battery through wall power, and sometimes even that is impossible. Solar is where we’re headed, with solar LiPo chargers, and solar LiFe chargers. That’s more than enough to keep a smartphone charged, but if you want to go completely off the grid, you’re going to need something bigger.

[Michel] has been off the power grid 80% of the time since he installed his home PV system a few years ago. How’s he doing it? A literal ton of batteries, huge chargers, and a 5kW inverter.


Hacklet 39: The Kerbal Way Of Doing Things

Kerbal Space Program is a space flight simulator based on an extremely stupid race of green space frogs that have decided to dedicate all their resources towards the exploration of space. It is a great game, a better space simulator than just about anything except for Orbiter, and the game is extremely moddable. For this edition of the Hacklet, we’re going to be taking a look at some of the mods for KSP you can find over on hackaday.io.

1271491420181365398Like most hardware builds for Kerbal Space Program, [lawnmowerlatte] is using a few user-made plugins for KAPCOM, a hardware controller and display for KSP. The Telemachus plugin is used to pull data from the game and display that data on a few screens [lawnmower] had sitting around.

There are a few very cool features planned for this build including seven-segment displays, a throttle handle, and neat enclosure.


IMG_20140419_013717[Gabriel] is working on a similar build for KSP. Like the KAPCOM, this one uses the Telemachus plugin, but this one adds three eight-digit, SPI-controlled, seven-segment displays, relegendable buttons, and a Kerbal-insipired frame made out of Meccano.


[Lukas]’ KSP Control Panel is another complicated control system that breaks immersion slightly less than a keyboard. He’s using a Raspberry Pi to talk to the Telemachus server to control every aspect of the craft. From staging to opening up the solar panels, it’s all right there in [Lukas]’ control panel.


You may have noticed a theme with these builds; all of them use the Telemachus plugin for KSP. Even though it’s fairly simple to create plugins for Unity, there really aren’t that many KSP plugins build for these immersive control panels and space flight simulators. Or rather, Telemachus is ‘good enough’. We’d like to see a fully controllable KSP command pod model, just like those guys with 737 flight simulators in their garage. If you have any idea how that could happen, leave a note in the comments.