Old TV Vacuum Tube Turned DIY X-Ray Machine

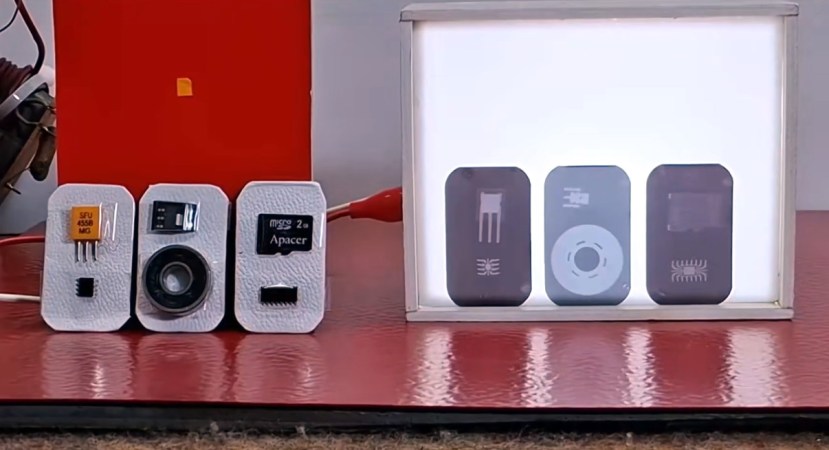
Just because you probably shouldn’t make a DIY X-ray machine, doesn’t mean nobody would. [mircemk] shows off his DIY unit, how it works, how to use it safely and of course, some pretty X-ray photos of household objects.

The machine repurposes a DY86 vacuum tube from old CRT TVs to emit X-ray radiation. To drive the tube without blowing it up, a rather specialized series of power supplies is needed; a low-voltage DC power supply powers a high-voltage AC inverter, which is then sent through first a transformer, and then a Crockfort-Walton voltage multiplier, to reach the incredibly high voltages needed for such a vacuum tube’s radiation emission to reach X-rays. Naturally, this didn’t go to plan first try, leading to the unfortunate demise of three vacuum tubes (as well as another three which had already lost their vacuums).

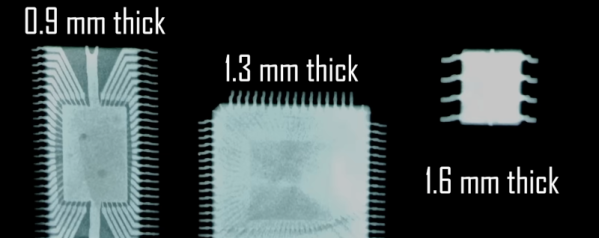
Now how do you capture an image with X-rays for a light source? With dental X-ray photo films of course! The dental film is placed behind the object to be scanned, the transmitted X-rays making up the resulting image. After going through the standard process of developing for about 30s, washing, fixing for about half an hour, and washing again, the photos become clearly visible. The best results were obtained at a distance of 10-15 cm an an exposure time varying from 15 minutes to an hour depending on material hardness.

Continue reading “Old TV Vacuum Tube Turned DIY X-Ray Machine”
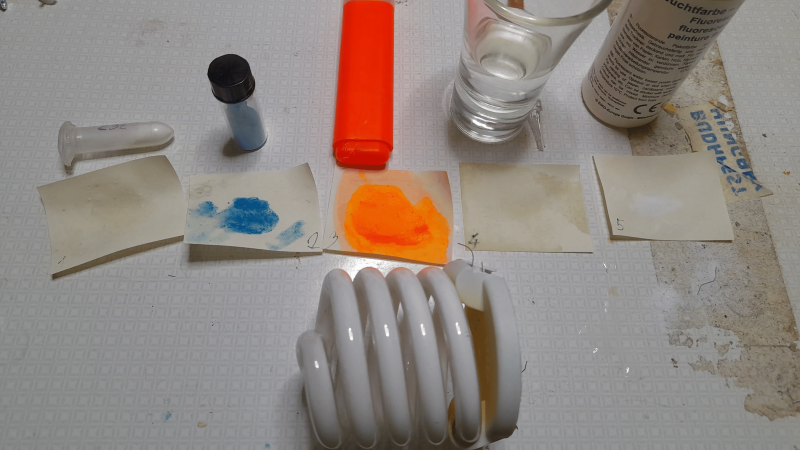
A selection of materials sits on a counter. There is a fluorescent light bulb, two papers stained with dyes, and a few other pieces of paper with no obvious staining.

Building Your Own X-Ray Detector Screen

Fluoroscopy is probably the best-known method of X-ray imaging: an X-ray beam passes through the subject to be imaged, and the transmitted X-rays illuminate a phosphor screen. Dense objects, such as metal or bone, cast a shadow on the screen, which provides a real-time image of the subject’s interior. Already having access to X-ray sources, [MarcellF]’s next step was to investigate common phosphor materials, then synthesize his own.

Most common materials that fluoresce under ultraviolet light showed no activity under X-rays: fluorescein, quinine, UV fluorescent paint, and common fluorescent minerals emitted no noticeable glow under 80 kV X-ray stimulation. However, strontium aluminate phosphors did fluoresce well, with a strong afterglow, as did the phosphors in a fluorescent light bulb, some LEDs, and an electroluminescent panel. The electroluminescent panel, which used a zinc sulfide phosphor, was almost as bright as the gadolinium oxysulfide screen from a CT scanner’s detector and had no noticeable afterglow.

Continue reading “Building Your Own X-Ray Detector Screen”

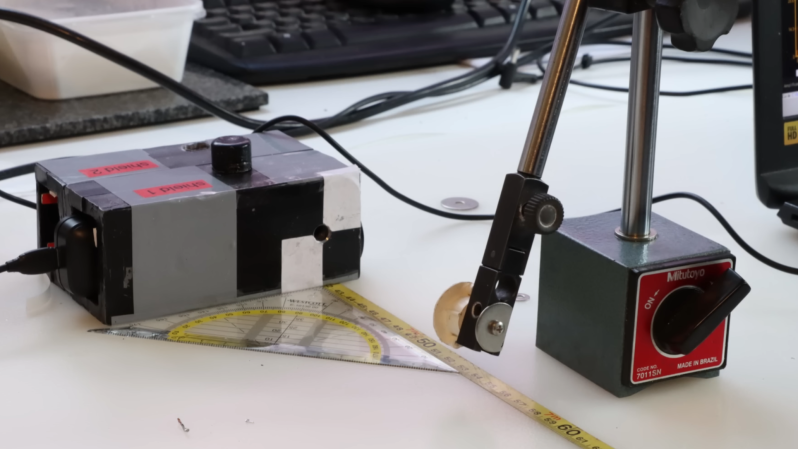
A lead box with a small aperture sits on a desk. A ruler leads away from it. A small disk on a stand is held in front of the aperture.

Testing The Wave-Particle Duality With Gamma Rays

Everything on the electromagnetic spectrum has some properties of both waves and particles, but it’s difficult to imagine a radio wave, for example, behaving like a particle. The main evidence for a particle-like nature is quantization, the bundling of electromagnetic energy into discrete packets. One way around this is to theorize that quantization is due to the specific interaction between the electromagnetic field and matter, not intrinsic to the field itself. To investigate this theory, [Huygens Optics] conducted several experiments with gamma rays, including Compton scattering.

For these experiments, he used a Radiacode 110 X-ray and gamma ray detector, which uses a photodetector to detect radiation’s passage through a scintillation crystal. By summing the energy contained in the light emitted by one ray, it can measure the ray’s energy and, over time, create an energy spectrum. [Huygens Optics] used the americium capsule from an old smoke detector as a radiation source, and cast a lead enclosure to shield the Radiacode from most background radiation, with a small opening for measurements.

Continue reading “Testing The Wave-Particle Duality With Gamma Rays”

Why Peeling Adhesive Tape Is So Unreasonably Noisy

Although not as reviled as the sound of nails on chalkboard, the sound of adhesive tape being peeled is quite probably at least as distinctive. With every millimeter of the tape’s removal from the roll sounding like it’s screaming in protest, it has led some to wonder just why this process is noisy enough to be heard from across an open-plan office. Recently [Er Qiang Li] et al. had their paper on a likely theory published in Physical Review E, in which they examine the supersonic air pulses at the core of this phenomenon.

The shockwaves produced by peeling tape, captured on Schlieren imaging. (Credit: Er Qiang Li et al., 2026)

Using rolls of adhesive tape and two microphones synchronized with two high-speed cameras in a Schlieren imaging setup, they gathered experimental data of this stick-slip mechanism. Incidentally, in addition to this auditory effect, adhesive tape is also known for the triboluminescence effect, as well as the generating of X-rays, making them quite the source of scientific demonstrations, even when they’re not also being used to create graphene with.

What they deduced from the recorded data was that the transverse fractures that suddenly appear after the extended stick phase hold a vacuum until they reach the end of the fracture during the brief slip phase, at which point the vacuum collapses very suddenly. This produces a pressure of 9600 Pa and clearly visible shock fronts on the Schlieren images.

Now that we know why peeling adhesive tape from its roll is so noisy, it won’t make it any more quiet, but at least we can add another fascinating science fact to its roll of achievements.

Tubeless X-Ray Runs On Patience

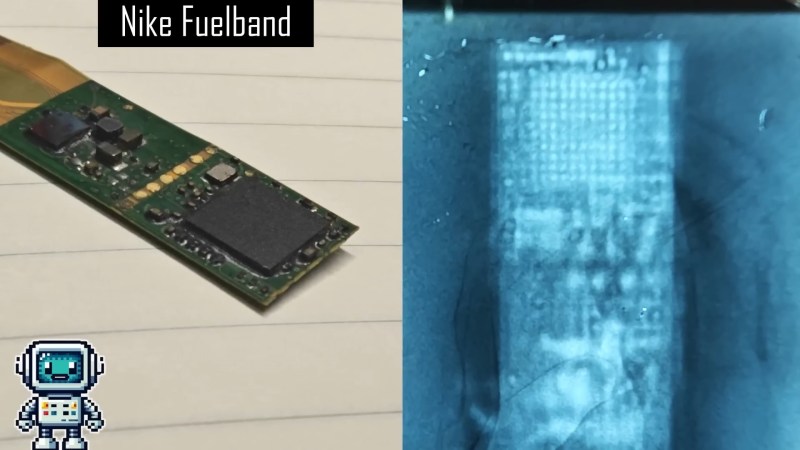
Every time we check in on [Project326], he’s doing something different with X-rays. This week, he has a passive X-ray imager. On paper, it looks great. No special tube is required and no high voltage needed. Actually, no voltage is needed at all. Of course, there’s no free lunch. What it does take is a long time to produce an image.

While working on the “easy peasy X-ray machine,” dental X-ray film worked well for imaging with a weak X-ray source. He found that the film would also detect exposure to americium 241. So technically, not an X-ray in the strictest sense, but a radioactive image that uses gamma rays to expose the film. But to normal people, a picture of the inside of something is an X-ray even when it isn’t.

Continue reading “Tubeless X-Ray Runs On Patience”

Food Irradiation Is Not As Bad As It Sounds

Radiation is a bad thing that we don’t want to be exposed to, or so the conventional wisdom goes. We’re most familiar with it in the context of industrial risks and the stories of nuclear disasters that threaten entire cities and contaminate local food chains. It’s certainly not something you’d want anywhere near your dinner, right?

You might then be surprised to find that a great deal of research has been conducted into the process of food irradiation. It’s actually intended to ensure food is safer for human consumption, and has become widely used around the world.

Continue reading “Food Irradiation Is Not As Bad As It Sounds”

DIY X-Rays Made Easy

Who doesn’t want an X-ray machine? But you need a special tube and super high voltage, right? [Project 326] says no, and produces a USB-powered device that uses a tube you can pick up two for a dollar. You might guess the machine doesn’t generate X-rays with a lot of energy, and you’d be right. But you can make up for it with long exposure times. Check out the video below, with host [Posh Arthur].

The video admits there are limitations, of course. We were somewhat sad that [Project 326] elected not to share the exact parts list and 3D printed files because in the unlikely event someone managed to hurt themselves with it, there could be a hysterical reaction. We agreed, though, that if you are smart enough to handle this, you’ll be smart enough to figure out how to duplicate it — it doesn’t look that hard, and there are plenty of not-so-subtle clues in the video.

Continue reading “DIY X-Rays Made Easy”