An Open Source GPU

Unless you’re bit-banging a CRT interface or using a bunch of resistors to connect a VGA monitor to your project, odds are you’re using proprietary hardware as a graphics engine. The GPU on the Raspberry Pi is locked up under an NDA, and the dream of an open source graphics processor has yet to be realized. [Frank Bruno] at Silicon Spectrum thinks he has the solution to that: a completely open source GPU implemented on an FPGA.

Right now, [Frank] has a very lightweight 2D and 3D engine well-suited for everything from servers to embedded devices. If their Kickstarter meets its goal, they’ll release their project to the world, giving every developer and hardware hacker out there a complete, fully functional, open source GPU.

Given the difficulties [Bunnie] had finding a GPU that doesn’t require an NDA to develop for, we’re thinking this is an awesome project that gets away from the closed-source binary blobs found on the Raspberry Pi and other ARM dev boards.

Why Kickstarter Projects Are Always Delayed

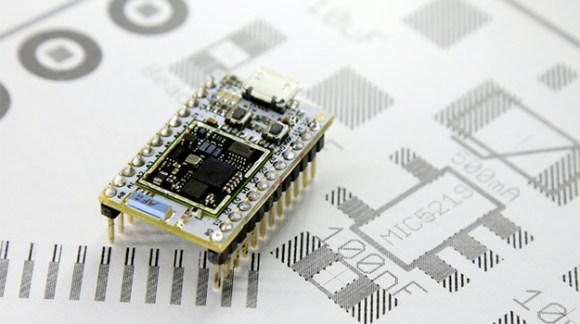
Most Hackaday readers may remember the Spark Core, an Arduino-compatible, Wi-Fi enabled, cloud-powered development platform. Its Kickstarter campaign funding goal was 10k, but it ended up getting more than half a million. The founder and CEO of Spark [Zach Supalla] recently published an article explaining why Kickstarter projects are always delayed as the Spark core project currently is 7 weeks behind schedule.

[Zach] starts off by mentioning that most founders are optimistic, making them want to embark in this kind of adventure in the first place. In most presentation videos the prototypes shown are usually rougher than they appear, allowing the presenters to skip over the unfinished bits. Moreover, the transition from prototype to “manufacturable product ” also adds unexpected delays. For example, if a product has a plastic casing it is very easy to 3D print the prototype but much harder to setup a plastic injection system. Last, sourcing the components may get tricky as in the case of Spark core the quantities were quite important. Oddly enough, it was very hard for them to get the sparkcore CC3000 Wifi module.

X-Winder: Carbon Fiber Wrapping

ScreenShot035

One of our readers just sent us a tip about this interesting kickstarter project. [Turner Hunt] is bringing carbon fiber manufacture into the hands of makers — at considerable cost savings!

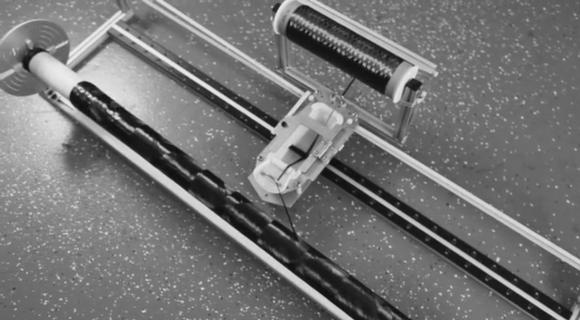
So how does it work? The machine wraps the filament around the workpiece, not unlike a CNC lathe in reverse. Actually it’s kind of a new breed of 3D printer! As the machine feeds the filament, it dips it through a bath of epoxy resin before being wrapped around the workpiece. A finishing step wraps heat shrink tape around the finished project using a heat gun, which then provides a glossy surface finish very similar to commercial carbon fiber products.

By purchasing carbon fiber filament and epoxy resin and using this machine, you can create structural carbon fiber tubes for about 80% less than they would cost commercially. The system comes with its own software that controls the machine via g-code, and you can also specify different wrapping patterns for different applications. While tube-shapes work best, you can also wrap other shapes including flat bars, wing skins, turbine blades and more — anything that is wrappable and under 6″ in total diameter. Is anyone else thinking about custom wrapped quadcopter frames?

[Thanks Alannah!]

Smoothieboard, The Be-all, End-all CNC Controller

A while back we took a look at electronics boards for 3D printers, going over the cost and benefits of the most common electronics boards for printers, laser cutters, and mills. One of the most impressive boards was the Smoothieboard, but finding a supplier back then was a little difficult. Now, the Smoothieboard is up on Kickstarter, giving everyone the opportunity to get their hands on this very cool CNC control board.

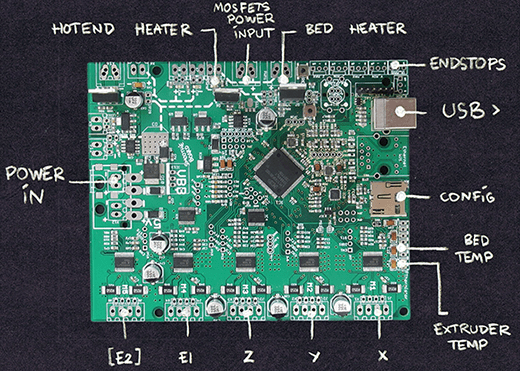
While most RepRap and 3D printer controller boards use an ATMega or other 8-bit microcontroller, the Smoothie uses a 32-bit ARM chip in the form of an NXP LPC Cortex-M3 chip. Not only does this allow the Smoothie to do some very cool things with your machine – native arcs and circles, for example, but this better hardware also allows for Ethernet, drag-and-drop firmware, and exposing the USB port as both a serial port or mass storage device.

The Smoothie comes in three flavors, with either 3, 4, or 5 stepper motor drivers. These Allegro A4982 drivers are good enough for any 3D printer, laser cutter, or small mill, but the broken out pins allow for stepper drivers supplying more than 2A of current.

Everything on the Smoothieboard is modular, meaning this board is equally capable of powering a RepRap, mill, laser cutter, or plotter. There’s even a planned control panel called the Smoothiepanel, making this a great choice for your next CNC build.

An Oscilloscope On Your Wrist

osc-watch2

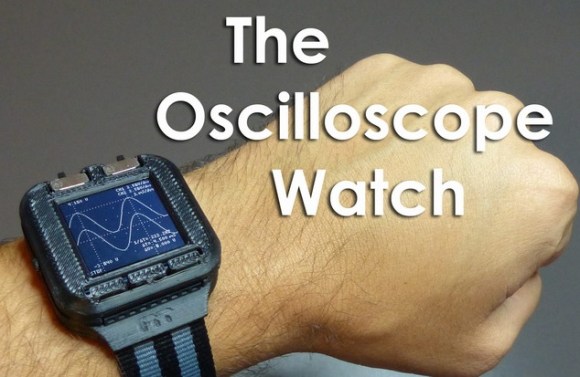
Calculator watches were the Geek cred of the 80’s. Today everyone is getting smart watches. How can the hip Geek stay ahead? [Gabriel Anzziani] to the rescue with his Oscilloscope Watch! [Gabriel] has made a cottage industry with his micro test tools. We’ve featured his Xprotolab and Xminilab on here on Hack a Day more than once. The Oscilloscope Watch basically takes all the features of the Xprotolab and squeezes them down into a wrist watch.

The Oscilloscope Watch includes an oscilloscope, a logic analyzer, an arbitrary waveform generator, and of course it tells time.  The Oscilloscope Watch’s processor is the AVR XMega128.  [Gabriel] has even included a link to the schematics (PDF) on his Kickstarter page. We really like that 3D printed case, and hope [Gabriel] opens up his CAD designs for us to work with.

Like its predecessors, the Oscilloscope watch won’t be replacing your Tektronix scope, or even your Rigol. Much like a Swiss army knife or Leatherman tool, the Oscilloscope Watch packs a bunch of tools into a small package. None of them are as good as a full-sized tool, but in a pinch they will get the job done. If you are wondering where the probes connect. [Gabriel] states on the Kickstarter page that he will design a custom 9 pin .100 connector to BNC adapter to allow the use of standard probes.

The screen is the same series of Sharp Memory LCD’s used in the Pebble watch. [Gabriel] chose to go with the FPC version of the Sharp LCD rather than the zebra connector.  We’ve learned the hard way that those flex circuits snap at the LCD glass after only a few flexes. Hopefully this won’t impact the hackability of the watch.

OneTesla Electrifies Maker Faire NY 2013

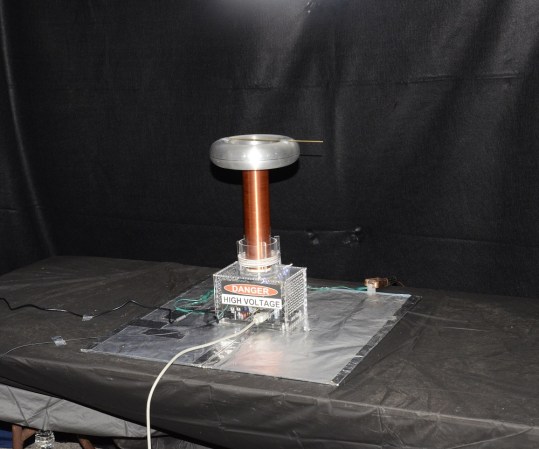
onetesla

Throughout the maker pavilion, the siren song of a musical Tesla coil could be heard. Those who followed their ears found themselves at the oneTesla booth. OneTesla is a hobby Tesla coil, with the added twist of polyphonic MIDI input.

Started by three MIT students, oneTesla had a successful Kickstarter campaign last year. Like many kickstarters, they are a bit behind in the shipping department. They are shipping out their third run of kits to backers now. The group had a small number of oneTesla coils for sale at the show, which appeared to have sold out by midday Sunday.

The actual process of generating sound with a Tesla coil is fascinating. All Tesla coils are resonant at high frequency. In oneTesla’s case, this is 220kHz. Human hearing ends around 20kHz, so this is well beyond the range of perception. Since the coil is locked in at this frequency, the power to the coil is modulated at the desired sound frequency. Playing an A note for example, would mean modulating the coil at 440Hz.

Continue reading “OneTesla Electrifies Maker Faire NY 2013”

A $100 Stereolithography 3D Printer

The Hackaday tip line has been blowing up with a new Kickstarter for a 3D printer. Although this is a pretty common occurrence around here, this printer is actually very interesting: it’s quite possibly the simplest and cheapest laser resin printer ever.

Most of the 3D resin printers we’ve seen, like the Form1 use mechanical means to raise a print up to the next slice. At $100, the Peachy printer doesn’t have the budget for such luxuries as servos or motors, so the layer height is increased by dripping salt water over the liquid resin. The X and Y axes are controlled with mirrors and voice coils, allowing this printer’s electronics to be controlled by a computer’s sound card. It’s really amazing in its simplicity, and from the looks of it the Peachy can produce some fairly good prints.

For a great explanation of how the Peachy printer works, you can check out the video below.

Continue reading “A $100 Stereolithography 3D Printer”