[Ladyada’s] Thoughts On Quick-turn And Small-run PCB Houses

So you’ve mastered your PCB layout software, and it’s time to make the board. But if you don’t want to etch your own you’ve got to decided where to have it fabricated. There’s a slew of services out there, most of which you cannot afford, but the short list of those you can is still pretty long. We think this set of PCB fabrication house reviews will help you make your choice.

[Ladyada] — aka [Limor Fried] — knows what she’s talking about. She owns Adafruit Industries and has done the lion’s share of designing the many kits and items they sell. If you’re going to charge money for something it better work right, and that involves lots of prototypes. But even if you don’t need a quick turn-around or numerous testing boards the post is helpful as she also covers some of the batch producers we’re already familiar with. These include DorkBot PDX and BatchPCB to name a couple.

[via Reddit]

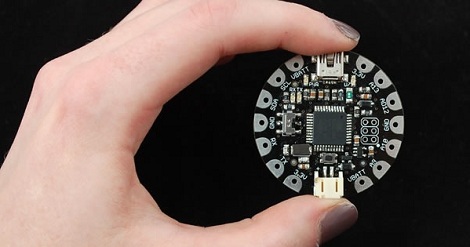
FLORA: A Better Arduino LilyPad

[Ladyada] has been working on FLORA, her wearable electronics platform, for a few months now. Even though it has just been announced the specs look much better than the previous queen of the hill, the Arduino LilyPad.

Going down the spec sheet for both the FLORA and the LilyPad, we see that FLORA has twice as much flash and SRAM as the LilyPad. The LilyPad has more options for I/O, but [Ladyada]’s FLORA has the benefit of not using an ISP header for programming; FLORA is completely USB-compatable. FLORA is also about a quarter-inch in diameter smaller than the LilyPad, something to take into account when you’re going for a wearable project.

On top of Bluetooth, GPS, accelerometer, compass and other modules planned for FLORA ( it doesn’t look like they’re available yet, though), FLORA has USB HID support so it can operate as a USB keyboard, mouse, MIDI device, or connect to a cell phone. If you’ve ever wanted a keytar cardigan, this is the board for you.

Check out [Ladyada]’s video demo of a LED-equipped fabric after the break.

Continue reading “FLORA: A Better Arduino LilyPad”

arduino_bootloader_burner

A Beginner’s Guide To Burning Arduino Bootloaders

When it comes to learning about microcontrollers, everyone has to start somewhere. [Lady Ada] recently posted a tutorial on burning the Arduino bootloader to standalone chips for those just getting started with the micro.

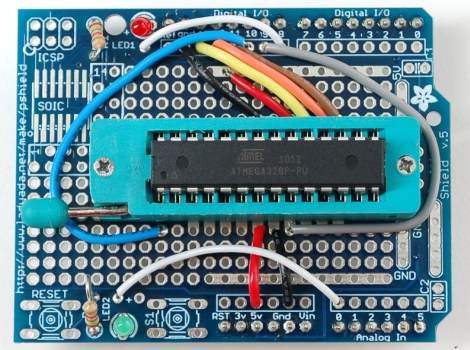
The tutorial cites a common situation, where someone is working on a project using an Arduino chip but they don’t want to sacrifice their dev board when just the micro and a few other components would do just fine. A short list of supplies is required, including an Arduino, a proto shield kit, a ZIF socket, and a blank ATmega chip.

The process is probably pretty straightforward and likely familiar to many of you out there. The ZIF socket is soldered to the board and handful of wires are added for powering and programming the new chip. The protoboard is installed on top of the Arduino like any other shield, and using a sketch that [Lady Ada] has made available, the bootloader burning process is a cinch.

It’s a useful tip for newcomers, and definitely a skill that seasoned Arduino users should have under their belts as well.

Ladyada To Be Featured In WIRED Magazine

ladyada_wired_cover

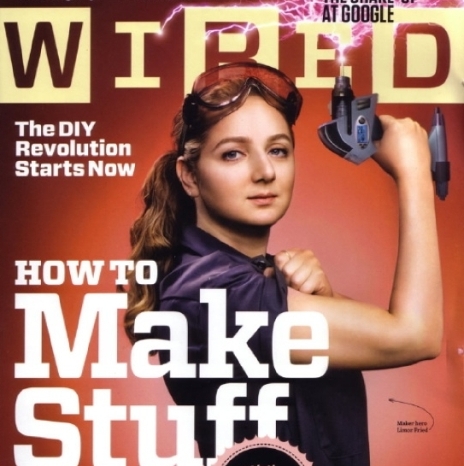
If you haven’t seen the news already, prolific maker [Limor Fried/Ladyada] is set to grace the cover of WIRED magazine in the upcoming April edition.

Not only is it a great day for the hacking/maker community as it puts a bright spotlight on the things we do every day, it’s a big day for female engineers as well. While WIRED has been around for 18 years as of this past January, this is the first time a female engineer has been featured on the cover. [Phillip Torrone] put it pretty well when he said, “She’s one of the most talented people in the world, she works harder than anyone else I know, she puts more value in the world than she takes.” – We couldn’t agree more, nor can we think of a better spokesperson to represent the community and inspire budding hackers around the world.

We would like to congratulate [Limor] on her accomplishment, and we encourage everyone to pick up a copy (or at least leaf through it at the bookstore) when it comes out.

If you’re still unconvinced as to how awesome she is, take a gander at some of her work we have featured in the past:

Kinect Open Source driver bounty

Non-lethal weaponry

The Wave Bubble

Minty Boost

Learn To Reverse Engineer

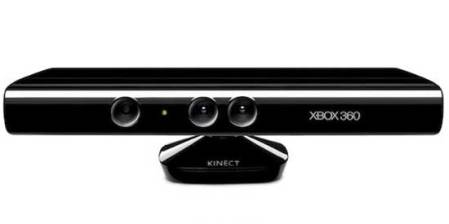
The most common email we get is “how do I learn how to hack things?”. It looks looks like [ladyada] gets that question a lot too. She didn’t waste any time writing up a step by step guide to reverse engineering USB devices, specifically the Kinect.

She goes into depth on how USB works, how to record the communication, what to look for, how to deconstruct what you’ve found, and how to put it all to use. This is all done with real world data from the Kinect so you could easily follow along at home.  There is source code available so you can download her example and see how to control the device as well.

We wish every hack could be so well written that it could also be called a tutorial.

Solar Panel Charger Analysis With Ladyada

[vimeo = http://vimeo.com/13936259%5D

[Phillip Torrone], one of the original crew of HackaDay, now working with [LadyAda] tipped us off to this video of her explaining the device they built for configuring the charging circuits to be used with their solar panels. Unlike most of their tutorials, this one is not intended to be a final product sold on their store. Rather, this is a project that helps them deliver the best quality they can.

The unit itself is built around an Arduino and can log the statistics to an SD card, show battery voltage, panel voltage, and current from panel to charger. You can see in the video above how she uses this to refine her design in real time for optimal results.

Reverse Engineering Apple’s Recharging Scheme

[vimeo=http://vimeo.com/13835359]

[Ladyada] has been hard at work reverse engineering the charging method used by Apple products. This saga takes us through the years as new devices were released and subsequently broke Minty Boost’s charging capabilities. It seems the data lines were gradually adopted as a means for iPhones and iPods to identify the charger that had been connected. By adding voltage dividers to the D+ and D- lines you can instruct the handheld to pull 1 Amp (with data voltages of 2.8v and 2.0v) for wall chargers or 0.5 Amps (2.0v on both data lines) for portable chargers. In the video above [Ladyada] removes the surface mount resistors from a commercial charger in order to measure the voltage divider and discover the secret.