Pocket Multimeter Review

three_pocket_multimeters

Reader [Mikey Sklar] told us about a review he wrote covering 3 different models of pocket multimeters. We’re sure that you’ve had the same experiences we have being the go-to-guy or got-to-gal  for all things electrical. For our sort, having a multimeter on hand at all times has become an expectation.

[Mikey] looks at a model from ebay, Harbor Freight, and Radio Shack. Not surprisingly, the ebay offering doesn’t rate too well but does get the job done. We were surprised to read that he picked up the Cen-Tech model for about $10 at Harbor Freight. Although it may no longer be sold there (we haven’t checked) [Mikey] seems pretty happy with it so we’ll be on the lookout during our next tool-buying trip. We’re unfamiliar with the tiny Radio Shack 22-820 but we’ve always been happy with our larger 22-811. The 22-820 allows the probes to be folded up inside of the case cover for a truly pocketable package.

You can never have too many meters at your disposal and we’ll have to keep this article in mind the next time we’re shopping for another. Never used a multimeter before? Take a look at the tutorial [Mikey] linked to over at ladyada.

Adjustable Breadboard Supply

breadboardpowersupply

adafruit industries’ latest product is an adjustable breadboard power supply kit. We’ve seen breadboard supplies before, but like most of adafruit’s kits, this is the best design you’re going to encounter. It uses an MIC2941 voltage regulator instead of the more commonplace LM317. It has a very low dropout which means your output voltage can be much closer to the input voltage. Their example is using 3AAA or a Li-Ion battery for an output of 3.3V. Input can be through a barrel jack or terminal blocks. There is a selection switch for 3.3, 5, and adjustable voltage. Using the adjustment pot you can select an output voltage anywhere from 1.3V to within .5V of the 20V maximum input. The adjusted output voltage will remain the same even if you increase the input voltage. Like all of their kits, you can find schematics, assembly and usage instructions, on their project site.

Adafruit Introduces The Sensor Pack 900

adafruit

Our friends over [adafruit] recently released the Sensor Pack 900, a collection of parts for anyone who is interested in using analog sensors with their projects. The pack includes 9 sensors. They range from simple thermistors and hall effect sensors to sharp distance sensors. Also included in the pack are 3 unidentified components that can be used to interface with the analog sensors in the pack. At only $30, the Sensor Pack 900 seems to offer a great set of introductory components for anyone prototyping a new device.

Tweet-a-Watt Kits

tweetawatt

[adafruit] wrote in to let us know that the Tweet-a-Watt is now available in kit form. While the plans have been available for a while, a kit is a welcomed addition. The kit doesn’t include the Kill-a-Watt monitor, but rather the XBee adapters and parts necessary to make it talk to your Arduino or computer. The kit is $90, while the Kill-a-Watt can be found for roughly $20.

Laser Etched Kindle 2

kindlesketch1

After seeing the xkcd comic where they call the Kindle2 the hitchhiker’s guide, [Ladyada] couldn’t help but laser etch the Kindle 2 with “Don’t Panic”. We think it looks pretty good, if a bit bubbly. You can see the video of the entire process after the break. Now that xkcd has infiltrated our interwebs, hearts, and minds, maybe he can put just a tiny bit of effort into learning to draw. If you don’t have access to a laser etcher, you could always make your own. Just be careful you don’t accidentally go full out and cut your kindle to shreds.

Continue reading “Laser Etched Kindle 2”

Ferric Chloride Etching Chemistry

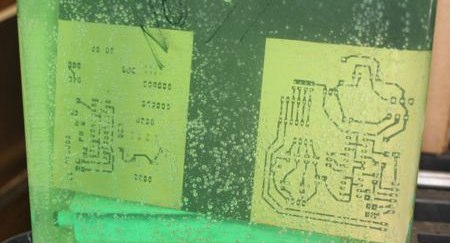
[ladyada] has republished an interesting snippet from the synthDIY mailing list. [David Dixon] discusses the actual chemistry behind ferric chloride based home circuit board etching. He concludes that ferric chloride is essentially a ‘one-shot’ oxidant. It can’t be regenerated and can be difficult to dispose of properly. The use of acidified copper chloride is a much better path and becomes more effective with each use, as long as you keep it aerated and top up the acidity from time to time. This etchant solution is actually the result of initially using hydrogen peroxide as an oxidant along with muriatic acid. You can see us using this solution in our etching how-to and while creating the board for our RGB lock. For more information on using hydrogen peroxide, check out [Adam Seychell]’s guide and this Instructable.

Aside: [ladyada] has added the receiver code to the Wattcher project page.