robot arm laser cutter

Robot Arm Wields Laser, Cares Not For Your Safety

Here at Hackaday we’ve covered a bunch of DIY laser diode projects. And for good reason, they are just cool. We’ve seen people add lasers to their 3D printers, stick one in a milling machine, use a highly modified scanner and even build a simple XY gantry specifically for the task. To say the least there is definitely a wide range of methods for moving around a laser but we’ve never seen anything like what [Sp4rky] sent in to us. He and his friends outfitted an old educational robot arm with a laser.

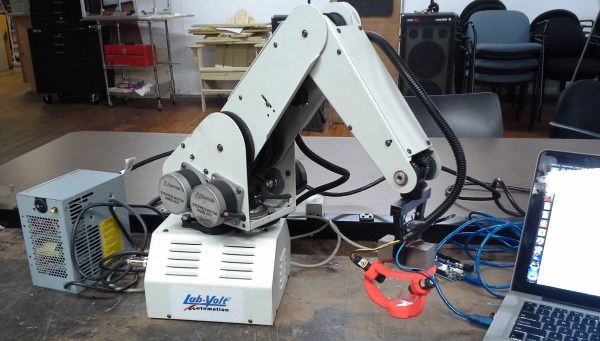
The robot arm is a 5 axis Armdroid 5100 picked up from eBay for a couple hundred dollars. It didn’t come with a controller but all of the stepper drivers were housed in the base of the arm. After a little tinkering around with the inputs the team was able to get the arm to move by sending serial commands from a PC, through an Arduino Mega which then sends the appropriate signals to the uni-polar stepper drivers. That was the easy part of the build.

The hard part was getting the arm to hold the laser at a consistent angle and height above the table. Inverse Kinematics to the rescue! Since the desired position of the laser, as well as the length of the arm segments is known, mathematical formulas can be derived to determine the necessary arm segment and joint positions while moving the laser around. The process flow starts out with an image in Inkscape, g-code is then generated with this plugin, then sent to the Arduino running a modified version of GRBL that has the inverse kinematic formulas. The Arduino directly controls the stepper drivers and the robotic arm moves. The Arduino also controls 3 constant-current laser drivers made from LM317 regulators. Three laser drivers, why?
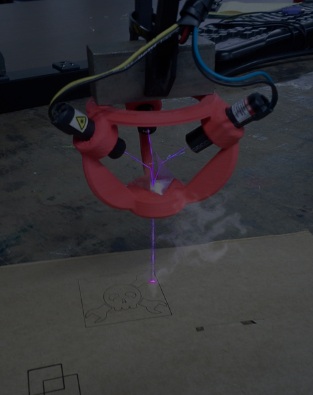
Triple Laser Robot[Sp4rky] got his laser diode modules out of surplus medical equipment and, unfortunately, the rated optical wattage was quite low. Since he had 3 diodes, he decided to try to combine the 3 low power beams into one high power beam. This can be done using a prism. A prism splits sunlight into a rainbow of colors because each wavelength(color) of light that passes through the prism is bent a different amount. Since the laser diodes only put out one wavelength of light, the beam bends but does not split or diffuse. A 3D printed bracket points each laser diode at a 3-sided pyramidal prism which sends the combined beam of light straight out the bottom towards the object to be cut or engraved.

This project is cool enough that we would have covered it even if [Sp4rky] wasn’t burning a Hackaday logo. Although it doesn’t hurt for anyone wanting their project to get covered!

Modern Tools From Old Table Saws

Somehow or another, the modern hackerspace isn’t centered around table saws, drill presses, band saws, lathes, or mills. The 3D printer and laser cutter are the tools of the future. No one has yet figured out how to build a 3D printer or laser cutter out of several hundred pounds of cast iron, so until then [Chad] will lead the charge modifying old table saws into these modern machine tools.

The build logs for the laser engraver and 3D printer are pic heavy and text lean, but there’s enough detail to make a few educated guesses. Both of these machines use Craftsman table saws from the early to mid 1950s for the chassis. Inside each chassis, the rails, belts, and shafts that make up a Cartesian bot are installed, and the electronics are tucked gently inside.

There’s a lot of creativity in this build; the electronics for the 3D printer are tucked away in the shell of the old motor. For the laser cutter, the focus adjustment is the same knob that used to lock the blade at an angle.

While this may look like a waste of two beautiful tools, keep in mind these are equivalent to contractor saws you can pick up at Home Depot for $500 today. They’re not professional cabinet saws, they just look really pretty. They’re still a solid piece of metal, though, and refurbishing the frames into useful tools is probably the best thing you could do with them.

Thanks [Frankie] for the tip.

Paper Cutter Becomes A Laser Engraver

Small and powerful laser diodes are getting cheaper and cheaper, and there are a few commercial products that give anyone the ability to cut paper and vinyl with a computer-controlled cutting machine. What happens when you combine the two? The beginnings of a hacked together laser engraver.

For this build, [Peter] is using a Silhouette Portrait, a desktop CNC cutting machine that’s usually used for vinyl decals and intricately cut paper crafts. This machine isn’t limited to mere decorative crafts – it’s been used for cutting PCB stencils and other pseudo-industrial tasks.

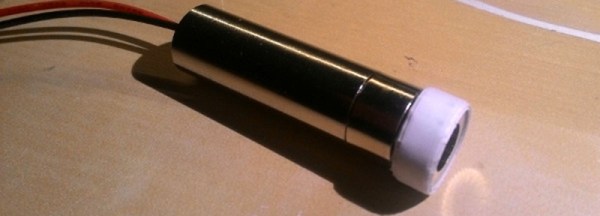
Because the Silhouette Portrait has an interface that allows just about any CAM software to control it, the only thing [Peter] needed to make for his experiments in laser engraving was a mount to hold the laser diode. Luckily, the laser had a similar form factor to the cutting blades for the machine, and a bit of tape held everything together.

Focusing the laser was done by unscrewing the lens, and with a bit of trial and error, [Peter] was able to make a few marks in the material of his choice. This isn’t a laser cutter, but with a little more work it will make a fantastic laser engraver.

Continue reading “Paper Cutter Becomes A Laser Engraver”

Augmented Laser Cutter Removes Design Technology Barriers

augmented laser

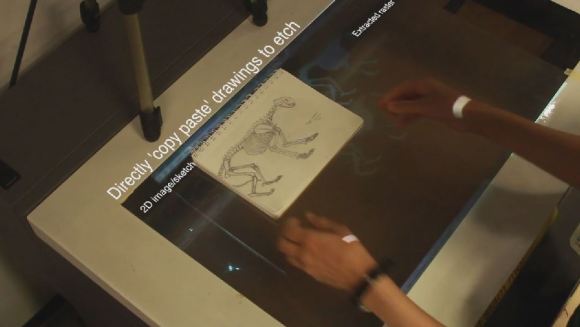
Laser cutters, 3D printers, CNC routers — they’re all great technology in the right hands, but unfortunately the learning curve sometimes puts would-be makers at a distance.  [Anirudh] from MIT’s Media Lab is attempting to break down at least one of those barriers with his augmented laser cutter system called, Clearcut.

The system consists of a webcam, a projector, and a semi transparent work space on top of the laser cutter. By placing objects on the surface, the webcam can identify them, duplicate them with the projector, and then laser engrave them. In addition to the “copy and paste” idea of this, you can also use infrared emitting pens to physically draw your design on the work surface to be engraved. It starts to bridge the gap between complex CAD and pencil and paper, something anyone is capable of.

Continue reading “Augmented Laser Cutter Removes Design Technology Barriers”

Raspi Mini Laser Engraver

If you’ve got a lot of spare parts lying around, you may be able to cobble together your own laser engraver without too much trouble. We’ve already seen small engraver builds that use an Arduino, but [Jeremy] tipped us off to [Xiang Zhai’s] version, which provides an in-depth guide to building one with a Raspberry Pi.

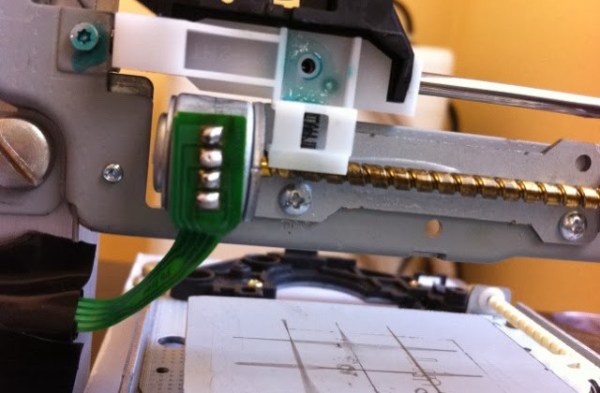
[Xiang] began by opening up two spare DVD writeable drives, salvaging not only their laser diodes but the stepper motors and their accompanying hardware, as well as a handful of small magnets near each diode. To assemble the laser, he sourced an inexpensive laser diode module from eBay and used a vise to push the diode into the head of the housing. With the laser snugly in place and the appropriate connecting wires soldered on, [Xiang] whipped up a laser driver circuit, which the Raspi will later control. [Xiang] worked out the stepper motors’ configuration by following [Groover’s] engraver build-(we featured it a few years back)-attaching the plate that holds the material to be engraved onto one axis and the laser assembly to the other.

Check out [Xiang’s] project blog for details explaining the h-bridge circuits as well as the Python code for the Raspi. As always, if you’re attempting any build involving a laser, please use all necessary precautions! And if you need more information on using DVD burners for their diodes, check out this hack from earlier in the summer

Microslice: The Tiny Arduino Laser Cutter

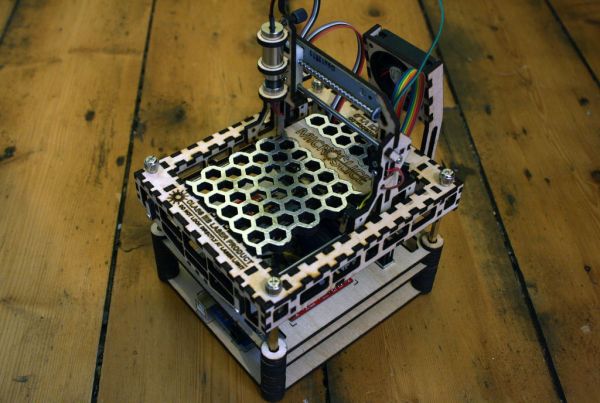
[SilverJimmy] already had a full-sized 50 watt laser cutter, but he decided to try his hand at putting together something smaller and microcontroller-driven. The result is this adorable little engraver: the MicroSlice.

To keep the design simple, [SilverJimmy] opted for a fixed cutting table, which meant moving the cutting head and the X-Axis as a unit along the Y-Axis. The solution was to take inspiration from gantry cranes. He snagged a couple of stepper motors with threaded shafts, designed the parts in Inkscape, then fired up his full-size cutter to carve out the pieces. An Arduino Uno and the relays for the laser and fans sit on the MicroSlice’s bottom platform, and two EasyDriver motor controllers sit above them on the next layer.

Swing by the Instructables for more details including the source code, and to see a video of the engraver below. [SilverJimmy] sourced his laser from eBay, but check out the engraver from earlier this year that used a DVD diode.

Continue reading “Microslice: The Tiny Arduino Laser Cutter”

Extruded Rail And 3D Printed Connectors Form A Proper Laser Engraver

3d-printed-laser-engraver

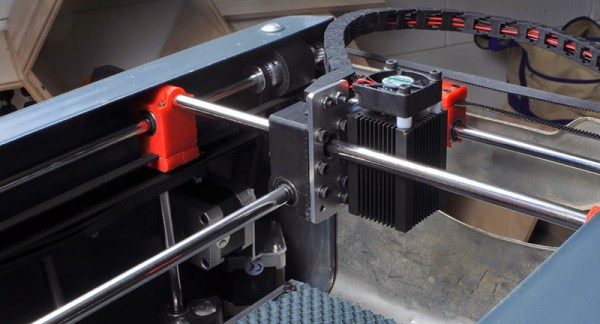
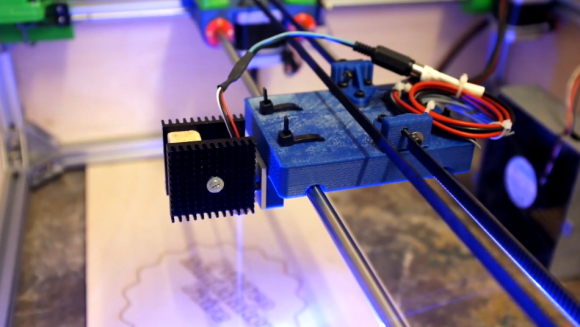
Fast and accurate is a good description of this laser engraver built by [Ragnar] and [Gunnar]. The’re planning to show it off at the Trondheim Maker Faire after the new year but they took it out in the wild for the PSTEREO Mini Maker Faire (also in Trondheim) this past August. The video below gives an overview of the build process and the engraver at work. But we also enjoyed reading the post about a few missteps in the early prototyping process. We call this one a proper laser engraver because it was purpose built from the ground-up. We still like seeing the engravers hacked from optical drives, but this really is a horse of a different color in comparison.

From the start they’re using familiar parts when it comes to CNC builds. The outer frame is made of extruded aluminum rail, with precision rod for the gantry to slide upon. Movement is facilitated with stepper motors and toothed belts, with all of the connecting and mounting parts fabricated on a 3D printer. The mistake made with an early (and unfortunately mostly assembled) prototype was that the Y axis was only driven on one side when it really needed to be driven on both. But filament is relatively cheap so a few tweaks to the design were able to fix this and get the production back on track.

Continue reading “Extruded Rail And 3D Printed Connectors Form A Proper Laser Engraver”