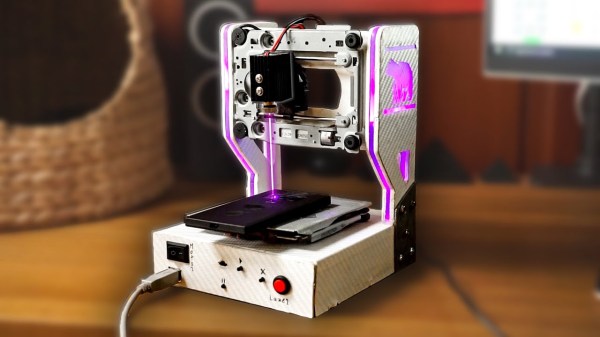
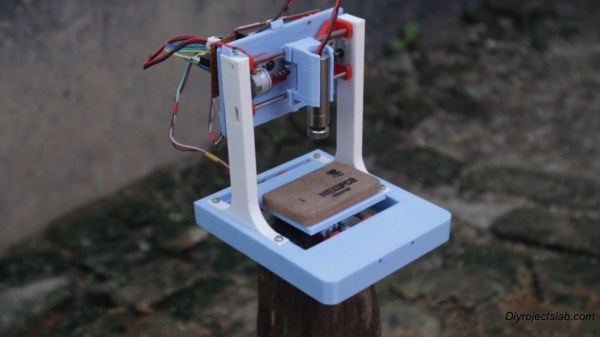
A 3D-printed mini laser engraver made from DVD-RW drive motors.

Mini Laser Engraver Could Carve Out A Place On Your Desk

Got a couple of old DVD-RW drives lying around, just collecting dust? Of course you do. If not, you likely know where to find a pair so you can build this totally adorable and fully dangerous laser engraver for your desk. Check out the complete build video after the break.

[Smart Tronix] doesn’t just tell you to salvage the stepper motors out of the drives — they show you how it’s done and even take the time to explain in writing what stepper motors are and why you would want to use them in this project, which is a remix of [maggie_shah]’s design over on Thingiverse. As you might expect, the two steppers are wired up to an Arduino Uno through a CNC shield with a pair of A4988 motor drivers. These form the two axes of movement — the 250mW laser is attached to x, and the platform moves back and forth on the y axis. We’d love to have one of these to mess around with. Nothing that fits on that platform would be safe! Just don’t forget the proper laser blocking safety glasses!

Need something much bigger that won’t take up a lot of space? Roll up your sleeves and build a SCARA arm to hold your laser.

Continue reading “Mini Laser Engraver Could Carve Out A Place On Your Desk”

Build A Plotter Using Scrap DVD Drives

Building your own CNC machine can present a series of varied challenges. There are the software considerations, but also the mechanical side of things – motors, shafts, screws and slides all need to be addressed in a working design. Of course, you can always outsource some of the work – and that’s precisely what [Daniele Tartaglia] did with this pen plotter build (Youtube link, embedded below).

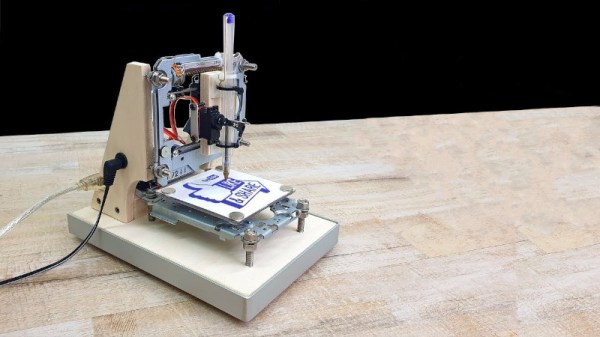
It’s a capable plotter, able to nicely reproduce both graphics and text.

The build gains X and Y axes by virtue of two salvaged DVD drives. The tray mechanisms come ready to go with stepper motors and lead screws already assembled, and make a great basis for a compact plotter. A wooden frame is constructed to hold everything together. The pen is held against the paper with a rubber band which helps the ballpoint to draw a nice dark line, with a servo used as a pen retract mechanism. An Arduino Uno with a stepper driver shield is then employed to run the show.

It’s a tidy build, with neat cable management and smart design choices giving it a pleasing aesthetic. The CNC fundamentals are good, too – with minimal backlash and slop, the plotter is able to draw quite effectively. Old optical drives are a popular choice for plotter builds, as it turns out. Video after the break.

Continue reading “Build A Plotter Using Scrap DVD Drives”

A Low-Cost Mini PCB Printer

The next great advancement in homebrew electronics is an easy way to turn copper clad board into functional circuit boards. This has been done since the 60s with etch resist pens, sheets of etch resist rub-on transfers, the ever-popular photocopy and clothes iron, and now with small CNC mills. It’s still a messy, slow, and expensive process. [johnowhitaker] and [esot.eric] are trying to solve the latter of these problems with a mini PCB printer made out of DVD drives.

Playing around with the guts of a DVD drive is something [john] and [eric] have been doing for a while now, and for good reason. There’s a lot of interesting tech in DVD drives, with motors, steppers, and gears able to make very, very accurate and precise movements. Most PCBs aren’t very big, either, so a laser cutter that can only traverse an area a few inches square isn’t that much of a downside in this case.

With a small diode laser mounted to a CNC gantry constructed out of DVD drives, the process of making a PCB is actually pretty simple. First, a slurry of laser printer toner and alcohol is applied to the board. Next, the laser on this PCB printer lases over the traces and copper fills, melting the toner. The board is removed, the excess toner wiped off, and the unwanted copper is melted away. Simple, even if it is a little messy.

Of course this method cannot do plated traces like your favorite Internet-based board house, but this does have a few advantages over any other traditional homebrew method. It’s cheap, since CD and DVD drive mechanisms are pretty much standardized between manufacturers. It’s also easy to add soldermask printing to this build, given that soldermasks can be cured with light. It’s a very cool build, and one that would find a home in thousands of garages and hackerspaces around the world.

The HackadayPrize2016 is Sponsored by:

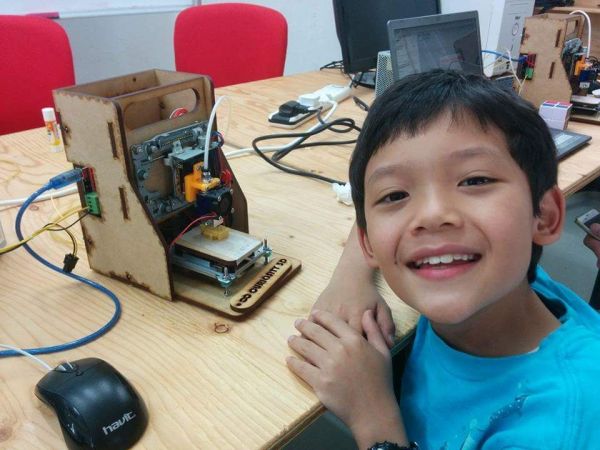
An E-Waste 3D Printer For Every Child?

The lofty goal of making sure every school kid has access to a laptop has yet to be reached when along comes an effort to put a 3D printer in the hands of every kid. And not just any printer – a printer the kid builds from a cheap kit of parts and a little e-waste.

The design of the Curiosity printer is pretty simple, and bears a strong resemblance to an earlier e-waste 3D printer we covered back in December. This one has a laser-cut MDF frame rather than acrylic, but the guts are very similar – up-cycled DVD drives for the X- and Z-axes, and a floppy drive for the Y-axis. A NEMA 17 frame stepper motor provides the oomph needed to drive the filament into an off-the-shelf hot end, and an Arduino runs the show. The instructions for assembly are very clear and easy to follow, although we suspect that variability in the sizes of DVD and floppy drives could require a little improvisation at assembly time. But since the assembly of the printer is intended to be as educational as its use, throwing a little variability into the mix is probably a good idea.

The complete kit, less only the e-waste drives and power supply, is currently selling for $149USD. That’s not exactly free, but it’s probably within range of being funded by a few bake sales. Even with the tiny print volume, this effort could get some kids into 3D printers early in their school career.


CNC Plotter Uses Only The Good DVD Drive Parts

It wasn’t that long ago that wanting to own your own 3D printer meant learning as much as you possibly could about CNC machines and then boostrapping your first printer. Now you can borrow time on one pretty easily, and somewhat affordably buy your own. If you take either of these routes you don’t need to know much about CNC, but why not use the tool to learn? This is what [Wootin24] did when building a 3D printed plotter with DVD drive parts.

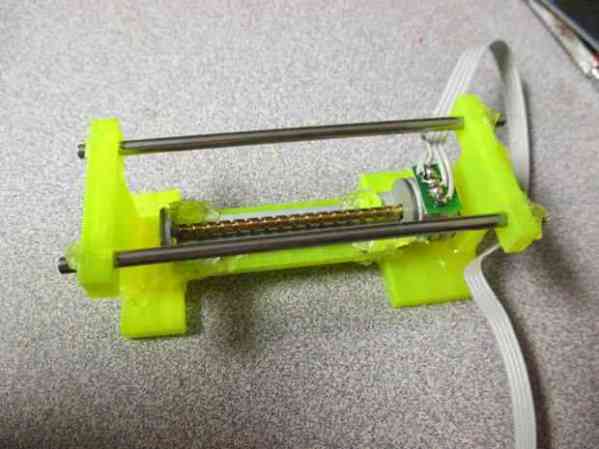
Plotters made from scrapped floppy, optical drives, and printers are a popular hand, and well worth a weekend of your time. This one, however, is quite a bit different. [Wootin24] used the drives to source just the important parts for CNC precision: the rods, motors, motors, and bearings. The difference is that he designed and 3D printed his own mounting brackets rather than making do with what the optical drive parts are attached to.

This guide focuses on the gantries and the mechanics that drive them… it’s up to you to supply the motor drivers and electrical side of things. He suggests RAMPS but admins he used a simple motor driver and Arduino since they were handy.

Reverse Engineering A Blu-ray Drive For Laser Graffiti

There’s a whole lot of interesting mechanics, optics, and electronics inside a Blu-ray drive, and [scanlime] a.k.a. [Micah Scott] thinks those bits can be reused for some interesting project. [Micah] is reverse engineering one of these drives, with the goal of turning it into a source of cheap, open source holograms and laser installations – something these devices were never meant to do. This means reverse engineering the 3 CPUs inside an external Blu-ray drive, making sense of the firmware, and making this drive do whatever [Micah] wants.

When the idea of reverse engineering a Blu-ray drive struck [Micah], she hopped on Amazon and found the most popular drive out there. It turns out, this is an excellent drive to reverse engineer – there are multiple firmware updates for this drive, an excellent source for the raw data that would be required to reverse engineer it.

[Micah]’s first effort to reverse engineer the drive seems a little bit odd; she turned the firmware image into a black and white graphic. Figuring out exactly what’s happening in the firmware with that is a fool’s errand, but by looking at the pure black and pure white parts of the graphic, [Micah] was able guess where the bootloader was, and how the firmware image is segmented. In other parts of the code, [Micah] saw thing vertical lines she recognized as ARM code. In another section, thin horizontal black bands revealed code for an 8051. These lines are only a product of how each architecture accesses code, and really only something [Micah] recognizes from doing this a few times before.

The current state of the project is a backdoor that is able to upload new firmware to the drive. It’s in no way a complete project; only the memory for the ARM processor is running new code, and [Micah] still has no idea what’s going on inside some of the other chips. Still, it’s a start, and the beginning of an open source firmware for a Blu-ray drive.

While [Micah] want’s to use these Blu-ray drives for laser graffiti, there are a number of other slightly more useful reasons for the build. With a DVD drive, you can hold a red blood cell in suspension, or use the laser inside to make graphene. Video below.

Continue reading “Reverse Engineering A Blu-ray Drive For Laser Graffiti”

CD Drive CNC Machine

CD Drive CNC Machine Steals Matt Groening’s Job, Says ‘Ha Ha’

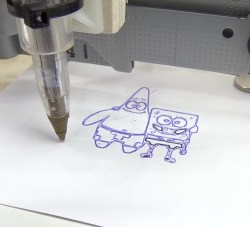
DIY CNC Machines are fun to build. There are a lot of different designs all over the internet. Some are large and some small. Some are made from new material and others from recycled parts. [Leonardo’s] newest project is at the absolute far end of the small and recycled spectra. His CNC Machine is made from CD Drives and can draw a mean Nelson.

First, the CD Drives were disassembled to gain access to the carriages. These were then mounted to a quick and dirty wooden frame. Notice the Y Axis carriage is mounted with bolts and nuts that allow for leveling of the bed, not a bad idea. A Bic pen mounted to the Z axis carriage is responsible for the drawing duties.

[Leonardo] does something a little different for generating his g-code. First he takes a bitmap image and converts it to monochrome using MS Paint. The image is then imported into Cadsoft Eagle and using a modified import_bmp.ulp script. The bitmap is converted into what Eagle considers wire traces and then outputted as x and y coordinates for each wire complete with a command for lifting and lowering the pen.

A PC sends the move commands via USB, through a PL2303HX USB-Serial TTL Converter, to a PIC16F628A which, in turn, sends step and direction signals to the three Easy Driver stepper motor drivers. The stepper motor drivers are connected directly to the original CD Drive motors.

Check out the video after the break….

Continue reading “CD Drive CNC Machine Steals Matt Groening’s Job, Says ‘Ha Ha’”