Making A Privacy Monitor From An Old LCD

privacy-screen

[dimovi] had a spare LCD monitor sitting around and thought it would be great to convert it into a “privacy” monitor.

The process is simple enough for anyone comfortable with disassembling electronics. He took apart the monitor’s plastic frame, cutting out the polarized film with a utility knife. Once the film was removed, he spent some time removing the film adhesive from the glass panel using a combination of Oops cleaner and paint thinner.

He reassembled the monitor, which now shines a bright white regardless of what is actually being displayed on the screen. He removed the lenses from a pair of theater 3D glasses, replacing the plastic with the film he removed from the monitor.

Now, [dimovi] is the only one who can see what’s he is doing on his computer, which is just the way he likes it.

While there’s not a lot of magic going on behind the process, we think it’s a neat way to reuse an old monitor.

A Wooden Computer Case, Monitor Stand, And Keyboard

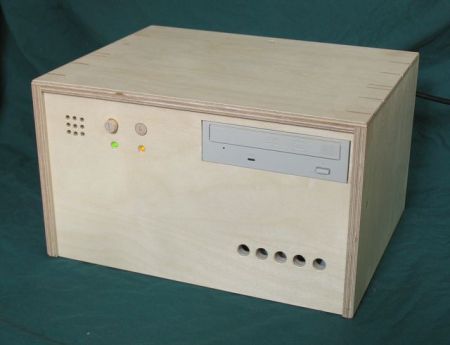
Wood and electronics don’t generally mix nowadays, but if you yearn back to a time when radios and the like had a nice wooden finish, this wooden computer case may be for you. Combine that with a Wooden keyboard enclosure, and maybe even a LCD monitor stand and you’ll have a setup that should fit in with any wood-themed decor!

The wooden computer case is actually more of a cover in that it uses most of the stock case to house all of the components.  It would definitely be a pain, and possibly a fire-hazard, to make a back mounting plate for all the components out of wood. To go along with this, the LCD monitor stand was engineered for a 21″ monitor when the owner of it wasn’t satisfied with the stability of the stock stand.  In the end, he ended up building something quite sturdy and nice looking to replace it.

The highlight for many for the keyboard would be that it was made, in part at least, out of a desire for a Commodore-64 keyboard.  It appears to function well andlooks great, so be sure to check out the other pictures after the break! Continue reading “A Wooden Computer Case, Monitor Stand, And Keyboard”

How To Build A 23″ Android Tablet

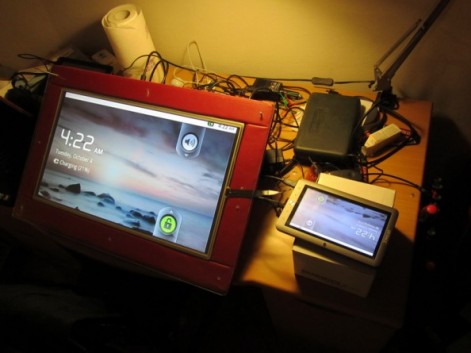
If you’re looking to build a really big Android tablet the trick is not to start from scratch. [Peter] pulled off a 23″ Android Tablet hack using a collection of easily acquired parts, leaving the hard work up to hardware that was designed to do it.

He didn’t really build a tablet, as much as he built a big touch-screen add-on for one. He already had a couple of inexpensive tablets on hand to play around with. One of them has an HDMI out port, which let him easily push the display onto a 23″ monitor. He knew the tablet was a 4-wire resistive touchscreen, but he didn’t know if other touchscreens with the same number of connectors and be directly swapped and still work. To test this, he cracked open a second tablet device and connected its touchscreen to the first one’s hardware. When he was met with success it was time to source a couple of 23″ touchscreen overlays to test with the external monitor. As you can see in the clip after the break, it works like a charm!

[Peter] was inspired to write about his experiences after seeing the 23″ Android tablet video in our recent links post.

Continue reading “How To Build A 23″ Android Tablet”

Arduino Heart Rate Monitor

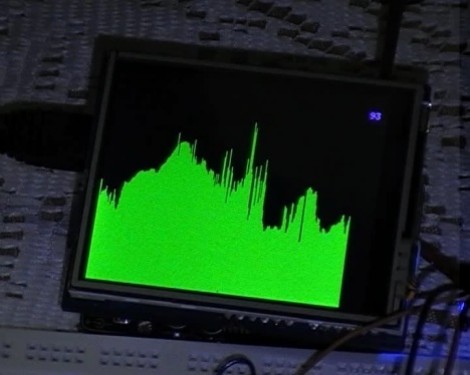
[Wolf] had a Polar brand exercise watch that wirelessly monitored a chest strap that sends it heart rate data. It sounds like there’s some way to transfer data from the watch to a computer, but it’s only meant for use with Polar’s website. He wanted to do a little more with the equipment so he ditched the watch and built an Arduino-based heart rate monitor.

He’s still using the chest strap and was happy to find that SparkFun sells an OEM receiver for it. Just add a 32.768 kHz clock crystal and an optional antenna wire and you’re up and running. Once the receiver finds a transmitting chest strap, it will pulse an output pin with each beat of the heart. [Wolf] used the D2 pin of an Arduino Uno to connect to the receiver because this pin corresponds to one of the ATmega’s external interrupts. A rolling average of five inputs are used to help smooth the display data, which is shown on the 2.8″ LCD screen seen above.

Controlling A CGA Monitor With An Arduino

CGA monitors may not be an amazing technological advance these days, but they can generally be found very cheaply. Additionally, they have a DB-9 connector and work off of TTL ranges (0-5VDC) making them ripe for experimentation. This hack takes advantage of all of these aspects to bring you an Arduino controlled CGA monitor.

One problem with experimenting with one of these monitors is that they are not that well documented. Fortunately, the detailed write up for this hack goes over some of the timing and frequency issues that one may encounter with this particular monitor. The article gives an Arduino pinout and the program used to drive the monitor with very detailed comments.

Although this hack is by no means a finished product, the now blurry test pattern seen above gives a pretty good proof of concept. It will be exciting to see if this hack inspires any other microcontroller-based projects. For some further information about CGA monitors, Wikipedia also has a fairly in-depth write-up about the technology.

Motion Activated Monitor Wakeup

This hardware is used to keep a computer monitor awake when there is motion in the room. The monitor displays important information for firefighter in the vehicle bay, but only needs to be on when they are getting ready to go out on a call. The solution is a simple one, a PIR sensor combines with a mouse for motion sensitive input. When the PIR sensor detects motion it causes a mouse button click via a 2N3904 transistor. Now the monitor will not waste power or have burn-in over the long term, but whenever someone is in the room it will be displaying the information that the emergency workers need to know.

[Thanks Andy]

Apple Studio Display Connector Ports

[Warrior_Rocker] pulled off his own Apple Studio Display hack by removing the cable and adding ports. As we saw in Wednesday’s post, these displays use a cable with a proprietary connector that combines DVI, USB and Power. Instead of altering the cable, [Warrior_Rocker] removed it completely. By wiring up a standard barrel jack for power, a USB type-B socket, and a DVI port, he can now use standard video, power, and USB cables to connect to the monitor.

This project was actually submitted to us on May 25th and we missed it. It’s sad that sometimes tips fall through the cracks, and we’re sorry that we missed this particularly well-executed hack. [Warrior_Rocker] wrote in asking why his project didn’t qualify after seeing the similar post on Wednesday. So please don’t take it personally if your project doesn’t get posted. If you think it fits right in here at Hackaday and haven’t heard anything after two weeks or so, consider sending to us again.