Aquarium Controller Starring Arduino Gets A Long Video Description

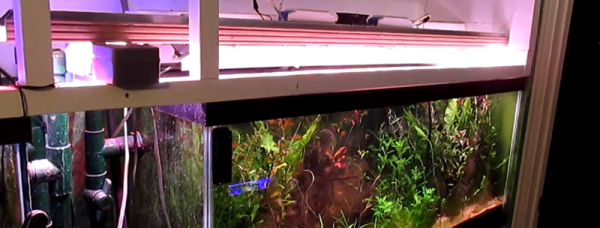
There’s an old saying that the cobbler’s children have no shoes. Sometimes we feel that way because we stay busy designing things for other people or for demos that we don’t have time to just build something we want. [Blue Blade Fish] wanted to build an Arduino-based aquarium controller. He’s detailed the system in (so far) 14 videos and it looks solid.

This isn’t just a simple controller, either. It is a modular design with an Arduino Mega and a lot of I/O for a serious fish tank. There are controls for heaters, fans, lights, wave makers and even top-off valves. The system can simulate moonlight at night and has an LCD display and keys. There’s also an Ethernet port and a Raspberry Pi component that creates a web interface, data storage, and configures the system. Even fail safes have been designed into the system, so you don’t boil or freeze expensive fishes. No wonder it took 14 videos!

Continue reading “Aquarium Controller Starring Arduino Gets A Long Video Description”

Modernizing A 170 Year Old Antique Grandfather Clock

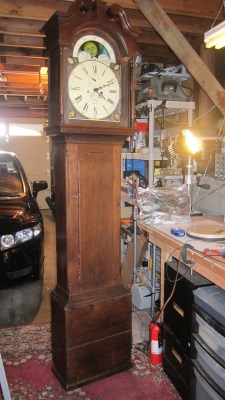
Frankly, we let out a yelp of despair when we read this in the tip line “Antique Grandfather clock with Arduino insides“! But before you too roll your eyes, groan, or post snark, do check out [David Henshaw]’s amazing blog post on how he spent almost eight months working on the conversion.

Before you jump to any conclusions about his credentials, we must point out that [David] is an ace hacker who has been building electronic clocks for a long time. In this project, he takes the antique grandfather clock from 1847, and puts inside it a new movement built from Meccano pieces, stepper motors, hall sensors, LEDs, an Arduino and lots of breadboard and jumper wires while making sure that it still looks and sounds as close to the original as possible.

He starts off by building a custom electro-mechanical clock movement, and since he’s planning as he progresses, meccano, breadboard and jumper wires were the way to go. Hot glue helps preserve sanity by keeping all the jumper wires in place. To interface with all of the peripherals in the clock, he decided to use a bank of shift registers driven from a regular Arduino Uno. The more expensive DS3231 RTC module ensures better accuracy compared to the cheaper DS1307 or similar clones. A bank of RGB LEDs acts as an annunciator panel inside the clock to help provide various status indications. The mechanical movement itself went through several iterations to get the time display working with a smooth movement of the hands. Besides displaying time, [David] also added a moon phase indicator dial. A five-rod chime is struck using a stepper motor driven cam and a separate solenoid is used to pull and release three chime hammers simultaneously to generate the loud gong sounds.

And here’s the amazing part – he did all of this before laying his hands on the actual grandfather clock – which was shipped to him in California from an antique clock specialist in England and took two months to arrive. [David] ordered just the clock housing, dial/face and external parts, with none of the original inner mechanism. Once he received it, his custom clock-work assembly needed some more tweaking to get all the positions right for the various hands and dials. A clock like this without its typical “ticktock” sound would be pretty lame, so [David] used a pair of solenoids to provide the sound effect, with each one being turned on for a different duration to produce the characteristic ticktock.

At the end of eight months, the result – christened Judge – was pretty satisfying. Check the video below to judge the Judge for yourself. If you would like to see some more of [David]’s clockwork, check out Dottie the Flip Dot Clock and A Reel to Reel Clock.

Continue reading “Modernizing A 170 Year Old Antique Grandfather Clock”

A Six-Voice Synth Built On The Raspberry Pi

Over the last few decades, audio synthesizers have been less and less real hardware and more and more emulations in software. Now that we have tiny powerful computers that merely sip down the watts, what’s the obvious conclusion? A six-voice polyphonic synthesizer built around the Raspberry Pi.

The exquisitely named ‘S³-6R’ synthesizer is a six-voice phase modulation synthesizer that outputs very high resolution (24-bit and 96 kHz) audio. It’s the product of R-MONO Lab, who have displayed interesting musical devices such as a recorder-based pipe organ in the past. This build is a bit more complex, offering up some amazing sounds, all generated on a Raspberry Pi 3.

While talk of oscillators and filters is great, what’s really interesting here is the keyboard itself. The S³-6R is using the Roland K-25m, a tiny MIDI keyboard meant to serve as a ‘dock’ of sorts for Roland’s recent re-releases of the classic Jupiter and Juno synths. Building a MIDI keyboard is not easy by any stretch of the imagination, and using this little keyboard dock is a cheap way to pipe MIDI notes into any project without a lot of fuss.

Below, you can check out the audio demos of the S³-6R. It’s a real synth and sounds great. We can only hope the software will be uploaded somewhere eventually.

Continue reading “A Six-Voice Synth Built On The Raspberry Pi”

Weather Clock Puts OLPC To Work

weather-clcok

A clock to tell the weather? [Andrew] has created a device to do that and more. Inspired by [Sean’s] weather clock, [Andrew’s]clock displays the current weather conditions, temperature, moon phase, and of course the time. The whole project started years ago with a broken keyboard. [Andrew] wanted to try to use the keyboard controller PCB as a bidirectional computer interface. Data to the computer would go in via the key matrix. Output data would be read via the status LEDs. Cheap simple microcontroller boards like the Arduino sidelined the project for a few years, but he never completely left it behind.

With an unused OLPC XO-1 in hand, [Andrew] pulled out his old keyboard controller and started hacking. His first task was getting meaningful data out of the keyboard LEDs. He coded up his own keyboard led control library in python. On the hardware side an op amp took on the roll of a comparator to ensure proper logic levels were present. [Andrew] then hooked two LEDs up as clock and data lines to standard 74 series shift registers (most likely 74HC/HCT595). He found that his data was completely garbled due to bounce. A second shift register buffering the clock cleaned things up. [Andrew] was left with a stable 40 bits per second serial link to his shift registers. With all this done, the next step was the clock itself. [Andrew] bought a RUSCH Wall clock from IKEA, and converted the clockwork to a gear reduction for a DC motor he pulled from an old answering machine. He could now move the hands at will, but had no way to determine their position. IR break beam sensors from old printers came to the rescue.

After connecting the motor drive, [Andrew] still had a number of outputs available. A few LEDs were in his parts box, so into the project they went. 12 LEDs around the outside of the clock to display the current time. 3 LEDs hide behind the weather icons as status indicators. [Andrew’s] python software really ties this together. His OLPC grabs data from the internet and displays it on the clock. A web interface allows the user to perform manual updates on the clock and to set alarms. The alarms even incorporate speech output via eSpeak. We love the reuse and recycling of parts in this hack. The end result is a clock any hacker would be proud to display on their wall.

Continue reading “Weather Clock Puts OLPC To Work”