By and large, our clothes don’t actively move. They’re simple pieces of fabric assembled to sit nicely on our bodies, and little more. [anoukwipprecht] created something a little more technological and confronting, though, with the Robotic Open-Source Scale Dress.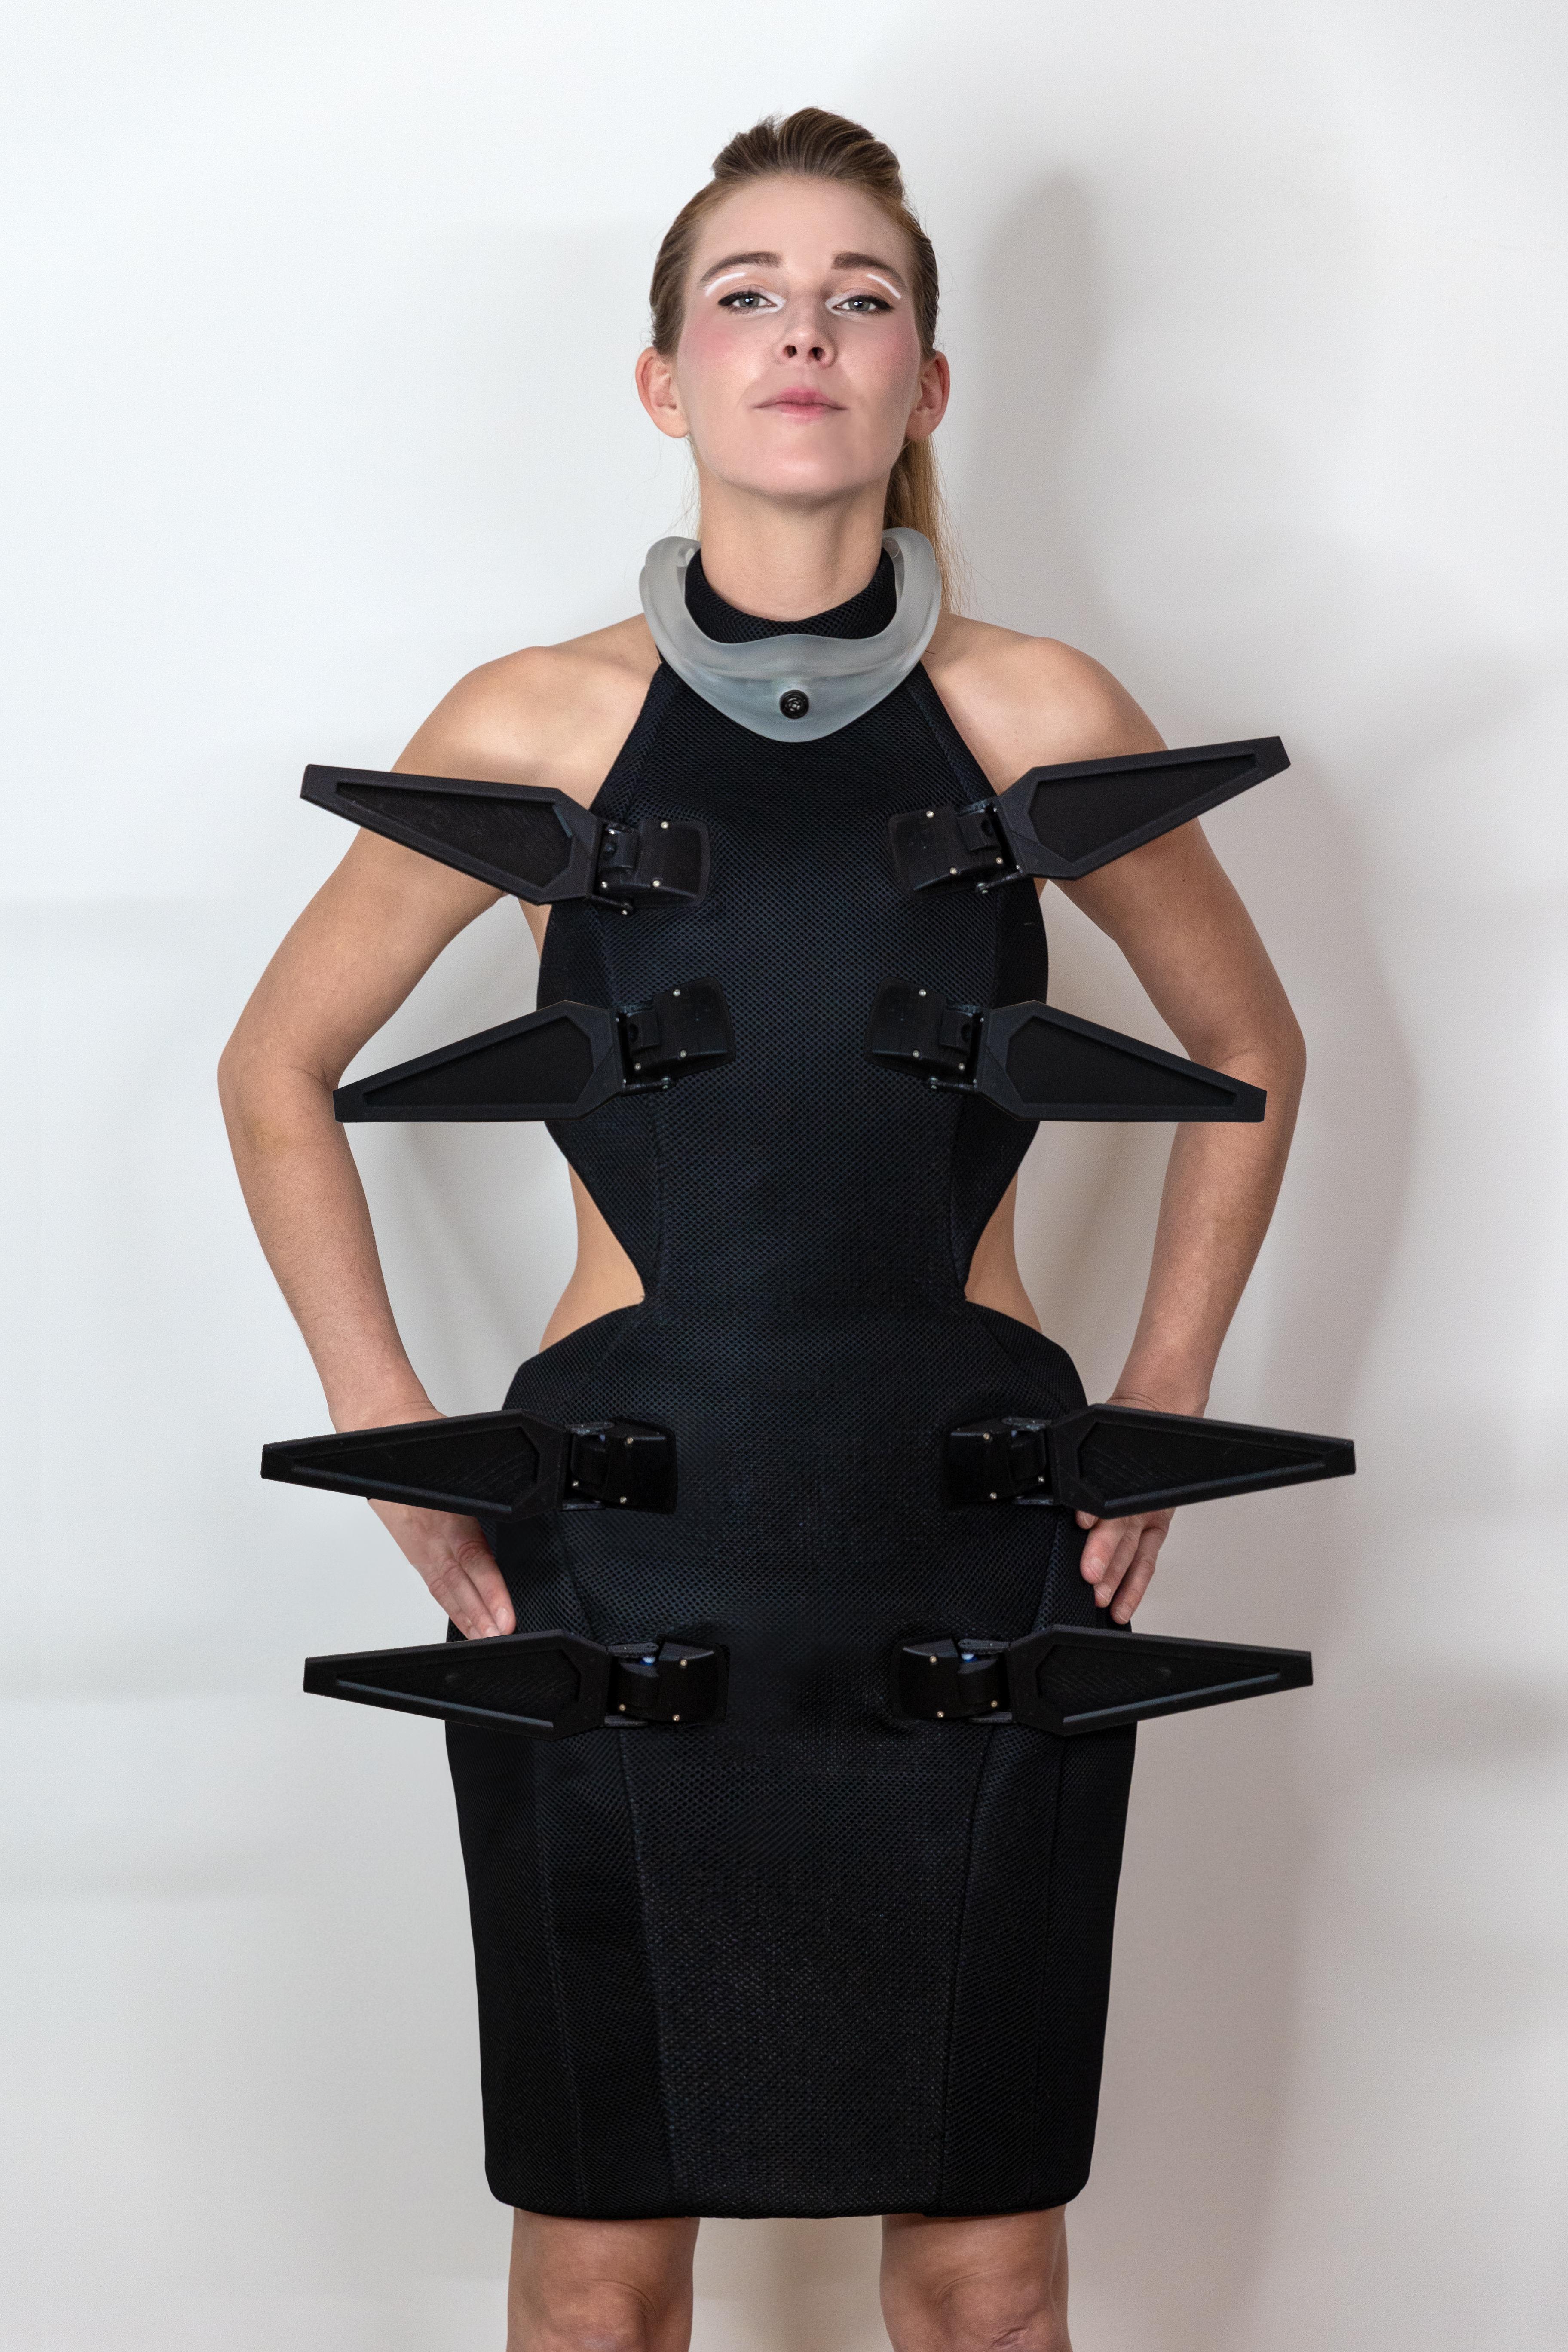
Right from the drop, you can see what the dress is all about. It’s an open-shoulder design that has eight large moving scales mounted on the front. These scales are printed, and each features its own servo for independent movement. The scale baseplates are designed to hide the servos themselves, creating a sleeker look that hides the mechanism underneath. Each baseplate is also perforated with holes, allowing it to be sewn on to the base garment in a stout fashion. The dress itself is created with thick neoprene fabric, enabling it to take the weight of the scale assemblies without sagging or pulling away from the body. You can even customize the scales in various ways—such as adding feathers instead.
The dress is a neat piece, and would catch eyes for its pointy scales alone. The fact that they can start moving at any time only increases the garment’s impact. We’ve seen some other great fashionable uses of 3D printing before, too, like these awesome printed shoes. Meanwhile, if you’re printing your own garments in your home lab, don’t hesitate to let us know! Or, even better… wear them to the next Hackaday event!