USB power supplies are super cheap and omnipresent. They are the Tribble of my household. But they’re not all created equal, and some of them may even be dangerous. I had to source USB power supplies for a product, and it wasn’t easy. But the upside is that I got to tear them all apart and check out their designs.
In order to be legitimate, it’s nice (but not legally required) for a power supply to have UL approval. Some retailers and offices and building managers require it, and some insurance companies may not pay claims if it turns out the damage was caused by a non-UL-approved device. UL approval is not an easy process, though, and it is time consuming and expensive. The good news is that if you are developing a low voltage DC product, you can pair it with a UL approved power supply and you’re good to go without any further testing necessary.
 If you are going for FCC approval and are having unintentional emissions testing done (which is more likely than UL as it’s a legal requirement for products that meet certain qualifications), the testing has to be done on the whole solution, so the power supply must be included in the testing, too.
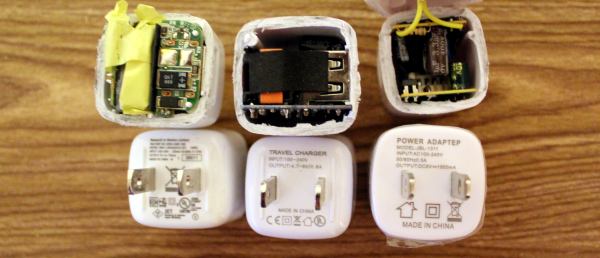
Sourcing cheap electronics in large quantities usually ends up in China, and specifically Alibaba. First, we started with a how-low-can-you-go solution. This wasn’t even a power adapter; it was a power “adapteP”, and the whole batch was mis-printed. Quality control could not be a high priority. After cutting it open, it wasn’t terrible, and it had all the necessary parts. It was surprising how much of it was through-hole, which indicates that the assembly was done mostly by people. That happens when factories are cheaper, hire inexpensive labor, don’t invest in technology, and don’t care as much about quality.
There are certain things you should look for in a power supply to determine the level of risk:
- Isolation Distance – This is how much space there is between the primary (AC) and secondary (DC 5V) sides. UL requires a few millimeters, and often you’ll see two separate PCBs. On many single-PCB solutions you’ll see a white line meander across the board to distinguish between the two. The smaller this separation, the closer your USB power is to AC line voltage, and if the gap is bridged somehow, you’re in for a world of hurt.
- Fuse – if there is a short, a lot of current starts flowing, components heat up, and things get dangerous. A thermal cut-off (TCO) fuse (also known as a resettable fuse or a PTC) is a component that breaks the circuit when it gets too hot, like a circuit chaperon. When it cools off, the TCO resets and you can plug the device back in with no harm done. Without the fuse, the supply heats up and current keeps flowing until a component fries, sometimes explosively.
- Connectors – You don’t want bare leads hanging out in space where they could move and touch something. You don’t want the USB port to be soldered only by its four pins. You don’t want the power pins to be loose.
- Decent Label – “Adaptep”? Yes, to someone who uses a different alphabet the “P” and R are very similar characters. But still. Also, fake certifications abound. Look for the difference between the CE (China Export) and the CE (Conformité Européenne) labels. And the UL Logo should have a number. So should an FCC label.
So this first adapter? Isolation distance was fine because it was two separate boards, but there was no fuse and no protective tape between components. The connectors were all secure, but the label didn’t make any promises. As for performance, output at 5.34V under my product’s load meant it was a little outside of USB spec (5.25V limit), but not dangerous. On the scope it was ringing with a peak at 5.5 V at 4 kHz.
Of course, sourcing this supply for a second batch proved tricky, and we wanted the USB plug to come out the side instead of the front so it would have a thinner profile against a wall. Additionally, we needed UL approval for a client. Our second attempt was surprisingly successful. This adapter had UL certification, with a number to look up. Note that just having a number isn’t enough; many companies will just put someone else’s number on their product and assume nobody will bother to check. So when you do look it up, and find a different manufacturer, a different enclosure, and it looks more like a refrigerator than a USB power supply, don’t be too surprised. But no, this particular one was great! The label had a company name on it, model number and specs, and certifications that could be verified. Let’s tear it open!
 Sweet sweet silicon meat inside an ABS shell! Components wrapped in protective tape, two PCBs for isolation, and even a special injection-molded plastic piece to add additional protection. Components are labeled, and what’s this, an IC to control the oscillation instead of a feedback winding on the transformer? Fancy! It’s pretty clear that this power supply is good, and I’d trust this one.
Comparing this one to the others, there were so many noticeable little details that are important and clearly thought-out. Take, for example, the connection between the prongs and the PCB. On the previous board, it was made with wires soldered by hand. Solid, but time consuming and prone to failure or quality issues. This adapter has metal contacts that snap into the case very solidly so that the prongs cannot get loose. The connection to the PCB is via the springiness of the metal, but notice that the PCB has pads specifically designed to maximize the surface area of that connection. On the next PCB you’ll see no such effort.
Some components were covered in shrink tube, tape, or non-conductive grey adhesive. The assembly was tight with no room for components to shake loose or accidentally touch. And the output was perfect. 4.9 Volts with nary a ripple.
But this is China, and component sourcing problems are a thing, so I guess I shouldn’t have been surprised when these supplies were no longer available. In retrospect, maybe these were unsold overstock, or possibly QC rejects. That would explain why they were only slightly more expensive than the others. And so we moved on to another supplier; one that could pad-print our logo on top.
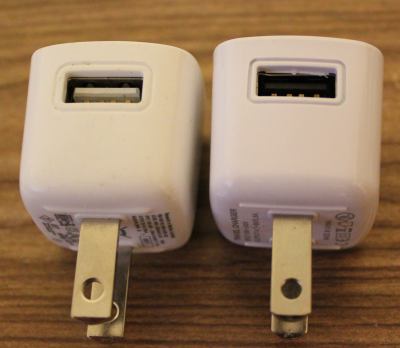 At first glance these power supplies appeared identical. But close inspection reveals slight differences in the style around the USB and the raised ridges on the underside. The label was completely different, and gone was the number next to the UL logo. There was no company name on the supply either, and the company we purchased from turned out to be a reseller and not the OEM. Also, why was the output 4.7-5V, and why did my scope say 5.5V (but surprisingly stable)?
Inside was a completely different beast. Using a single PCB, the creep distance was about a millimeter. You can see the white line meandering through the bottom of the PCB that shows the high and low sides. The USB port wasn’t soldered to the PCB except by the four signal/power pins (see the bottom side lower left and the hanging USB connection pins), and there was a capacitor with really long uncovered leads and the positive side dangerously close to the USB shell. There was almost no protective tape, no shrink tube on the leads, and no protection in case of a short.
In the end, I wouldn’t trust the two non-UL supplies with anything worth more than a few bucks, and certainly not my cell phone. I’d have really big reservations about reselling them to customers who don’t know the difference. The UL-approved one was great, but the other two are only good for powering low-current-draw devices that are not sensitive to voltage. Also, finding a reliable supplier in China is HARD.
Check out a much more thorough analysis of this and pretty much every USB power supply cube by [Ken Shirriff]. It’s surprising how little has changed in four years with these supplies, and his analysis goes into how the circuits behind these supplies work, identifying each component and its purpose.
We also covered a Sparkfun teardown of some power supplies with similar conclusions, and a Fail of the Week in which a faulty USB power adapter was the likely cause of a fire.
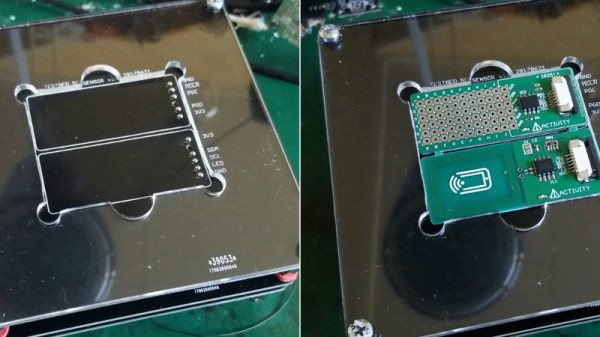
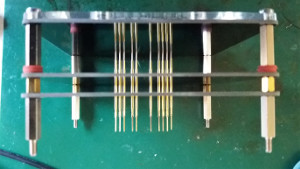 The idea behind a jig is pretty simple: essentially it’s just a mount that holds the PCB, and a set of pins which contact the appropriate points on the board. The jig can then provide power, programming, status LEDs for testing, etc. Basically anything that you can’t or don’t want to include on the final board, but will help in testing or programming them.