Type4me Is A Hardware Clipboard For Your Digital Copy And Paste Needs

type4me-hardware-clipboard

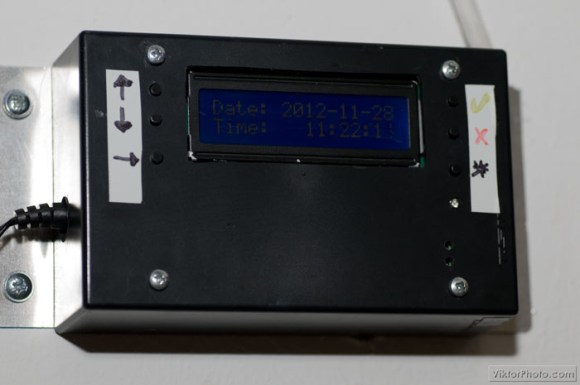
It doesn’t happen often, but every now and again we find ourselves wanting for a more extensible cut and paste experience. Most notably we’ve searched for something that makes is very easy to keep multiple things in the clipboard and paste them as needed. Although we’ve tried several software offerings nothing really made it up to grade, but this hardware clipboard looks very promising. [Luca Dentella] calls it Type4me as it functions as a USB keyboard.

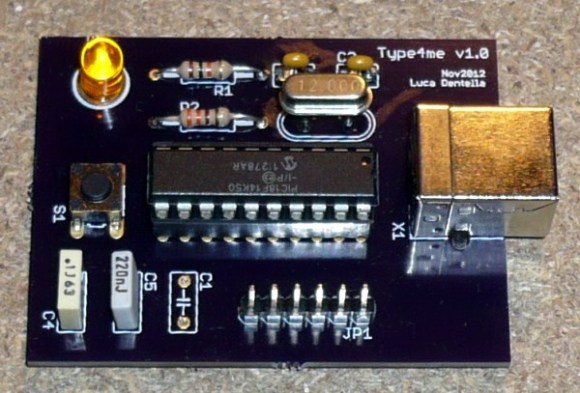
The PIC 18F14K50 enumerates as a USB keyboard, allowing it to send characters anywhere the cursor is located. It sends whatever string is stored inside, with an optional return character at the end. In addition to its keyboard properties it also establishes a serial connection, which allows you to push new strings to the device. This setup does require you to do copy or type your strings into a serial terminal, along with one of four special commands which are parsed by the microcontroller. One of these commands allows you to save the string to EEPROM so that it will be persistent through a power cycle.

The pasting back to the computer takes a mere push of the button. We’ve embedded the video demo after the break. It’s in Italian but there are English subtitles. Near the end [Luca] shows off the device as a macro button for gaming.

Continue reading “Type4me Is A Hardware Clipboard For Your Digital Copy And Paste Needs”

The PICnDuino Review

picnduino

For those of you that can’t make a decision between buying an Arduino and a PIC processor, [Brad] has come up with a novel solution, the PICnDuino. We’ve featured him before with his [Retroball] project, but this time Brad has been full funded on Kickstarter, and is pre-selling boards for delivery in March.

[HAD], specifically I, was fortunate enough to be sent one of the boards to try out early. I’ve worked with an Arduino before, but never a PIC processor, so read on to see if it was actually as easy as the tutorial video (at the end of the article) would have you believe it is to get started. Continue reading “The PICnDuino Review”

Playing A WAV File With 64 Bytes Of RAM

montage-final

[Jacques] thought his doorbell was too loud, so of course the first thing that came to mind was replacing the electronics and playing a WAV file of his choosing every time someone came knocking. What he ended up with is a very neat circuit: he used a six-pin microcontroller with 64 bytes of RAM to play an audio file. (French, Google translation)

The microcontroller in question is a PIC10F322. one of the tiniest PICs around with enough Flash for 512 instructions, 64 bytes of RAM, and a whole bunch of other features that shouldn’t fit into a package as small as a mote of dust. Without the space to store audio data on the microcontroller, [Jacques] turned to a 64 kilobyte I2C EEPROM. The PIC communicates with the EEPROM with just two pins, allowing it to read the audio data and spit it out again via PWM to an amplifier. The code required for this feat is only 253 instructions and uses just a few bytes of RAM; an impressive display of what a very small microcontroller can do.

Adding A Timer Feature To This Desk Lamp

timer-lamp

[Steven Mackaay] added a simple user interface that implements a shutoff timer for his desk lamp. His project log comes in two parts, the breadboarding and the actual implementation.

He wanted a few things out of the build. The first is an LED that would help him find the lamp in the dark. The second feature is a shutoff timer with different delay options. To get everything working he used a PIC microcontroller to drive a mechanical relay. That relay switches the mains power to the lamps. Now he uses one button to switch the lamp on and off. The other selects a shutoff timer of one, five, or thirty minutes. Power for the control circuitry is provided by the green wall wart PCB seen in the photo of the electronic guts.

This is a pretty general setup that could be applied to a lot of other mains switching applications. Just connect the logic hardware to some type of relay.

Building Pong For An 8-pin Micro

pong

For playing around with video signals and trying to create a an interesting microcontroller project, you can’t do better than the classic Pong. We’ve seen our share of microcontroller-based pong builds, but rarely have we seen an 8-pin microcontroller recreate every part of the first video game.

[Tim] started his PIC12F1840-based Pong build with just a few buttons for controls and a video output. This in itself is somewhat of an achievement, as [Tim] used all the data memory and every GPIO pin on this small microcontroller.

He had time to optimize his build and ended up adding the bleeps and bloops of the original Pong to his build. He’s got an interesting design on his hands, and also what is probably the smallest Pong clone in existence.

Rolling Your Own Furnace Controller

replacement-thermostat

[Viktor’s] found an opportunity to put his embedded design skills to use when the furnace controller in his building went out. He admits it would have been much easier to just purchase a replacement, but not nearly as fun. Instead he built this furnace controller based on a PIC 18F4550.

First off, you may find it strange that we’re calling this a furnace controller and not a thermostat. But a study of the hardware schematic reveals that the device doesn’t have the ability to sense temperature. It merely switches the furnace on and off based on a time schedule. We guess this is for an apartment building where measuring the temperature at one central point doesn’t suffice?

At any rate, the build is clean and the UI looks quite easy to use. Inside there’s a board-mounted 12V relay which controls the furnace. The schedule is saved to the EEPROM of the microcontroller and time is kept by a battery-backed DS1307.

We’d love to see this extended in the future. Some possibilities would be adding internet connectivity and implementing a mesh network of temperature sensors which would give feedback to the main unit.

Variometer Build For Gliding Aircraft

If you’re flying through the air in a non-powered vehicle your rate of descent is something that you want to keep any eye one. With that in mind, [Adrian] decided to design his own Variometer (translated) what will have a place in the cockpit next to the other instrumentation. It emits a pitch whose frequency is dictated by the rate at which altitude is being lost or gained.

He went with a PIC 24FJ64 microcontroller to drive the device. It’s reading data from an MS5611 barometric pressure sensor. This measures changes in air pressure associated with a change in altitude. As a user interface he chose one of SparkFun’s Nokia 5110 LCD screen breakout boards. He also went with one of their boost converts which lets him power the device from just one battery cell. The case itself is cut from several layers of plastic using a CNC mill.

In the video after the break you can see how sensitive the device is. Moving it just a few feet up or down has an immediate effect on the sound and the displayed data.

Continue reading “Variometer Build For Gliding Aircraft”