PIC Up A NeoPixel Ring And C What You Can Do Using This Tutorial

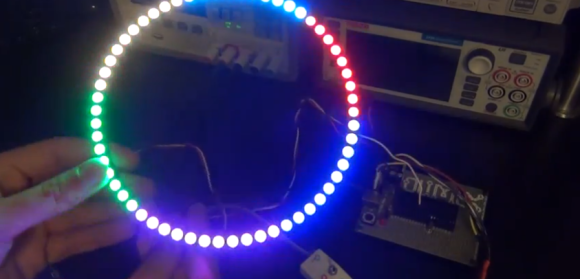
lit ringAs [Shahriar] points out in the introductory matter to his latest video at The Signal Path, Arduinos are a great way for a beginner to dig into all kinds of electronic excitement, but they do so at the cost of isolating that beginner from the nitty gritty of microcontrollers. Here, [Shahriar] gives a very thorough walkthrough of a 60-neopixel ring starting with the guts and glory of a single RGB LED. He then shows how that ring can easily be programmed using a PIC and some C.
[Shahriar]’s eval board is a simple setup that he’s used for other projects. It’s based on the PIC18F4550 which he’s programming with an ICD-U64. The PIC is powered through USB, but he’s using a separate switching supply to power the ring itself since he would need ~60mA per RGB to make them burn white at full brightness.

He’s written a simple header file that pulls in the 18F4550 library, sets the fuses, and defines some constants specific to the ring size. As he explains in the video, the PIC can create a 48MHz internal clock from a 20Mhz crystal and he sets up this delay in the header as well. The main code deals with waveform generation, and [Shahriar] does a great job explaining how this is handled with a single pin. Before he lights up the ring, he puts his scope on the assigned GPIO pin to show that although the datasheet is wrong about the un-delayed width of the low period for a zero bit, it still works to program the LEDs.

[Shahriar] has the code available on his site. He is also holding a giveaway open to US residents: simply comment on his blog post or on the video at YouTube and you could win either a TPI Scope Plus 440 with probes and a manual or a Tektronix TDS2232 with GPIB. He’ll even pay the shipping.

Continue reading “PIC Up A NeoPixel Ring And C What You Can Do Using This Tutorial”

Rolling Your Own Furnace Controller

replacement-thermostat

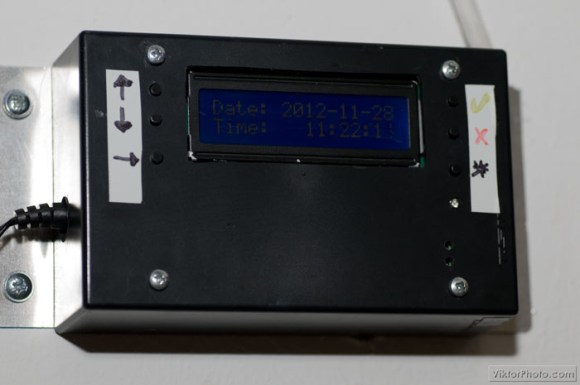
[Viktor’s] found an opportunity to put his embedded design skills to use when the furnace controller in his building went out. He admits it would have been much easier to just purchase a replacement, but not nearly as fun. Instead he built this furnace controller based on a PIC 18F4550.

First off, you may find it strange that we’re calling this a furnace controller and not a thermostat. But a study of the hardware schematic reveals that the device doesn’t have the ability to sense temperature. It merely switches the furnace on and off based on a time schedule. We guess this is for an apartment building where measuring the temperature at one central point doesn’t suffice?

At any rate, the build is clean and the UI looks quite easy to use. Inside there’s a board-mounted 12V relay which controls the furnace. The schedule is saved to the EEPROM of the microcontroller and time is kept by a battery-backed DS1307.

We’d love to see this extended in the future. Some possibilities would be adding internet connectivity and implementing a mesh network of temperature sensors which would give feedback to the main unit.

CUIduino, Arduino With True USB Support

cuiduinotop

The CREATE USB Interface (CUI) was a project that came out of UC Santa Barbara around the same time the Arduino was being developed. It has a USB port, a PIC18F4550, and a prototyping area. It was designed to enable easy interfacing with the real would through many A/D inputs and general I/O ports. It supports both OSC and MIDI-over-USB natively. The biggest difference between the CUI and the Arduino is its USB support. The Arduino uses an FTDI chip to create a serial interface to its onboard AVR. The CUI’s PIC has native support for USB. That means you can have the CUI appear to be any USB HID device you want: keyboard, mouse, game controller, etc.

The Arduino has a friendly development environment and a large following though. CUI create [Dan Overholt] decided to add an ATmega168 to his board to get the best of both worlds, the CUIduino (scroll down). It can be programmed just like any other Arduino compatible device, but the having the CUI parent means your Arduino project can behave like a native USB HID gadget.

[Thanks Peter]