A Plotter Made From Lego Parts

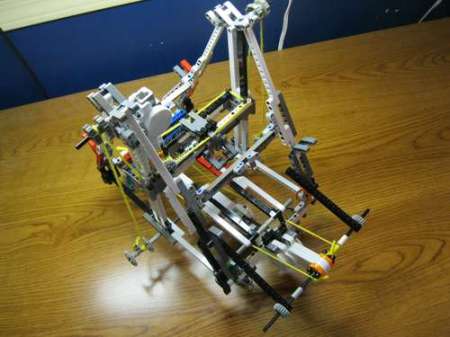
We’re always amazed at what people can come up with using Lego parts, but this hack certainly pushes the limits. Originally conceived as a 3D printer, this plotter is still an impressive proof-of-concept. Ironically, this “3D printer” was build with the hope of winning a Makerbot 3D printer, so be sure to vote for it if you’re impressed.

it’s pretty impressive seeing what [graphmastur] has done using only Lego parts. It’s especially entertaining to see a sheet of Lego “grass” used as the Y-axis table. The build was designed in Lego Digital designer, and the parts are available in “LDD” format or HTML.

This project is explained further in the video after the break. If you’d like to simply see it do a plotting operation, fast forward to around 4:30. The device is not perfect, but as the video says “it worked, pretty well” when drawing a square with an ordinary marker. Continue reading “A Plotter Made From Lego Parts”

3 Axis Plotter Made From Spare Parts

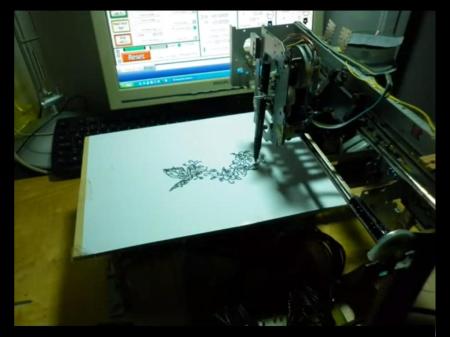
The plotter featured above was, according to the author, made almost entirely of salvaged parts. In addition to what he had accumulated, only $20 in parts was needed to complete this build. Pretty good considering the thousands of dollars that a new plotter goes for.

Control of all axes is accomplished using unipolar stepper motors.  In this case only one unipolar motor was available along with two bipolar motors. [Lovro] actually hacked these into a unipolar setup to save costs on the build.

Mach3 control software along with a parallel port is used to control the steppers. A similar “junk” setup could be used to power a CNC mill or laser engraver, so think twice before tossing that old printer in the trash!  Check out the video of this plotter in action after the break! Also, see this hack for a similar laser engraving machine using Mach3 control software. Continue reading “3 Axis Plotter Made From Spare Parts”

knex_plotter

K’nex Whiteboard Plotter

[Jerry] has been wanting to put together a whiteboard plotter for some time and just recently got around to building one.

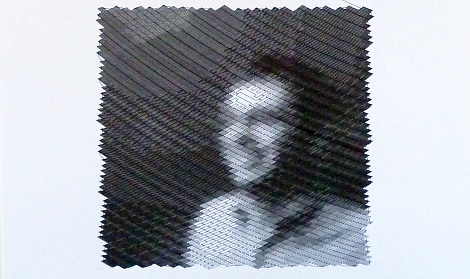
The plotter draws pretty much about anything he can imagine on a white board measuring just shy of 2′ x 3′. The design first started off with a Basic Stamp board at the helm, which he sourced from another project he no longer had any use for. The Stamp worked for awhile, but eventually he ran into problems due to the board’s limited 128 bytes of program space. Needing a more robust micro controller, he switched to an Arduino mid-project, which he says runs the plotter far faster than the Stamp ever did.

The plotter uses a pair of stepper motors mounted on a horizontal platform situated above the whiteboard. Much like this large-format printer we featured earlier this week, the steppers vary the length of a pair of fishing lines, moving the pen precisely across the board.  As you can see in the image above, [Jerry] has been able to create some pretty intricate patterns with his plotter, and we imagine they will only get better with more refinement.

Be sure to check out his site for more details on his build process as well as several additional samples of the plotter’s capabilities.

CNC Machine From PC Parts

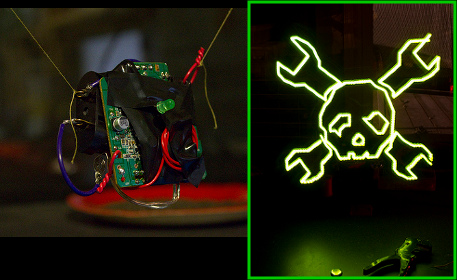
[Mike Rankin] built a small CNC machine using some PC parts. He repurposed two optical drives and a floppy drive to create the plotter seen drawing the Hackaday logo above. The X and Y axes use the stepper motor controlled read heads from two optical drives. The Z axis is built using the read head hardware from a floppy drive. A 3-axis controller module from eBay drives the little machine, keeping the cost quite low at around $45.

As you can see in the video after the break it does a great job as a plotter. [Mike] doesn’t think there’s enough power in the hardware to be used as a mill. We’d still like to try adding a flexible shaft rotary tool and see if this could mill some rudimentary PCBs, but maybe you need to shell out just a little bit more for that functionality. It might also be possible to use an etchant resist marker instead of toner transfer or photo-resist.

Continue reading “CNC Machine From PC Parts”

Vector Plotter With Lasers

[Hubert] sent in his experiments using HDDs, CDROMs, speakers, and other components to make an XY laser plotter. Those carefully reading will note, its not all three to make one plotter, but rather three plotters each using a separate system. The setups have their advantages and disadvantages, and [Hubert] is sure to point them out; including circuit diagrams and pictures to help you on your own trials.

There is a little difficulty in reading English not so good, but considering we’ve never seen a single-laser vector plotter done before (spirographs come close, and no one wants to wait 85 seconds) it’s still very impressive.

[Thanks TJ]

LEGO Printer Built Without NXT parts

[youtube=http://www.youtube.com/watch?v=zX09WnGU6ZY]

[Squirrelfantasy] built a printer using LEGO pieces. It’s not a Mindstorm project but instead depends on some type of development board and some auxiliary components on a protoboard. We couldn’t get a good enough look to tell exactly what makes up the electronics so start the debate in the comments. We feel this is a printer and not a plotter because the stylus moves on just one plane while the paper feeds past it but that’s open for debate as well.

Guess this answers the question of why aren’t we building our own printers? Some folks are.

[Thanks Haxorflex and many others, via DVICE]

CNC Plotter From Old Parts

[vimeo=http://vimeo.com/10479779]

Get a quick fix of CNC for the day with this plotter. [Francisco Dulanto] grabbed the cartridge carriage from an old inkjet printer and turned it into a gantry by mounting it on two drawer sliders. The optical head assembly from a cd-rom provides the Z-axis movement with the whole thing controlled by three RepRap boards. [Francisco] called his project a joke compared to the Turing Machine, but we like it and we’re glad he tipped us off. There’s something zen-like about the projects that are thrown together with what you have available. After all, he’s certainly achieve a clean-looking build that does what it’s intended to do.