Ghostly Images Captured Only On Camera

is that a logo

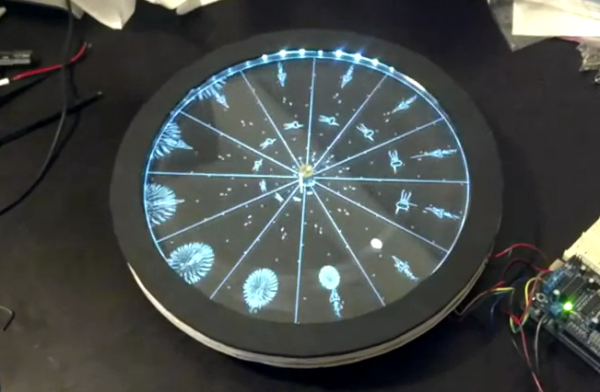
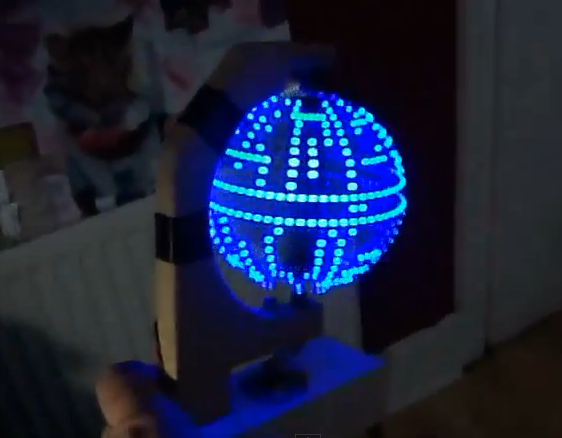
A while back our good buddy [Ch00f] built a QR code clock, unreadable to both humans and computers. A human couldn’t read the clock because of the digital nature of a QR code, and because the clock used persistence of vision in driving the LEDs, a digital camera can’t capture all the pixels in the QR code at the same time. It’s a highly useless but impressive art piece. Now, [Ch00f] is turning that build on its head. He created a rudimentary display that is invisible to the human eye, but easily detected with a digital camera.

This build exploits a basic property of CMOS digital cameras – the rolling shutter. Because it takes time to get pixels off a modern digital image sensor, each picture is actual a composite of many different strips, each taken slightly out of sequence. You can see this for yourself by taking a picture of something rotating very fast with your camera phone; a picture of an airplane propeller will make the blades appear curved, or look like [Dr. Seuss] has an aeronautical engineering degree.

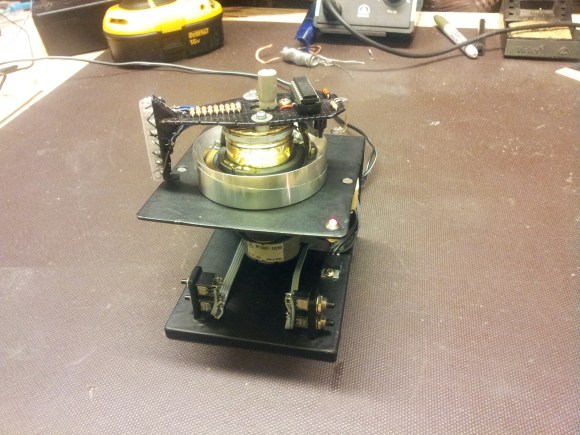
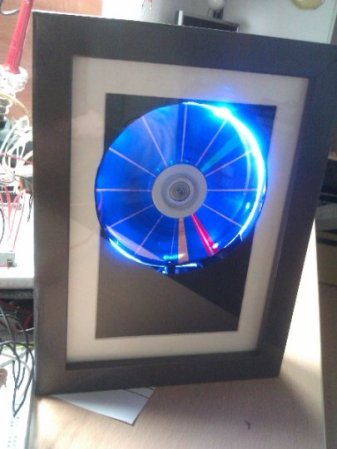
To create his display, [Ch00f] found a few inexpensive fiber optic lights. By aligning a few of these into columns and lighting them up in a precise sequence, he can exploit the rolling shutter and make an image appear. To the human eye, it looks like a solid wall of illuminated fiber optics.

As for how practical this build is, [Ch00f] says not much. For cell phone cameras, you’d need to have a very, very short exposure time for this to work. The only way to do that is to make this display unbelievably bright, or just put it out in the sun. We can’t see that being practical for any potential use case, but we’d be more than happy to see a large-scale attempt at displaying images with this technique.

POV Pong Game Uses All Kinds Of Smart Design

pov-pong-game-uses-smart-design

This little device lets you play some head-to-head pong using a spinning LED display. We’re really in love with the design. You get a pretty good idea of the Persistence of Vision aspect of the build by looking at this picture. But hearing [Dennis] explain the entire design in the video after the break has us really loving its features.

He’s using the head from a VCR as the spinning motor. The display itself uses a vertical row of LEDs with a bit of wax paper as a diffuser. These are current limited by a 1k resistor for each of the eight pixels. They’re driven by a PIC 16F690 but you may have already noticed that there’s no battery on the spinning part of the board. It gets voltage and ground from a pair of brushes which he fabricated himself. To avoid having to do the same thing to map the control buttons in the base to the spinning board he came up with something special. There’s a downward facing phototransisor which registers LED signals from the base to move the paddles up or down.

If you love this project check out the POV Death Star.

Continue reading “POV Pong Game Uses All Kinds Of Smart Design”

HDD POV Clock Takes The Best From Those That Came Before It

hdd-pov-clock

The concept behind this clock has been seen before, but [Dieter] tried to combine the best aspects of several projects into his HDD POV clock (translated). The basic principle of the design is to cut a slot into the top platter of the hard drive. This will let the light from some LEDs shine through. By carefully synchronizing the LED with the spinning platter a set of differently colored hands can be shown to mark time. We’ve been looking at the project for several minutes now and we’re not quite sure if the lines marking the 5-minute segments on the clock are generated in the same way as the hands, or if they’re marks on a faceplate on top of the platters. Check out the clip after the break and let us know what you think.

Past HDD clock project include this one, or this other one. Some of the design improvements include a better motor driver (which [Dieter] pulled from an old VCR) and the inclusion of an RTC chip to keep accurate time without the need to be connected to a computer. We also think it’s a nice touch to sandwich the hardware between two picture frames for a nice finished look.

Continue reading “HDD POV Clock Takes The Best From Those That Came Before It”

POV Wheels For A Longboard

If you don’t mind working with really small components this POV wheel project for a longboard will certainly attract some attention.

The name of the game here is small and cheap. Small because the wheels are only 72mm in diameter (about 2.8 inches). Cheap because [Ch00f] wants to produce and sell them locally. He went with an ATtiny24 microcontroller driving fifteen LEDs. Obviously this will present a problem as the uC uses a 14-pin SOIC package and that’s just not enough I/O to drive the LEDs individually. Add to that the issue of storing patterns to be displayed and you start to run out of program memory very quickly.

But obvious he pulled it off. The image above shows the wheel displaying the CT logo (for ch00ftech.com) and there are several other patterns shown off in the clip after the break. The LEDs are multiplexed, but the wheel spins fast enough that this turns out to be okay. The rotation is measured by an IR reflectance sensor aimed at the stationary axle. A CR2032 powers the device, with some counterweights added to keep the wheel balanced.

Our only concern is the fragility of the exposed electronics. But if you hit the right BOM price we guess you can just replace the board as needed.

Continue reading “POV Wheels For A Longboard”

Laser-etched LED Zeotrope Looks Like A Circular Monochrome Screen

The still image of this animated display really doesn’t do it justice. But you can get an idea of how this really does look like an old monochrome display. It’s actually a zeotrope made from LEDs and etched acrylic. The LEDs blink at a rate that synchronizes with the spinning acrylic to produce an animated image.

You probably already know that a zeotrope uses moving physical models to trick the eye into seeing an animation. In this case the models are etched into a piece of acrylic so that their outline glows when the material is edge-lit. Twelve pie piece shaped panes were designed in Inkscape to look like a scene from the Linux game World War IV. A stepper motor spins the ring which allows for the perfect synchronization seen in the clip after the break.

Continue reading “Laser-etched LED Zeotrope Looks Like A Circular Monochrome Screen”

Build A POV Death Star, You Will

Building a Persistence of Vision globe is pretty awesome, but overlaying a Death Star pattern on the display takes it to the next level of geekery. Like us, [Jason] has wanted to build one of these for a long time. His success pushes us one step closer to taking the plunge and we hope it will inspire you to give it a shot too.

As he mentions in the beginning of his write up, the mechanical bits of these displays are really where the problems lie. Specifically, you need to find a way to transfer power to the spinning display. In this case use went with some DC motor brushes. These are replacement parts through which he drilled a hole to accept the metal axles on top and bottom. We hadn’t seen this technique before, but since motor brush replacements are easy to find and only cost a few bucks we’d say it’s a great idea.

The 24 blue LEDs that make up the display are all on one side of the PCB. They’re driven by an ATmega328 running the Arduino bootloader. [Jason] uses an FTDI adapter to program the chip. Don’t miss the video embedded after the break.

Continue reading “Build A POV Death Star, You Will”

StarGate Eggbeater

[Jason] used a strip of 142 Adafruit LPD8806 Addressable RGB LEDs to create the StarGate Eggbeater persistence of vision display. The LED strips are controlled by an Arduino Mega, which is used to control the strip and provides 21 bit color control for each LED. The strip is housed into a ring-shaped tube which is mounted onto a rod and bearing to allow it to spin. A 1/4 HP motor is used to spin the ring at 250 RPM creating the POV effect.

One issue when controlling a spinning object is making electrical connections to a spinning object. The LPD8806 requires four connections: power, ground, clock, and data. To make the connections, [Jason] used a MOOG Slip Ring. This allows for the four connections to be made while the ring spins at 250 RPM.

Of course POV demos need videos, so check one out the “boss program” video after the break.

Via Adafruit

Continue reading “StarGate Eggbeater”