Mineable Minecraft Block

At Hack A Day, we’re pretty big Minecraft fans so you can imagine our interest when we saw [Ben Purdy]’s real-life Minecraft block. The build uses a projector system to display a block onto a cardboard box and reacts to being ‘mined’ just like in the game.

Block animation is handled by a piezo sensor, an Arduino and a Processing sketch. From earlier posts on [Ben’s] blog, we’re going to guess that he used the keystone video projection library his own solution to map the Minecraft block onto the cardboard box. Animation is handled just as in Minecraft – overlaying the breaking animation onto the block and adding some particle effects.

We’ve seen a few Minecraft hacks before, like using it as a 3D design tool, and connecting your redstone CPU to the outside world. [Ben]’s build follows in the tradition of its forebears and is something we really want to try out. Check out the demos after the break.

Continue reading “Mineable Minecraft Block”

All Your I/O Pins Belong To ArduinoDashboard

arduino_dashboard

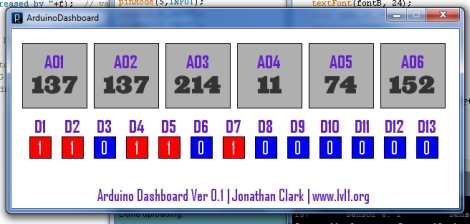
So if you’re knee deep in an Arduino-based project and you want to constantly monitor all of the micro’s pins, what’s the best way to go about it? [Jonathan Clark] from LVL1 in Louisville was looking to keep a closer eye on his board and whipped up an application he calls ArduinoDashboard.

Programmed in Processing, the application gives you a look at all of your Arduino board’s analog and digital pins in a simple to use display. All that’s required to run the application is a bit of code inserted at the top of your sketch, which can be called anywhere in your program’s loop. Once the code snipped is called, all of the board’s pins are read and the data is sent to your PC.

ArduinoDashboard is still very much in beta at the moment, but it looks to be stable enough for everyday use. [Jonathan] has plenty of improvements and new features in mind, so be sure to check back often to see what’s changed.

[via Adafruit Blog]

Controlling An Infuriating Game With An Accelerometer

[Daniel] just made a motion controlled game controller to go with his infuriating game. Thankfully, [Daniel] posted the source for this game so first time players already know the level select codes.

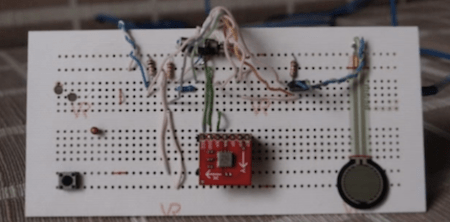
The controller is based on an Arduino Uno with what looks to be a Sparkfun 2-axis accelerometer providing the tilt sensing. A similarly sourced half-inch force sensitive resistor and temperature sensor control the ‘jump pads’ in the game. A small vibrating pager motor strapped onto the controller as a rumble pack.

Continue reading “Controlling An Infuriating Game With An Accelerometer”

word_clouds_from_broacast_television

Analyzing TV’s Talking Heads With Processing

[Michael] from Nootropic Design wrote in to share an interesting and fun project he put together using one of the products his company sells. The gadget in question is their “Video Experimenter” shield which was designed for the Arduino. It is typically used to allow the manipulation of composite video streams via overlays and the like, but it can also serve as a video analyzer as well.

When used for video analysis, the board lets you decode closed captioning data, which is exactly what [Michael] did here. He decided it would be fun to scrape the closed captioning information from various shows and commercials to do a little bit of content analysis.

Using a Processing sketch on his Arduino, he reads the closed captioning feed from his cable box, keeping a count of every word mentioned in the broadcast. As the show progresses, his sketch dynamically constructs a cloud that shows the most commonly used words in the video feed.

The results he gets are quite interesting, especially when he watches the nightly news, or some other broadcast with a specific target audience. We think it would be cool to run this application during a political debate or perhaps during a Hollywood awards ceremony to discover which set of speakers is the most vapid.

if you’re interested in learning more about the decoding process, [Michael] has put together a detailed explanation of how the closed captioning data can be pulled from a video stream. For those of you who just want to see the decoder in action, keep reading to see a quick video demonstration.

Continue reading “Analyzing TV’s Talking Heads With Processing”

Twitter Notifier Lets Us Know How Awesome We Are

twitter_notifier

Let’s admit it, you’re just a little bit vain. Heck, we’re all just a little bit vain when you really think about it. Instructables user [pdxnat] was self-absorbed enough that he constructed an LED “mood light” that alerts him each time someone mentions his user name on Twitter.

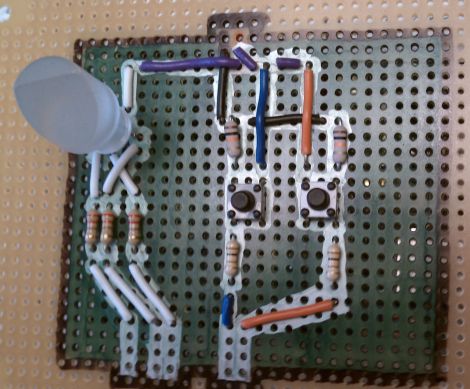
The build is pretty simple, with most of the work being done on his PC. His Arduino is wired to a simple RGB LED that calmly cycles through various colors until someone mentions his name on Twitter. At that point, the client software running on his PC passes a message to the Arduino over a serial interface, causing it to wildly pulse the LED. Once it catches his eye, he stops the alert cycle with the press of the reset button, returning the LED to its previous state. As a bonus, he decided to write the Twitter-polling application in both Processing and Python, enabling fans of either language to easily replicate his work.

It’s a pretty cool idea, and it would be great to see someone expand it to include other online services to provide a greater overall feel for how awesome they really are.

Keep reading to see a quick video of the notifier in action.

Continue reading “Twitter Notifier Lets Us Know How Awesome We Are”

Modifying A Cheap Robot Arm For Arduino Control

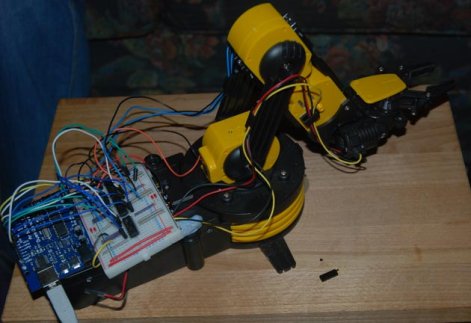
Many a hacker has put together one of those cheap $30 robot arm kits you can get in just about any store with a section labeled, “science”.  In an ongoing search for a cheap robot arm, [Larry] decided to modify one of them to be controlled with a PC through an Arduino. The article doubles as a really basic tutorial on dc motor control. On the site he gives a brief explanation of how to use H-bridges and a good explanation of how he wired them up for this purpose. He eventually goes on to add a processing interface to the project. The next step would be figuring out how to add some kind of position feedback, such as encoders. Though, if modifying an arm is not your style, [Larry] has another cool article on rolling your own robot arm cheaply with some foam board and hobby servos.

Fixing Arduino’s Serial Latency Issues

arduino_latency

[Paul] wrote in to tell us about some interesting Arduino latency issues he helped nail down and fix on the Arduino.

It seems that [Michu] was having some problems with controlling his Rainbowduino project we featured earlier this year, and he couldn’t quite figure out why he was experiencing such huge delays when sending and receiving data.

Searching online for answers turned up very little, and since [Michu] was using Processing, the pair designed a set of tests to see what kind of latency was being introduced by Java. Pitting an Arduino Uno and an Arduino from 2009 against a Teensy 2.0, the tests gauged the latency of native data transfers versus transfers facilitated by Java via the rxtx library it uses for serial communications.

The results were pretty stunning. While both of the Arduinos lagged behind the Teensy by a long shot, their latency values under Java were always 20ms at a minimum – something didn’t add up. [Michu] poked around in the rxtx code and found a mystery 20ms delay programmed into the serial library. It made no sense to him, so he changed the delay to 2ms and saw a drastic increase in performance when transferring less than 128 bytes of data.

The pair’s fix doesn’t seem to affect latency when larger amounts of data (>1kB) are being transferred, but it makes a world of difference when manipulating smaller chunks of data.

For the sake of disclosure, it should be noted that [Paul’s] company produces the Teensy mcu.