Reverse Engineering An AC Signal Protocol

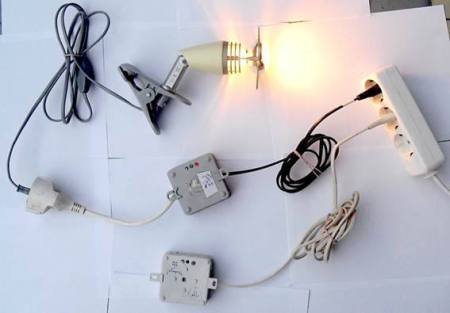
[Arpad] has spent quite a bit of time reverse-engineering a home automation system, and, as he is quick to point out, presents the information learned for informational purposes only. He’s really done his homework (and documented it well), looking into the US patent application, and figuring out how the protocol works.

If you’re wondering how someone is able to send a signal over an AC sine wave, at least one technique is the proprietary [Universal Powerline Bus]. This works by sending precisely times pulses in conjunction with the wave that would exist normally. Given the correct software on the other end, this can then be decoded and used for whatever data transfer is necessary.

Although as engineers and technologists, we certainly don’t condone stealing patents,  part of point of one is that others are allowed to learn your secrets in exchange for some legal protection. [Arpad]’s motivation in doing this is that the technology is only widely available in the US with our puny 120 VAC 60Hz power. With this knowledge, he’s been able to transfer it to work with European 230 VAC 50Hz.

Continue reading “Reverse Engineering An AC Signal Protocol”

IR Receiver As USB Keyboard

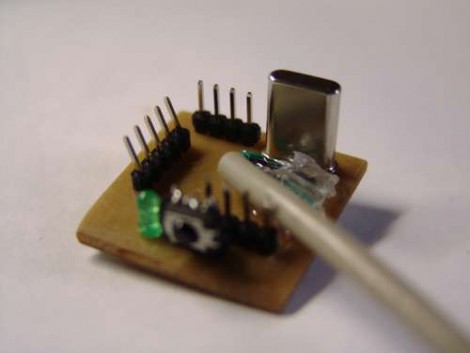
[Arthur] built an IR receiver to use with XBMC. Because it’s software specific he identifies the device on USB as a keyboard, and passes the IR commands as keystrokes used by the popular media platform.

Normally, homebrew IR receivers would use LIRC, the Linux Infrared Remote Control software. But this method doesn’t require you to have that running. In fact, it doesn’t need any setup on the PC end of things. Any remote that uses the Sony SIRC protocol will work off the bat.

[Arthur] chose a PIC 18f2550 for the project. It is a popular microcontroller because it has built-in USB handling. We’re a bit skeptical of the hardware design though. We didn’t see specifically which IR receiver he’s using, but many require some type of filtering so check the suggested layout in the datasheet for your module.

Manual Protocol Analysis

packetfu

As a followup to last week’s post on automated protocol analysis, [Tod Beardsley] has written up how to start analyzing a protocol manually. He walks through several examples to show how to pull out the interesting bits in binary protocols. His first step was sending 10 identical select statements and capturing the outbound packets. He used the Ruby library PacketFu to help with the identification. It compared the ten packets and highlighted one byte that was incrementing by four with each packet, probably a counter. Looking at the response indicated a few other bytes that were also incrementing at the same rate, but at different values. Running the same query on two different days turned up what could be a timestamp. Using two different queries helped identify which byte was responsible for the statement length. While you may not find yourself buried in HEX on a daily basis, the post provides good coverage of how to think critically about it.

Automated Protocol Analysis

wireshark

[I)ruid] from BreakingPoint Labs has been doing quite a bit of protocol reverse engineering as part of his work. He put together a post covering some of the tools that have been useful for this task. Text-based protocols have a lot of human readable characters that can help you identify fields. Binary protocols don’t have this luxury though. He recommends the Protocol Informatics Project for tackling these situations. It applies bioinformatics algorithms to network traffic. You give it a packet dump of the protocol and it compares them to find similarities the same way genetic sequences are compared. It can be confused by protocols that waste a lot of space, but it’s still a very clever approach to reversing.

[photo: slashcrisis]

Logicport Overview


As promised earlier, the Near Future Laboratory has published an overview of the Logicport Logic Analyzer. They’re using the Playstation 2 analysis as an example. The Logicport uses “interpreters” to define protocols. It has I2C/TWI, SPI, RS232, and CAN 2.0A/2.0B, but you can build your own interpreter based on these. You can specify bit order and the format you want the data in. Slave interpreters can be used for specific tasks: with the PS2 they were used to just show the fifth byte, which is the actual button press.

“Triggers” are used to signal specific activity. On the PS2, one was attached to the falling signal on the slave select line. This event means the master is about to start sending data.

The final area worth exploring is “measurements”. These can be frequency or arbitrary time intervals between events. The Logicport has multiple ground connections to eliminate noise from the signal and you’ll have to play with sample rate and logic level to get things running smooth. It’s nice to see how-tos written from the perspective of someone just getting started with the tool.