Baffle The Normies With This Binary Thermometer

We think it’s OK to admit that when someone puts a binary display on a project, it’s just a thinly veiled excuse to get more blinkenlights into the world. That and it’s a way to flex a little on the normies; you’ve gone pretty far down the tech rabbit hole to quickly decipher something like this binary-display thermometer, after all.

Don’t get us wrong, we think those are both perfectly valid reasons for going binary. And all things considered, a binary display for a thermometer like [Clovis Fritzen]’s is much simpler to decode than, say, a clock. Plus, it seems a bit that this build was undertaken at least partially as an exercise in Charlieplexing, which [Clovis] uses to drive the six-bit LED display using only three lines of GPIO from the Digispark ATtiny85 board running the show.

The temperature sensor is a DHT11, whose output is read by the microcontroller before being converted to binary and sent to the six-bit display. The 64-degree range is perfect for displaying the full range of temperatures most of us would consider normal, although we’d find 63°C a touch torrid so maybe there’s a little too much resolution on the upper end of the scale. Then again, switching to Fahrenheit would shift it toward the hypothermia end of the scale, which isn’t helpful. And you can just forget about Kelvin.

Clock Mixes Analog, Digital, Retrograde Displays

Unique clocks are a mainstay around here, and while plenty are “human readable” without any instruction, there are a few that take a bit of practice before someone can glean the current time from them. Word clocks are perhaps on the easier side of non-traditional displays but at the other end are binary clocks or even things like QR code clocks. To get the best of both worlds, though, multiple clock faces can be combined into one large display like this clock build from [imitche3].

The clock is actually three clocks in one. The first was inspired by a binary clock originally found in a kit, which has separate binary “digits” for hour, minute, and second and retains the MAX 7219 LED controller driving the display. A standard analog clock rests at the top, and a third clock called a retrograde clock sits at the bottom with three voltmeters that read out the time in steps. Everything is controlled by an Arduino Nano with the reliable DS3231 keeping track of time. The case can be laser-cut or 3D printed and [imitche3] has provided schematics for both options.

As far as clocks builds go, we always appreciate something which can be used to tell the time without needing any legends, codes, or specialized knowledge. Of course, if you want to take a more complex or difficult clock face some of the ones we’re partial to are this QR code clock which needs a piece of hardware to tell the time that probably already has its own clock on it.

Want To Learn Binary? Draw Space Invaders!

This was the week that I accidentally taught my nearly ten-year-old son binary. And I didn’t do it on purpose, I swear.

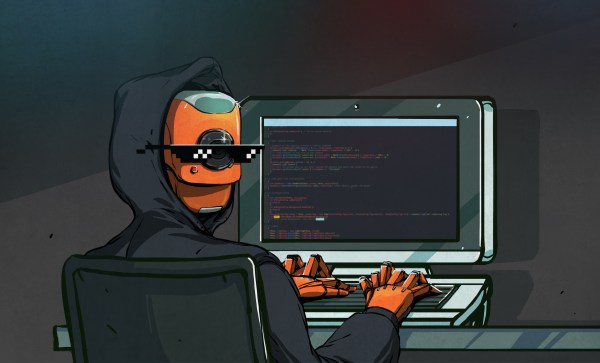
It all started innocently enough. He had a week vacation, and on one of those days, we booked him a day-course for kids at our local FabLab. It was sold as a “learn to solder” class, and the project they made was basically a MiniPOV: eight LEDs driven by a museum-piece AVR ATtiny2313. Blinking lights make a pattern in your persistence of vision as you swipe it back and forth.

The default pattern was a heart, which is nice enough. But he wanted to get his own designs in there, and of course he knows that I know how to flash the thing with new code. So I got him to solder on an ISP header and start drawing patterns on grids of graph paper while I got the toolchain working and updated some of the 2000’s-era code so it would compile.

There’s absolutely no simpler way to get your head around binary than to light up a row of LEDs, and transcribing the columns of his fresh pixel art into ones and zeros was just the motivation he needed. We converted the first couple rows into their decimal equivalents, but it was getting close to dinner time, so we cheesed out with the modern 0b00110100 format for the rest. This all happened quite organically; “unintentional parenting” is what we call it.

While we were eating dinner, I got the strangest sense of deja vu. When I was around ten or eleven, my own father told me about the custom fonts for the Okidata 24-pin printer at his lab, because he needed me out of his hair for a while, and I set out to encode all of the Hobbit runes for it. (No comment.) He must have handed me a piece of graph paper explained how it goes, and we had a working rune font by evening. That was probably how I learned about binary as well.

Want to teach someone binary? Give them a persistence of vision toy, or a dot-matrix printer.

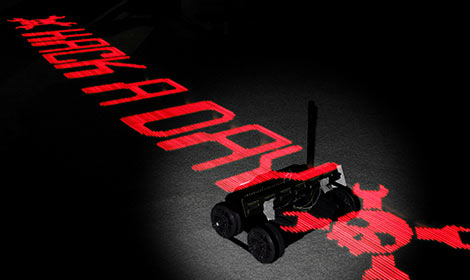
(Art is from a much older POV project: Trakr POV — a hack of an old kids’ toy to make a long-exposure POV image. But it looks cool, and it gets the point across.)

Gentoo Linux, Now A Bit Less For The 1337

Among users of Linux distributions there’s a curious one-upmanship, depending on how esoteric or hardcore  your distro is. Ubuntu users have little shame, while at the other end if you followed Linux From Scratch or better still hand-compiled the code and carved it onto the raw silicon with a tiny chisel, you’re at the top of the tree*. Jokes aside though, it’s fair to say that if you were running the Gentoo distribution you were something of a hardcore user, because its source-only nature meant that everything had to be compiled to your liking. We’re using the past tense here though, because in a surprise announcement, the distro has revealed that it will henceforth also be available as a set of precompiled binary packages.

There may be readers with long and flowing neckbeards who will decry this moment as the Beginning of the End, but while it does signal a major departure for the distro if it means that more people are spurred to take their Linux usage further and experiment with Gentoo, this can never be a bad thing. Gentoo has been on the list for a future Jenny’s Daily Drivers OS review piece, and while we’re probably going to stick with source-only when we do it, it’s undeniable that there will remain a temptation to simply download the binaries.

Meanwhile this has been written on a machine running Manjaro, or Arch-for-cowards as we like to call it, something that maybe confers middle-ranking bragging rights. Read a personal tale of taking off those Linux training wheels.

* Used a magnifying glass? You’re just not cutting it!

Art of 3D printer in the middle of printing a Hackaday Jolly Wrencher logo

G-code Goes Binary With Proposed New Format

G-code is effective, easily edited, and nearly ubiquitous when it comes to anything CNC. The format has many strengths, but space efficiency isn’t one of them. In fact, when it comes to 3D printing in particular file sizes can get awfully large. Partly to address this, Prusa have proposed a new .bgcode binary G-code format. You can read the specification of the new (and optional) format here.

The newest version of PrusaSlicer has support for .bgcode, and a utility to convert ASCII G-code to binary (and back) is in the File menu. Want to code an interface of your own? The libbgcode repository provides everything needed to flip .gcode to .bgcode (with a huge file size savings in the process) and vice versa in a way that preserves all aspects of the data. Need to hand-edit a binary G-code file? Convert it to ASCII G-code, make your changes, then flip it right back.

Prusa are not the only ones to notice that the space inefficiency of the G-code file format is not ideal in all situations. Heatshrink and MeatPack are two other solutions in this space with their own strong points. Handily, the command-line tool in libgcode can optionally apply Heatshrink compression or MeatPack encoding in the conversion process.

In a way, G-code is the assembly language of 3D printers. G-code files are normally created when slicing software processes a 3D model, but there are some interesting tricks to be done when G-code is created directly.

Building Up Unicode Characters One Bit At A Time

The range of characters that can be represented by Unicode is truly bewildering. If there’s a symbol that was ever used to represent a sound or a concept anywhere in the world, chances are pretty good that you can find it somewhere in Unicode. But can many of us recall the proper keyboard calisthenics needed to call forth a particular character at will? Probably not, which is where this Unicode binary input terminal may offer some relief.

“Surely they can’t be suggesting that entering Unicode characters as a sequence of bytes using toggle switches is somehow easier than looking up the numpad shortcut?” we hear you cry. No, but we suspect that’s hardly [Stephen Holdaway]’s intention with this build. Rather, it seems geared specifically at making the process of keying in Unicode harder, but cooler; after all, it was originally his intention to enter this in last year’s Odd Inputs and Peculiar Peripherals contest. [Stephen] didn’t feel it was quite ready at the time, but now we’ve got a chance to give this project a once-over.

The idea is simple: a bank of eight toggle switches (with LEDs, of course) is used to compose the desired UTF-8 character, which is made up of one to four bytes. Each byte is added to a buffer with a separate “shift/clear” momentary toggle, and eventually sent out over USB with a flick of the “send” toggle. [Stephen] thoughtfully included a tiny LCD screen to keep track of the character being composed, so you know what you’re sending down the line. Behind the handsome brushed aluminum panel, a Pi Pico runs the show, drawing glyphs from an SD card containing 200 MB of True Type Font files.

At the end of the day, it’s tempting to look at this as an attractive but essentially useless project. We beg to differ, though — there’s a lot to learn about Unicode, and [Stephen] certainly knocked that off his bucket list with this build. There’s also something wonderfully tactile about this interface, and we’d imagine that composing each codepoint is pretty illustrative of how UTF-8 is organized. Sounds like an all-around win to us.

Remote Code Execution On An Oscilloscope

There are a huge number of products available in the modern world that come with network connectivity now, when perhaps they might be better off with out it. Kitchen appliances like refrigerators are the classic example, but things like lightbulbs, toys, thermostats, and door locks can all be found with some sort of Internet connectivity. Perhaps for the worse, too, if the security of these devices isn’t taken seriously, as they can all be vectors for attacks. Even things like this Rigol oscilloscope and its companion web app can be targets.

The vulnerability for this oscilloscope starts with an analysis of the firmware, which includes the web control application. To prevent potentially bricking a real oscilloscope, this firmware was emulated using QEMU. The vulnerability exists in the part of the code which involves changing the password, where an attacker can bypass authentication by injecting commands into the password fields. In the end, the only thing that needs to be done to gain arbitrary code execution on the oscilloscope is to issue a curl command directed at the oscilloscope.

In the end, [Maunel] suggests not connecting this oscilloscope to the Internet at all. He has informed the producer about it but as of this writing there has not been a resolution. It does, however, demonstrate the vulnerabilities that can be present in network-connected devices where the developers of the software haven’t gone to the lengths required to properly secure them for use with the modern Internet. Even things not connected to a traditional Internet connection can be targets for attacks.