Repurposing Server PSU For Your Charging Needs

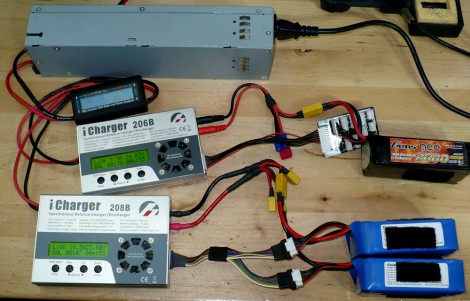
That grey box at the top of the photo is a modular power supply unit for a rack-mounted server system. [Sebastian] decided to repurpose it as a charging source for his RC batteries. He chose this HP DPS-600PB because of its power rating, efficiency, and you can get them at a reasonable price.

This is an active power factor corrected (APFC) PSU, which he says draws 40% less current than the non-APFC variety. Since he sometimes charges batteries in the field from a generator this is a big plus. But a bit of modification is necessary before it can be used as a source.

Since this is a rack device it has a set of connectors on the back. For power there are spade connectors which mate with a fin on the rack. He soldered positive and negative leads between the spades to interface with the battery chargers. The PSU won’t fire up if it’s not in the rack, so some jumper wires also need to be added connecting three of the interface pins.

With his modding all worked out he went on to use two PSUs for a 24V source, housing them to a nice carrying case while at it.

Bench Supply Built In A Power Strip

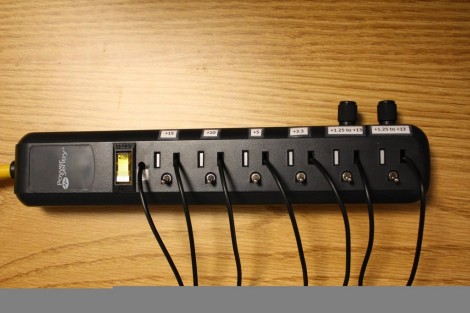
Back in his college days [Print_Screen] grew tired of always building a power supply on his breadboard. To make prototyping quicker he came up with the bench supply that is build into a power strip. This one is using linear regulators for power, and create much less noise on the lines than a supply made from a switch-mode PSU.

First thing’s first, he needed to step down from mains voltage and rectify the AC into DC. He gutted the smallest adapter he could find and managed to fit it into the gutted power strip. It puts out 15V which will work perfectly for the regulators he’s chosen. Each one gets its own slot where an outlet is on the case. The ground hole has been plugged by a toggle switch which routes power to the free-formed regulator/capacitors/heat sink modules. There is a slot for 15V (coming directly off of the converter), 10V, 5V, 3.3V, and two variable regulators which are controlled by the knobs above the outlet. We’ve never seen anything like this and find it most excellent!

[Thanks OverFlow636 via Reddit]

Building A Bench Supply Without Altering The ATX Psu

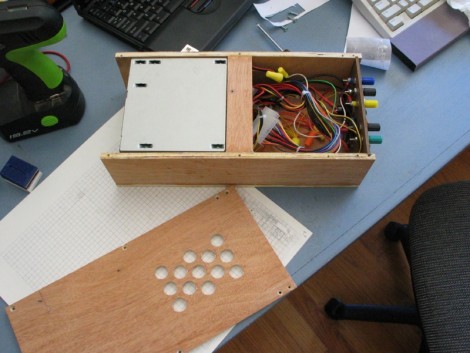
[FozzTexx] has been using a bench supply he made from an AT PSU for years. He put a lot of work into that one, removing unnecessary wires, mounting banana plug jacks on the metal case, and adding an on/off switch and labels. But if it ever dies on him it will be a major pain to do all that work again in order to replace it. When he set out to build another bench supply from an ATX PSU he decided to do so without altering the PSU. This way he can easily swap it out for a different one if he ever needs to.

The hardest part of the hack was sourcing connectors. But with the parts in hand he’s able to just plug the faceplate into the stock connector. This gives him access to all of the voltages, and provides an on/off switch and indicator light. He might also want to add the option of resetting the unit if the over-current protection kicks in.

Another Take On Using ‘dead’ Batteries

Here’s another circuit that can be used to squeeze the remaining potential from supposedly dead batteries. Just like the AASaver, we see this as a useful prototyping tool, providing juice for a breadboard even though it’s not reliable enough for long-term use (the batteries are just about through after all).

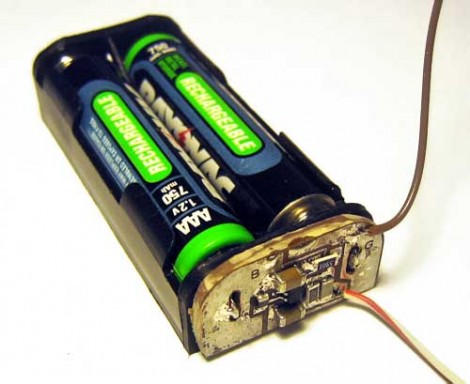
First off, the image above shows rechargeables instead of alkalines. We don’t recommend this as the circuit has no cutoff feature and the 0.7V input for the boost converter surely is below the recommended low-voltage limit for those cells. But that aside, we like the diminutive board which solders onto the end of a battery pack. It uses an SC120SKTRT which is a variable boost regulator capable of outputting 1.8-5V depending on resistor choices. You can leave the resistors off and it will default to 3.3V, set the output explicitly, or roll in some potentiometers and use your multimeter to tune the output.

This regulator costs more than the MCP1640 used in the AASaver, but it appears to use less passive components making for a smaller footprint. At a total of $3.50 plus the PCB (which will be a snap to etch at home) this is another great option to top off your next parts order.

[Thanks Uwe]

Hackaday Links: February 19, 2012

Industrial control robot band

Remember Animusic, a series of videos featuring computer-generated, highly  implausible instruments? Intel made their own to demo their industrial control tech. From the looks of things, we’re putting money on a bunch of MIDI triggers bolted onto plastic panels; now it’s slightly less impressive and the reason we’re looking at xylophones on eBay right now.

Quadrocopters everywhere

[Jouni] sent in his quadrocopter build that was inspired by the Japanese spherebot we caught earlier this year. [Jouni] used a carbon fiber frame to  prevent the copter from bumping into things. Other things bumping into it are another story entirely.

This is my gun. There are none like it, because I printed it.

[Landru] printed a Nerf gun on his 3D printer. The only non-printed parts are a few screws, springs and an o-ring. [Landru] promised to put the files up on Thingiverse, but we can’t find them.

Media center auto power on circuit

[Dizzy]’s media server doesn’t have an ‘AC power loss reset’ feature in its BIOS, and he can’t jumpstart the thing by shorting pins on the ATX power socket. He came up with a very clean, minimal solution to starting his server after a power loss. Nice job, [Diz].

Better run, better run, outrun my soldering gun

Alright, circuit board shoes probably aren’t that comfortable, or useful, but we did find a like to the works of [Steven Rodrig], an artist who works in the medium of PCBs. The recycled circuits don’t do anything, and that’s giving us a few ideas on how to improve a digital banana.

Running The Numbers On A Cheap PSU

[Mike] picked up a cheap USB hub for four pounds (about $6) including delivery. He wanted to know how it’s possible to get quality electronics for that price, and as you may have guessed it’s not possible. He cracked open the power supply that shipped with the hub and hooked it up for some testing.

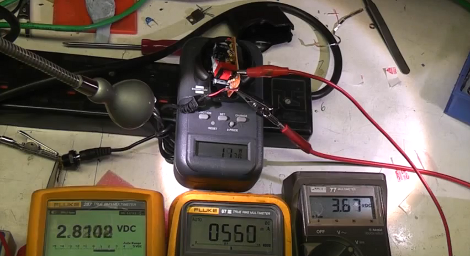
The wall wart has a sticker on it that claims a rating of 1 Amp at 5 volts. It’s pretty easy to see that this hardware cannot meet that spec just by looking at the circuit board. It’s a low-end single sided board that has some really disappointing isolation between the mains and regulated side of the circuit. As far as we can tell there’s really no reliable regulation circuit on the low side of the transformer, and the tests that [Mike] runs in the clip after the break show this. From left to right in the picture above you can see voltage at the hub-side of the power cord, current on the load, and voltage leaving the circuit board. At just 560 mA the voltage the USB hub is receiving has fallen below 3 volts!

The link to this project was sent in by [Paul] after reading about that fake Canon camera PSU. We love this kind of stuff so keep the tips coming as you find them!

Continue reading “Running The Numbers On A Cheap PSU”

Designing And Building A Bench Supply

[Scott’s] been digging around the back issues of the Internet to find this project. He blew the dust off and sent us a link to an article that traverses the design and build process of a bench power supply.

[Guido Socher] does an excellent job of presenting his bench supply project. So many others show of the final product, but he has gone out of his way to make sure we understand the design principles that went into it. He starts off by talking about the simplest possible supply design: a transistor and Zener diode which generates a reference voltage. He goes on to discuss the problems with this simplified circuit and how to address them, covering the gotchas that pop up at each step in the process.

Once he designed the circuit and laid out some boards he began building an enclosure. We love his tip about using a stick pin and an unpopulated through-hole PCB to mark button locations on the front bezel of the case. The final design is shown above, and includes a laptop brick to translate mains power into a 24V 3A DC feed for his custom circuitry.