Home Network Organization Gets Out Of Hand

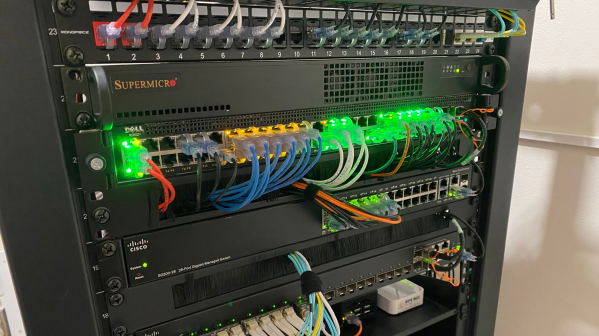
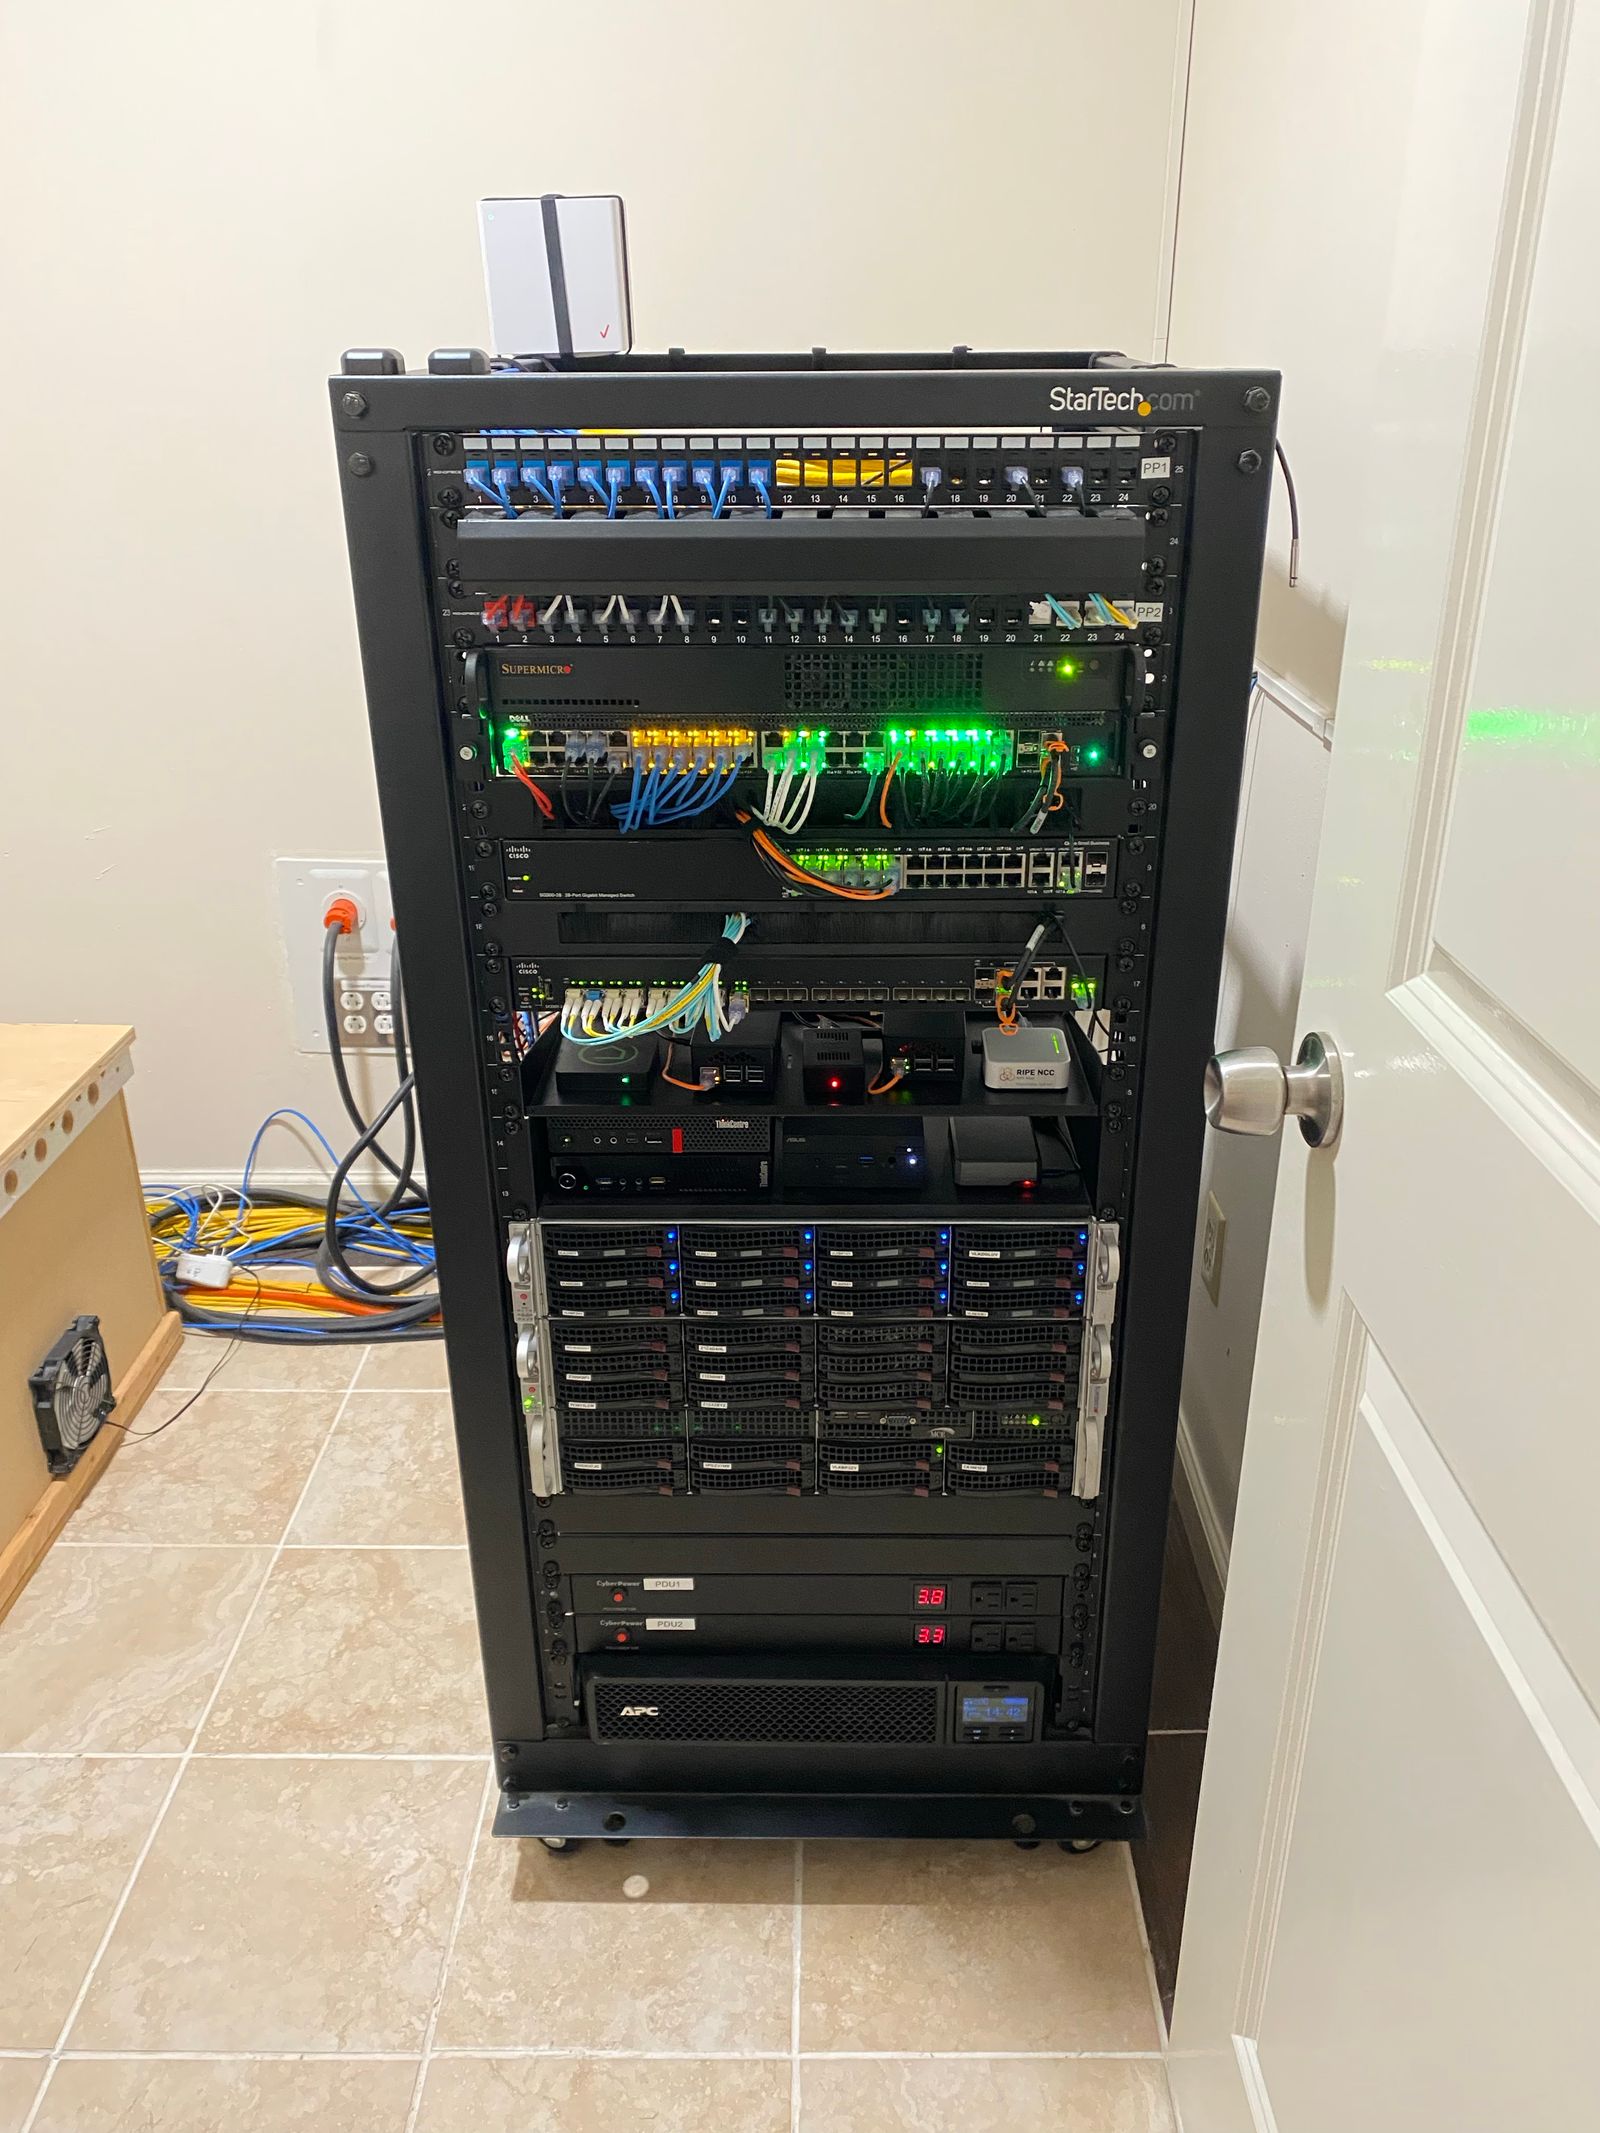
[SpookyGhost] has a big home network, and has taken cable management and server organization to the extreme. He has written about individual components before, but this blog post brings it all together and reviews the entire system. The networking gear is installed in a closet and mounted in a 25U tall 19-inch rack. From top to bottom, here is a brief list of the gear:

Full View of Network Equipment Rack
  • Keystone patch panels
  • pfSense Firewall / Router
  • Two Cisco Ethernet switches
  • Redundant internet connections
  • Shelf of numerous servers
  • RAID-Z2, 12 each 8 TB SCSI, media storage
  • NAS RAID, 6 ea 4 TB SAS, 2 ea 800 GB SSD
  • Video Management System, 48 TB storage
  • UPS and power distribution units

Most of the Ethernet uses 10GBASE-T and Cat6 cabling and connectors, with some interconnects use fiber optical cable and LC connectors. Unsurprisingly, as this setup grew and grew, [spooky] had to pipe in air-conditioning to the closet.

This is a serious installation, but there are plenty of good ideas for folks with less ambitious networking goals and/or requirements. We liked the swappable Keystone jacks in the patch panels, and the cable pass-through panel with a dense curtain of rubber fringe to keep things looking tidy. If you have any ideas to share on network equipment and cable management, let us know in the comments.

The LackRack Enterprise Edition in Revspace, Netherlands

Rackmount Hardware Placement Issues? IKEA LACK To The Rescue!

[hackbyte] reminds us about a classic hack that, even though we’ve seen floating around for over a decade, has somehow never quite graced our pages before. Many of us keep small home labs and even, at times, collections of servers that we’d be comfortable be calling mini-datacenters. However, if you use the ever-abundant 19″ switches, servers and other hardware, keeping these mounted and out of the way can be a thorny experience. Which leads us to, undoubtedly, unintentional – but exceptionally handy – compatibility between IKEA LACK table series and 19″ rackmount hardware.

The half-humorous half-informative wiki page on Eth0Wiki talks about this idea in depth, providing a myriad of examples and linking to pages of other hackerspaces and entities who implemented this idea and improved upon it. These tables look nice and fit anywhere, stack neatly when not in use, and you can put a bottle of Club-Mate on top. Aka, they’re the exact opposite of cheap clunky cabinets actually designed for rackmount you can buy, and cost a fraction of the price. What’s not to love?

You can buy a whole lot of cheap hardware in 19″, and arguably, that’s where you can get the best hardware for your dollar. Many a hackerspace has used these tables for makeshift infrastructure, permanent in all but intent. So, in case some of us missed the memo, now you are aware of yet another, underappreciated solution for mounting all these servers we get for cheap when yet another company replaces its equipment – or undergoes a liquidation. If LackRack hasn’t been on your radar – what have you been using for housing your rackmount hardware collection?

Wondering what to do with an old server? Building a powerful workstation is definitely on the list. Alternatively, you could discard the internals and stuff it full of Raspberry Pi!

A HP Proliant 360 g6 server with its lid taken off, showing separate green wires coming out of every fan, enabling Dave's modification

Domesticating Old Server Hardware In The Age Of Shortages

Our own [Dave Rowntree] started running into bottlenecks when doing paid work involving simulations of undisclosed kind, and resolved to get a separate computer for that. Looking for budget-friendly high-performance computers is a disappointing task nowadays, thus, it was time for a ten-year-old HP Proliant 380-g6 to come out of Dave’s storage rack. This Proliant server is a piece of impressive hardware designed to run 24/7, with a dual CPU option, eighteen RAM slots, and hardware RAID for HDDs; old enough that replacement and upgrade parts are cheap, but new enough that it’s a suitable workhorse for [Dave]’s needs!

After justifying some peculiar choices like using dual low-power GPUs, only populating twelve out of eighteen RAM slots, and picking Windows over Linux, [Dave] describes some hardware mods needed to make this server serve well. First, a proprietary hardware RAID controller backup battery had to be replaced with a regular NiMH battery pack. A bigger problem was that the server was unusually loud. Turns out, the dual GPUs confused the board management controller too much. Someone wrote a modded firmware to fix this issue, but that firmware had a brick risk [Dave] didn’t want to take. End result? [Dave] designed and modded an Arduino-powered PWM controller into the server, complete with watchdog functionality – to keep the overheating scenario risks low. Explanations and code for all of that can be found in the blog post, well worth a read for the insights alone.

If you need a piece of powerful hardware next to your desk and got graced with an used server, this write-up will teach you about the kinds of problems to look out for. We don’t often cover server hacks – the typical servers we see in hacker online spaces are full of Raspberry Pi boards, and it’s refreshing to see actual server hardware get a new lease on life. This server won’t ever need a KVM crash-cart, but if you decide to run yours headless, might as well build a crash-cart out of a dead laptop while you’re at it. And if you decide that running an old server would cost more money in electricity bills than buying new hardware, fair – but don’t forget to repurpose it’s PSUs before recycling the rest!

Raspberry Pi Server Cluster In 1U Rack-Mount Case

[Paul Brown] wants to take advantage of off-site server colocation services. But the providers within [Paul]’s region typically place a limit of 1A @ 120V on each server. Rather than search out commercial low-power solutions, [Paul] embraced the hacker spirit and built his own server from five Raspberry Pi 4b single board computers.

The task involves a little bit more than just mounting five Pi4s in a chassis and calling it done. There is an Ethernet switch connecting all the modules to the network, and each Pi has a comparatively bulky SSD drive + enclosure attached. By far the most annoying part of the assembly is the power supply and distribution cabling, which is further complicated by remote controlled power switching relays (one of the computers is dedicated to power management and can shut the other four modules on and off).

Even if you’re not planning on building your own server, check out the thoroughly documented assembly process and parts list — we particularly liked the USB connector to screw terminal breakout connector that he’s using for power distribution. For all the detailed information, assembly instructions and photos, we think a top-level block diagram / interconnection drawing would be very helpful for anyone trying to understand or replicate this project.

There are a lot of connections in this box, and the final result has a messy look-and-feel. But in fairness to [Paul]’s craftsmanship, there aren’t many other ways to hook everything together given the Raspberry Pi form-factor. Maybe a large and costly PCB or using CM4 modules instead of Raspberry Pi boards could help with cable management? In the end, [Paul] reckons he shelled out about $800 for this unit. He compares this expense with some commercial options in his writeup, which shows there are some cheaper and more powerful solutions. But while it may be cheaper to buy, we understand that strong urge to roll your own.

We’ve written about many Pi cluster projects in the past, including this one which contains a whopping 750 Raspberry Pis. Have you ever used a colocation service, and if so, did you use a DIY or an off-the-shelf server?