Custom Monitor For Pi-Powered Commodore 64

Classic games never seem to have gone out of style and with the emulation powers of the Raspberry Pi, there seems to be no end of projects folks have been coming up with. [Chris Mills] project is a great looking monitor to get his Commodore 64 fix by combining the retro looks of a home-made 64-style monitor with the Raspberry Pi.

[Chris] is only interested in Commodore 64 emulation, at least with this project, and wanted something that would fit on a desk without taking up too much room. An eight inch LCD security monitor fit the bill perfectly. [Chris] ended up building a wooden enclosure for the monitor to give it that Commodore look. The monitor, power supply and cable connections fit inside along with speakers; each of these having their inputs on the back. A fan vents in the back as well and the Pi sits outside running the Combian 64 emulation software.

[Chris] has put up some galleries of build pics. The logo from the old Commodore logo is a nice touch. Read over the Hackaday site and you could build your own Commodore 64, or use the Commodore 64 itself to house the Raspberry Pi if you wanted.


Raspberry Pi Streams Music Using Only The Default Linux Tools

Getting a  home music streaming system off the ground is typically a straightforward task. Using Apple devices with Airplay makes this task trivial, but if you’re a computing purist like [Connor] who runs a Linux machine and wants to keep it light on extra packages, the task gets complicated quickly. His goal is to bring audio streaming to all Linux platforms without the need to install a lot of extra software. This approach is friendly to light-footprint devices like the Raspberry Pi that he used in his proof of concept.

[Connor] created a set of scripts which allow streaming from any UNIX (or UNIX-like) machines, using only dependencies that a typical OS install would already have. His Raspberry Pi is the base station and streams to his laptop, but he notes that this will work between virtually any UNIX or Linux machine. The only limitation is what FFmpeg can or can’t play.

We definitely can appreciate a principled approach to software and its use, although it does seem that most people don’t have this issue at the forefront of their minds. This results in a lot of software that is bulky, making it difficult to maintain, use, or even know what it does, and also makes it harder for those of us that don’t want to use that type of software to find working solutions to other problems. It’s noble that [Connor] was able to create something without sacrificing any principles.

Auto-Trickler Gently Doles Out Powder To Assist Reloading

Do you even trickle?

[Eric] does, and like everything else about reloading, trickling is serious business. Getting an exact charge of powder to add to a cartridge is not a simple task, and very tedious when done manually. This smartphone-controlled auto-trickler is intended to make the job easier, safer, and more precise.

Reloading ammunition is a great way for shooters to save money and recycle the brass casings that pile up at the end of a long day at the range. It can be a fairly simple process of cleaning the casings, replacing the spent primers, adding the correct powder charge, and seating a new bullet. It’s all pretty straightforward, but the devil is in the details, especially with the powder charge. A little too much can be a big problem, so tricklers were invented to allow the reloader to sneak up on the proper charge. [Eric]’s auto-trickler interfaces to a digital powder scale and uses a standard cell phone vibration motor to gently coax single kernels of powder from a hopper until the proper charge has accumulated. It’s easier to understand by watching the video below.

The hardware behind the trickler is pretty standard — just a Raspberry Pi Zero to talk to the smartphone UI via Bluetooth, and to monitor and control the scale via USB. [Eric] has made all the code open source so that anyone can build their own auto-trickler, which we applaud; he did the same thing with his rifle-mounted accelerometer. This project might have applications far beyond reloading where precision dispensing is required.

Continue reading “Auto-Trickler Gently Doles Out Powder To Assist Reloading”

A Raspberry Pi Is A Hardware Hacker’s Swiss Army Knife

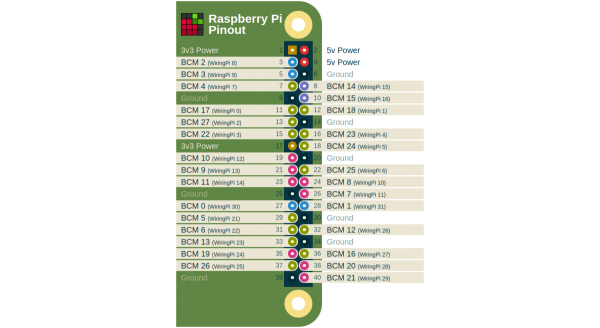
By now most of us have used a Raspberry Pi at some level or another. As a headless server it’s a great tool because of its price point, and as an interface to the outside world the GPIO pins are incredibly easy to access with a simple Python script. For anyone looking for guidance on using this device at a higher level, though, [Arun] recently created a how-to for using some of the Pi’s available communications protocols.

Intended to be a do-everything “poor man’s hardware hacking tool” as [Arun] claims, his instruction manual details all the ways that a Raspberry Pi can communicate with other devices using SPI and I2C, two of the most common methods of interacting with other hardware beyond simple relays. If you need to go deeper, the Pi can also be used as a full JTAG interface or SWD programmer for ARM chips. Naturally, UART serial is baked in. What more do you need?

As either a tool to keep in your toolbox for all the times you need to communicate with various pieces of hardware, or as a primer for understanding more intricate ways of using a Raspberry Pi to communicate with things like sensors or other computers, this is a great write-up. We also have more information about SPI if you’re curious as to how the protocol works.

Thanks to [Adrian] for the tip!

OpenGL Shaders And An LED Cube

Back in February at the Hacker Hotel camp in the Netherlands, among the many pieces of work around the venue was a rather attractive LED cube. Very pretty, but LED cubes have been done many times before.

If a casual attendee had taken the time to ask though, they might have found something a little more interesting, for while the cube in question might have had the same hardware as the others it certainy didn’t have the same software. [Polyfloyd] had equipped his LED cube with OpenGL shaders to map arbitrary images to the cube’s pixels in 3D space.

Hardware-wise it’s the same collection of AliExpress LED panels and Raspberry Pi driver board that the other cubes use, in this case mounted on a custom laser-cut frame. Driver software comes from an open-source library round which he’s put a wrapper allowing input through a UNIX pipe. This can take the RGB output of an OpenGL shader, of which he has created both 2D to 3D and spherical projection versions. The must-see demo is a global map of light pollution, and the result is a rather impressive piece of work.

If LED cubes are your thing, don’t forget this recent Hackaday Prize entry.

Need A Small Keyboard? Build Your Own!

If you want keyboards, we can get you keyboards. If you want a small keyboard, you might be out of luck. Unless you’re hacking Blackberry keyboards or futzing around with tiny tact switches, there’s no good solution to small, thin, customization keyboards. There’s one option though: silicone keyboards. No one’s done it yet, so I figured I might as well.

Unfortunately, there is no readily available information on the design, construction, or manufacture of custom silicone keypads. There is a little documentation out there, but every factory that does this seems to have copy and pasted the information from each other. Asking a company in China about how to do it is a game of Chinese Whispers. Despite this, I managed to build a custom silicone keypad, and now I’m sharing this information on how to do it with you.

Continue reading “Need A Small Keyboard? Build Your Own!”

Vintage Slide Viewers Make Beautiful Retro Emulators

35mm still photography is still hanging on out in the wild, with its hardcore fans ensuring it never quite dies out despite the onward march of digital imaging. Slides are an even more obsolete technology, forgotten long ago when the quality of color negative films improved. The related paraphernalia from the era of the photographic slide continues to clutter up attics and garages the world over. [Martin Burlus] was in possession of some retro slide viewers, and found they made an excellent basis for a RetroPie build.

The build relies on stock standard fundamentals – a Pi Zero runs the show, combined with a USB hub and a power supply. [Martin] then chose to build this all inside the case of the slide viewer, combined with a 2.8″ PiTFT display. This neatly slots directly on to the Pi Zero’s 40-pin header, and comes complete with a touch screen. It’s the perfect size to slide into most slide viewers, though some models required removal of the tact buttons.

The slide viewers make for a charming enclosure, and the classic 1970s optics make for pleasant viewing. Throwing a modern display behind a vintage lens is a great way to give a project a more classic look and feel. One thing’s for sure – we’ll be keeping an eye out for a slide viewer of our own next time we’re passing through the local junk shops.