Put Those IPad Displays To Work With This EDP Adapter

Regardless of how you might feel about Apple and the ecosystem they’ve cultured over the years, you’ve got to give them some credit in the hardware department. Their “Retina” displays are a perfect example; when they brought the 2,048 by 1,536 panel to the iPad 3, the technology instantly became the envy of every tablet owner. But what if you want to use one of these gorgeous screens outside of Apple’s walled garden?
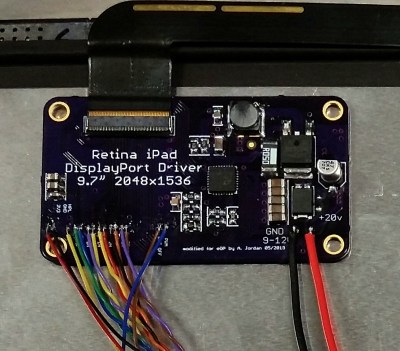
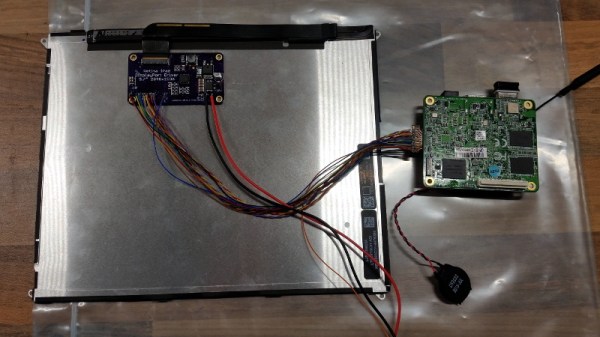
As it turns out, there are a number of options out there to use these screens on other devices, but [Arthur Jordan] wasn’t quite happy with any of them. So he did what any self respecting hacker would do, and built his own adapter for iPad 3 and 4 screens. Not that he did it completely in the dark; his design is based on the open source Adafruit Qualia driver, which in turn was based on research done by [Mike’s Mods]. A perfect example of the open source community at work.

The resulting board allows you to connect the Retina display from the iPad 3 or 4 to any device that features Embedded DisplayPort (eDP). Rather than put a dedicated port on his board, [Arthur] just left bare pads where you can solder up whatever interface method your particular gadget might use. In his case, he wanted to hook it up to an x86 UP Core SBC, so he even came up with a seperate adapter that breaks out that board’s diminutive display connector to something that can be soldered by hand.

So what’s different between the board [Arthur] developed and Adafruit’s Qualia? Primarily its been made smaller by deleting the DisplayPort connectors in favor of those bare pads, but he’s also dumped the backlight control hardware and 3.3V regulator that in his experience hasn’t been necessary with the eDP devices he’s worked with. So if space is a concern in your build, this version might be what you’re after.

We’ve seen other Retina display adapters in the past, and of course the iPad isn’t the only high-end device that’s had a screen good enough to reuse on its own. The lesson here is that if you put a must-have feature in your product, don’t be surprised when some hacker comes along and figures out how to liberate it for their own purposes.

Excruciating Quest Turns Chromebook Pixel IPS Into Exquisite Extra Monitor

[Shen] wanted an extra monitor at his desk, but not just any monitor. He wanted something particularly special and unquestionably refined. Like any super-power-possessing engineer he set out to scratch his hacking itch and was sucked into a multi-year extravaganza. For the love of everything hardware we’re glad this one came in on the weekend. If we had spent all that time drooling during a weekday we’d be so far behind.

The final product is a desktop monitor on an articulated arm. It features a Chromebook Pixel’s IPS display in a custom-crafted case everything. The journey started out with two different LCD units, the first from a Dell L502x replacement display using a generic LVDS board. The results were meh; washed out colors and obvious pixellation, with display adjustments that left [Shen] with a grimace on his mug. Installment two was an iPad Retina display. This iteration required spinning his own boards (resulting in [Shen’s] discovery of OSH Park). Alas, 9.7″ was too small coupled with short-cable-requirements making this version a no-go.

chromebook-pixel-ips-driver-boardAnd so we arrive at the meat and potatoes of this one. [Shen] identified the IPS LCD display on Google’s first Chromebook Pixel laptop as the object of his desire. The hack takes him through sourcing custom display cables, spinning rev after rev of his own board, and following Alice down the rabbit hole of mechanical design. Nothing marginal is good enough for [Shen], we discovered this with his project to get real audio out of a computer. He grinds away at the driver board, the case design, the control presentation, and everything else in the project until perfection was reached. This work of art will stand the test of time as a life fixture and not just an unappreciated workhorse.

This one is not to me missed. Head over to [Shen’s] project entry on Hackaday.io (don’t forget to give him a skull for this) and his blog linked at the top. We need to celebrate not only the people who can pull off such amazing work. But also the ones who do such a great job of sharing the story both for our enjoyment, and to inspire us.

Converting The Wacom Intuos Into A Cintiq

wacom

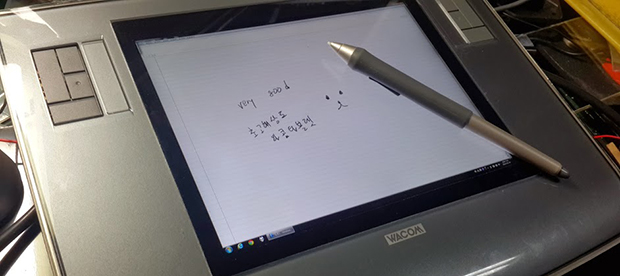
Wacom, purveyors of fine pen tablets for digital artists, basically have two product lines of pen tablets. The first, Intuos, is a great pen tablet that give an artist the ability to turn a computer into a virtual dead tree notebook. The second product line, the Cintiq, takes the same technology and adds an LCD to the mix, effectively turning a drawing tablet into a second display. [Bumhee] wanted a Cintiq, but didn’t want to pay the Cintiq price, leading him to install a display in his old Intuos tablet. It’s an amazingly simple build, making us think we’ll be seeing a few derivatives of his work in the future.

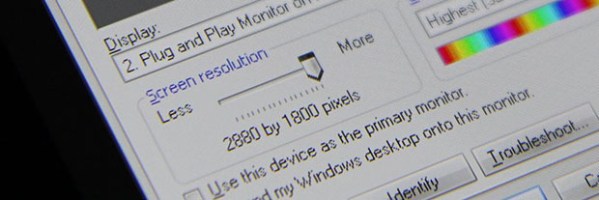
The display [Bumhee] used for this modification is a Retina display from an iPad. With the right adapter, you can easily connect one of these displays to a computer, giving you a very thin 2048×1536 9.7″ display. The initial tests to see if this mod would work on his tablet – removing the metal shield on the display, placing it on the tablet, and drawing – were a success, giving [Bumhee] the confidence to irreparably modify his tablet.

From there, the modification was a simple matter of cutting up the enclosure of the tablet, installing the display with a few screws, and installing a piece of glass over the display. Very easy, and it’s just about the only way you’re going to get a pen tablet with a small, high-resolution display for less than a thousand dollars.

Thanks [David] for sending this one in.

An Open Source IPad Display Adapter

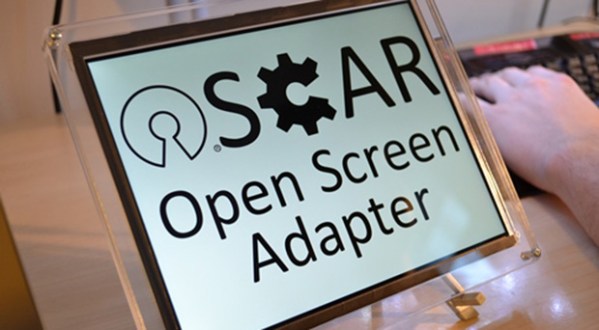
Those fancy 2048×1536 pixel resolution displays found in the iPad 3 and 4 can be used for much more than high def Candy Crush and Netflix viewing. [Freddie] over in Southampton, UK built his own adapter to connect these high-resolution LCD panels to anything with a DisplayPort connection. It’s called OSCAR, and it’s the open source way to add a whole lot of pixels in a second (or third, or fourth….) monitor.

The LCD panels found in the iPad 3 and 4 don’t use the usual LVDS connection found in just about every other LCD panel ever made. It uses an extension of the DisplayPort protocol, meaning any graphics card with one of these ports already does the heavy lifting for this panel. The only other thing that’s needed is an adapter to control the power and backlight, which is easily handled by an ATMega32U4. This makes OSCAR Arduino compatible, making it easy to add sensors and USB playthings.

OSCAR is available on Kickstarter for £65 (~$100 USD) for the board itself. Adding to that, you’ll need to grab an iPad retina display through the usual channels for about $65. Not exactly cheap, but try finding another better-than-1080p display for that price.

MacBook Pro Retina Display With A Normal Computer

If you’ve seen one of the fancy, expensive MacBook Pro laptops with a Retina display, you’ll know how awesome having that much resolution actually is. This incredible resolution comes with a price, though: the MBP with a Retina display is about $500 more expensive than the normal resolution MPB model, and it’s very difficult to find a laptop of comparable resolution without cries of fanboyism being heard.

[Daniel] over at Rozsnyo came up with a neat solution that connects one of these fancy 15-inch Retina displays to just about any computer. The build is the beginning of a product that works just like the previous DisplayPort adapter for the iPad retina display, but with the possibility of a few added features such as HDMI input and use of the internal webcam and WiFi antennas.

This build isn’t really a finished product anyone can buy and plug into a replacement Retina display just yet. Even if it were, it’s extraordinarily difficult to find a replacement display for the high-end MacBook for under the price of a really good monitor, anyway. In a few years, though, when the old, busted Retina laptops are traded up for a new, shiny model, though, we’ll be the first to try out this mod and get some serious desktop space.

Connect A Retina Display To A Regular Computer

You don’t have to search very long before you find someone raving about the Retina display used in Apple iPads. We’re not going to disagree. These 9.7″ panels pack in a whopping 2048×1536 resolution and the color is fantastic. But we were surprised to hear you can get one of these for a meager $55. That’s how [Andrzej] sourced the part when he set out to connect a Retina display to a regular PC.

It turns out this isn’t all that hard. The display uses the eDisplayPort protocol. This is an extension of DisplayPort which is an alternative to LVDS that is gaining a foothold in the industry. An external DisplayPort adapter can already be found on higher-end laptops, which means this should be a snap to use as an external display if the signals can be routed correctly.

To do this, [Andrzej] figured out how to order the PCB connector for the panel’s ribbon cable. He then etched and populated his own board which serves as an adapter for a DisplayPort cable. It even powers the panel, but an external 20V supply is necessary for the backlight.

[Thanks Adam]