The Best Photo Booth For Really Small Stuff

tank

[Doog] builds plastic models, and like anyone who makes really small stuff, he needed a good photo booth to show off his wares and techniques. He was working with the very common ‘poster board and work light’ setup we’ve all put together, but after photoshopping seam lines one too many times, he decided to upgrade his booth to something a little better.

The new setup consists of an aluminum frame with a 40×80 inch sheet of translucent plexiglass forming the bottom and backdrop of the booth. Two lights in diffuser bags illuminate the subject from the top, while the old worklights are attached to the bottom of the table frame to light the subject from beneath.

Compared to the ‘poster board and work light’ technique of the past, [Doog]’s new photo booth is absolutely incredible for taking pictures of very small things. This model of a Spitfire looks like it’s floating and this snap of a Thunderbolt is good enough to grace magazine covers.

Of course this photobooth isn’t just limited to models, so if you’re looking at taking some pictures of hand-soldered BGA circuits in the future, you may want to think about upgrading your studio setup.

MacBook Pro Retina Display With A Normal Computer

If you’ve seen one of the fancy, expensive MacBook Pro laptops with a Retina display, you’ll know how awesome having that much resolution actually is. This incredible resolution comes with a price, though: the MBP with a Retina display is about $500 more expensive than the normal resolution MPB model, and it’s very difficult to find a laptop of comparable resolution without cries of fanboyism being heard.

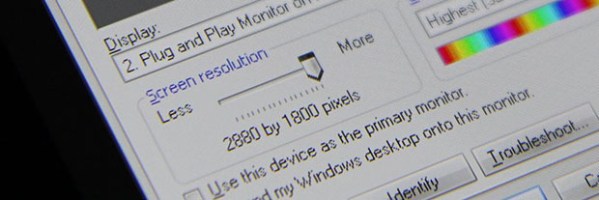
[Daniel] over at Rozsnyo came up with a neat solution that connects one of these fancy 15-inch Retina displays to just about any computer. The build is the beginning of a product that works just like the previous DisplayPort adapter for the iPad retina display, but with the possibility of a few added features such as HDMI input and use of the internal webcam and WiFi antennas.

This build isn’t really a finished product anyone can buy and plug into a replacement Retina display just yet. Even if it were, it’s extraordinarily difficult to find a replacement display for the high-end MacBook for under the price of a really good monitor, anyway. In a few years, though, when the old, busted Retina laptops are traded up for a new, shiny model, though, we’ll be the first to try out this mod and get some serious desktop space.

PlayStation 3 Controlled With Head Movement

Our excitement just keeps building about how hackers can ply their skills to develop new adaptive technologies. Here’s another great example of custom control technology that helped [Steven] get back into gaming. The effects of muscular dystrophy have left him unable to use the stock PS3 controller. But after being paired up with [John Schimmel] he’s able to game again thanks to a head motion control system.

[John] looked at the way [Steven] interacts with the assistive technology at hand. He can drive his wheelchair with one finger, and interacts with his computer by moving his head. The computer detects a marker on the brim of his hat. [John] grabs input from the computer using Java and sends it to an Arduino board connected via USB. The Arduino has a USB Bit Whacker board letting it also connect to the PS3 as a controller. In the image above you can see the computer screen has a GUI for each of the controller’s buttons. [John] moves his head to select a control and clicks a button with his finger to actuate it.

If you like this check out some of the other assistive gaming hacks we’ve seen lately.

[via The Controller Project]

Simon Says Learn How To Program ARM Chips

barebones-simon-says

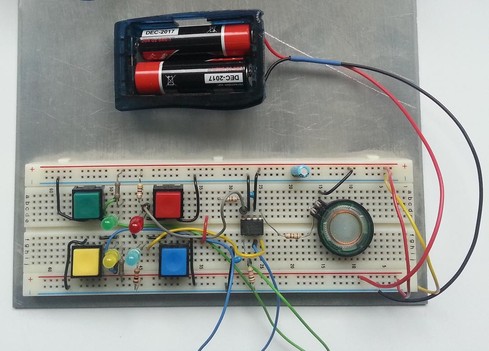
This breadboard version of a Simon Says game is a great way to try your skills on a new microcontroller platform. The eight-pin chip seen in the center of the board is an LPC810 microcontroller which [Hartmut Wendt] is just getting started with. It’s a rare example of a low-pin count DIP package for an ARM device (Cortext M0). The breadboard friendly footprint makes it easy to work with, but you could pull off the same build with a dev board like one of the STM discovery offerings or the Stellaris Launchpad boards.

Why is this a good way to learn? It involves input, output, and generating waveforms which we’d assume means timers (we didn’t dig through the source code which is available form the page linked above). Each colored button has a matching LED which blinks out the pattern which you must replicate to keep the game going; you know how Simon Says works, right?. At the same time a different pitch is played by the speaker on the right.

Another good exercise would be to take [Hartmut’s] code and port it for a different chip, be it ARM or otherwise.

Continue reading “Simon Says Learn How To Program ARM Chips”

Building A 70-foot Sailboat In Oklahoma

boat

Call it a retirement plan, a hobby, or a beautiful expression of a mental imbalance, but [Doug and Kay Jackson] of Tulsa, OK are building a seventy-four foot steel sailboat in their backyard.

For the last few years, the couple has been working on the SV Seeker, a motor sail junk, since late 2011. They have a wonderful build log, but they’ve also gone the extra mile and documented the entire build process on video. Their YouTube channel is one of the best subscriptions you can have on the site, constantly updated with new portions of the build.

Yes, building an oceangoing ship in a landlocked state may seem like an ill-informed idea, but Tulsa, OK is the home of the port of Catoosa, about 400 miles and 20 locks from the Mississippi river, then another 600 miles to the Gulf of Mexico and the open ocean.

Below you can find some of the highlights of [Doug] and [Kay] fabricating the prop for their ship. First, a pattern was created with a CNC machine, then a mold was made to cast each blade in brass. It’s an impressive bit of work putting all these tools together, and you really get a sense of the challenge of building something this big.

Continue reading “Building A 70-foot Sailboat In Oklahoma”

LegoDuino For Kid-friendly Microcontrollers

Lego

[J. Benschop] is teaching his nine-year-old son electronics by giving him a few wires, LEDs, and batteries. Eventually, the son looked over at his dad’s workbench and wondered what the little bug-shaped rectangles did. Microcontrollers and embedded programming are just a bit too advanced for someone who hasn’t hit a double-digit age, but [J] figured he could still have his son experience the awesomeness of programming electronics by building a custom electronic Lego microcontroller system.

This isn’t as complex as a Lego Mindstorms system. Really, it’s only an ATMega and a 2.4 GHz wireless transceiver. Still, that’s more than enough to add a few sensors and motor drivers, and an awesome introduction to electronics development. The enclosure for the LegoDuino is, of course, compatible with every Lego brick on the planet. It’s made from a 6×16 plate, three blocks high, with enough room for the electronics, three AA batteries, and the IO headers.

Programming an ATMega, even with the Arduino IDE, is a little beyond the capacity of [J. Benschop]’s nine-year-old son, so he made a few changes to the Minibloq programming environment to support the newly created LegoDuino. It’s a graphical programming language that kids of just about any age can pick up quickly, and with the included RF transceiver inside the ‘Duino, it can even be programmed wirelessly.

It’s an amazing piece of work, and much, much simpler than even the noob-friendly Lego Mindstorms. Not as powerful, though, but when you’re just teaching programming and electronics, you really don’t need much.


Packing A Jeep Wrangler Full Of Hacks

Picking just one image to show off all of the hacks done on this Jeep Wrangler is a tough order. We decided to go with this custom ceiling console as it features the most work done in a confined area.

Give the video walk-around a bit of time before you decide it’s not for you. [Eddie Zarick] spends the first moments touting his “Oakley” branding of the vehicle in decals, emblems, embroidered seats, zipper pulls, and more. But after that you’ll get a look at the pressurized water system we previously saw. Pull open the back gate and there’s a nice cargo cover he built that includes a cubby hole which stores the soft sides when he wants to take the top off. There are several other interesting touches, like the police radar spoofer that he uses to scare the crap out of speeders. Ha!

The ceiling console we mentioned earlier was completely custom-built. It includes a CB, scanner, HAM, and seven-inch Android tablet. There is also a set of push buttons which control the various bells and whistles; well, spotlights and inverter actually. Just add a commode and he’s ready to live out of his car.

Continue reading “Packing A Jeep Wrangler Full Of Hacks”