Kid-friendly RFID Media Center Playlist Control

rfid-dreambox-control

While young children have the tiny hands and fingers that most hackers/tinkerers wish they possessed from time to time, their fine motor skills aren’t always up to par when it comes to operating complicated electronics. People are always looking for ways to make their home entertainment systems accessible to their kids, and [Humpadilly] is no exception. Much like some of the other hacks we’ve seen this week, he has devised a way for his little ones (1 and 2 years old) to control his Dreambox Media Player using RFID, which seems to be the go-to technology for this sort of thing.

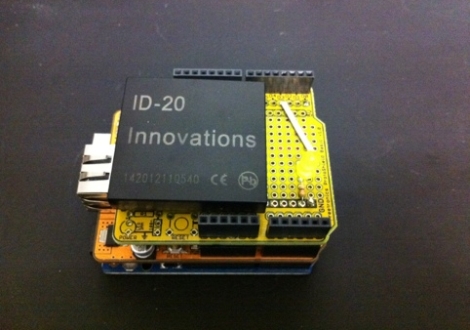
His RFID remote consists of three major components aside from the media player itself. An Arduino runs the show, and is connected to both an Ethernet shield and a breakout board fitted with an ID-20 RFID reader module. The Ethernet shield allows the Arduino to talk to his Dreambox over a telnet connection, while the RFID reader does what you would expect.

The device is in its infancy at the moment, and while [Humpadilly] hasn’t published a ton of details about the actual RFID devices he is using to control the system, he says that more details and improvements are forthcoming. In the meantime, you can check out his code here.

RFID Playlists Plus A QR Code Concept

Here’s another audio playback hack that uses physical tokens to choose what you’re listening to. It uses Touchatag RFID hardware to control iTunes. The concept is very similar to the standalone Arduino jukebox we saw on Wednesday except this one interfaces with your computer and the tags select entire albums instead of just one song. A shell script processes the incoming tag ID from the reader, populates a playlist with all the tracks from the associated album, then executes an AppleScript to launch that playlist. Check out the short demo after the break.

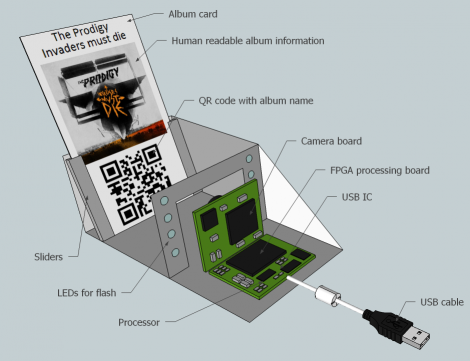
But what really caught our eye is the QR-code reader concept which [Janis] hopes to implement at some point in the future. The computer side of things doesn’t need to be changed, but we love the challenge of putting together an FPGA-based camera to recognize and decode the QR image. Looks like a perfect use for that $10 camera module and it’s FPGA driver!

Continue reading “RFID Playlists Plus A QR Code Concept”

RFID Jukebox For The Kids

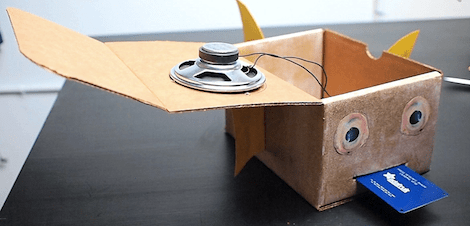
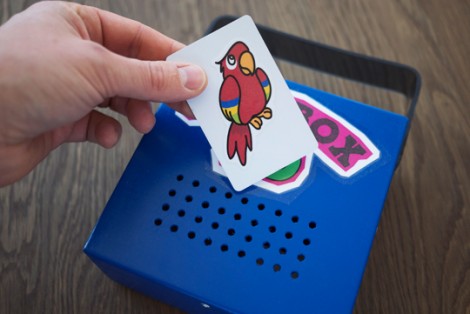
[Dominik] built a fun musical toy for his daughter [Anna]. It’s a jukebox that lets her play her favorite tunes using RFID tags to select between them.

The project is simple, yet robust. The enclosure is a wooden craft box that you can pick up for a couple of bucks. Inside there’s an Arduino with a Wave Shield which handles the audio playback. An RFID reader takes input from the set of card-tags he procured. An internal Lithium battery powers the device, with a USB port for charging.

Sure, those guts have some cost involved in them. But there’s no LCD which can be broken, and we thing the boards will hold up well to abuse if mounted correctly. Plus there’s a lot of future potential here. When we saw the cards we thought of those toys which make the animal sounds (“what does the cow say… mooo”). This could be used for that with really young children. Then repurposed into this jukebox as they get a bit older. If you put the guts in a new enclosure it will appear to be a brand-new toy, right?

See a demo of the project in the clip after the break.

Continue reading “RFID Jukebox For The Kids”

RFID Reader Gets User Inputs And Smart Card Write Capability

[Navic] added a slew of abilities to his RFID reader. It’s now a full-featured RFID reader and smart card writer with extras. When we looked at it last time the unit was just an RFID and smart card reader in a project enclosure. You could see the RFID code of a tag displayed on the LCD screen, but there wasn’t a lot more to it than that.

The upgrade uses the same project enclosure but he’s added four buttons below the display. These allow him to access the different features that he’s implemented. The first one, which is shown in the video after the break, allows him to store up to six tags in the EEPROM of the Basic Stamp which drives the unit. He can dump these tag codes to a smart card (pictured above), but also has the option of interfacing with a PC to read from and write to that card.

We don’t think you can directly write RFID tags with the device, but we could be wrong.

Continue reading “RFID Reader Gets User Inputs And Smart Card Write Capability”

Securing Your Keurig With RFID

keurig-hacking

[Andrew Robinson] and his co-workers are lucky enough to have a Keurig coffee maker in their office, though they have a hard time keeping track of who owes what to the community coffee fund. Since K-Cups are more expensive than bulk coffee, [Andrew] decided that they needed a better way to log everyone’s drinking habits in order to know who needs to cough up the most cash at the end of the month.

He started by tearing down the Keurig B40, making note of the various PCBs inside while identifying the best way to go about hacking the device. The coffee maker is controlled by a PIC, and rather than try to re-engineer things from the bottom up, he left the core of the machine intact and focused on the control panel instead.

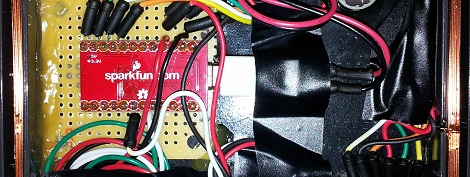
He disconnected all of the unit’s buttons from the control board, routing them through an Arduino before reconnecting them to the machine. This essentially rendered the machine inoperable unless triggered by the Arduino, giving [Andrew] control over the brewing process. He wired in an RFID reader from SparkFun, then got busy coding his security/inventory system. Now, when someone wants coffee, they merely need to swipe their office access card over the machine, which enables the use of its control panel.

As you can see in the video below the system seems to work well. If we were to offer some constructive criticism, we would suggest ditching the laptop and rolling the RFID reading/verification into the Arduino instead – other than that, we think it’s great.

Continue reading “Securing Your Keurig With RFID”

Geared System Adds RFID To Regular Door Locks

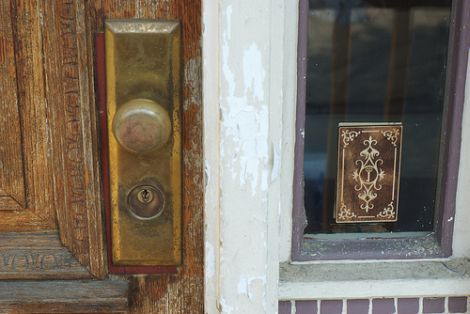
[Flowolf] added an auto-locking RFID entry system to his front door. He used our favorite fabrication system, acrylic and threaded rod (we also like to throw in aluminum angle bracket from time to time). The support structure mounts underneath the escutcheon plate for the lockset, keeping the main acrylic sheet flat against the door.

An RFID reader and Arduino run the system, with a button inside to unlock the door. But if power were to fail, you will still be able to get in or out manually. When you are using the electronic system, a stepper motor connected to the geared lock knob by a chain is what grants access, then revokes it again five seconds later. The wire going up out of the this image is for a switch that lets the unit sense when the door is closed.

As shown in the video after the break, you can turn the auto-lock feature off. But we’d like to see an emergency entry feature, like a knock-based lock, because eventually you will leave without your keys!

Continue reading “Geared System Adds RFID To Regular Door Locks”

Getting Useful Data From A Dirt Cheap RFID Reader

cheap-rfid-reader

[Aaron] was looking for a cheap RFID reader that had some easy to follow documentation and a standardized interface. Most everything he saw was pretty expensive, so he decided to buy a cheap $10 reader from eBay to see how easy it would be to work with.

The reader came with very little documentation, but [Aaron] did know that the device identifies itself as a USB keyboard, outputting scan tag data into a text editor. That functionality wasn’t incredibly useful, so he took it apart to see if he could interface with it in some other manner. Exposing the PCB revealed an unknown IC for which he could find no documentation, but the board did include some breakout pins, so [Aaron] started by probing those for data.

He tried reading the data in both a terminal program and with a logic analyzer, but nothing seemed to make a whole lot of sense. He turned the sampling rate of the sniffer down, and things started looking a little better. After comparing the data from the sniffer with known tag codes, he noticed that each digit had an offset of 39 applied, so he whipped up a bit of code to correct the numbers.

[Aaron] did a good amount of legwork to get usable data from the reader, but at a cost of $10 it can’t be beat. We certainly know what we’re going to be hunting for on eBay this afternoon…