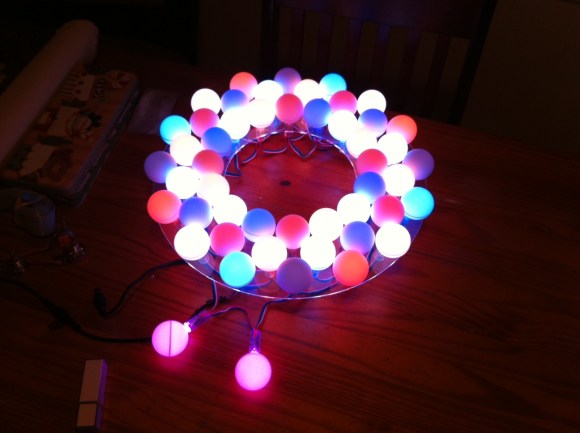
[Dennis Adams’] wreath lights project looks pretty good. But he did some amazing coding to produce a whole set of interesting animated patterns that really seal the deal for the project. Don’t miss the video after the break where he shows off all of his hard work.
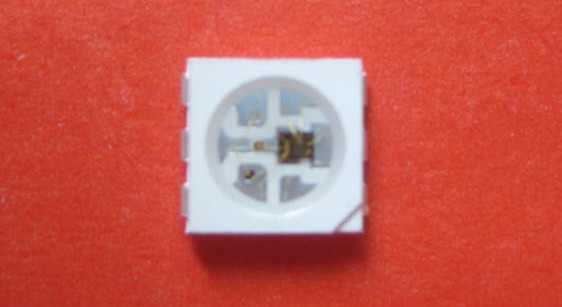
He started with a string individually addressable LEDs. These are the 12mm variety like what Adafruit sells (we’ve seen them popping up in a number of projects). To mount each pixel he tried a several different prototypes before settling on a ring that was 14″ in diameter. The design was laser cut from acrylic, with sets of staggered holes to host each ring of LEDs. The final touch was to add ping-pong balls to diffuse the light.
As we mentioned earlier, the light patterns really add the finishing touch to the project, but there is more functionality there too. [Dennis] rolled in the ability to monitor a Twitter feed with the wreath. When he gets a new tweet, a different animation will let him know about it.
Continue reading “Animated Holiday Wreath From A String Of LED Lights”