accelerometer, oled, and PocketBeagle create a gesture-controlled calculator

The Calculator Charm: Calculatorium Leviosa!

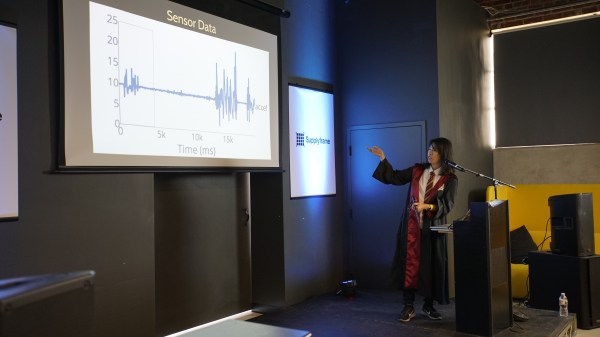
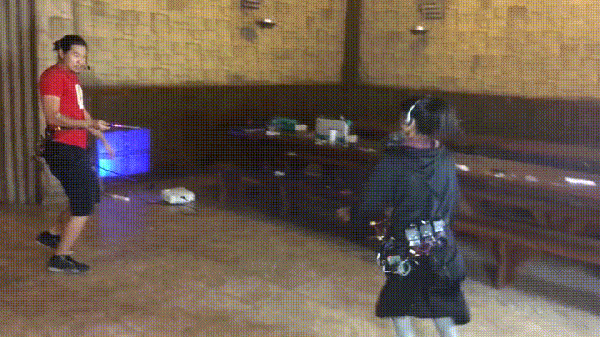
Have you ever tried waving your hand around like a magic wand and summoning a calculator? We would guess not since you’d probably look a little silly doing so. That is unless you had [Andrei’s] cool gesture-controlled calculator. [Andrei] thought it would be helpful to use a calculator in his research lab without having to take his gloves off and the results are pretty cool.

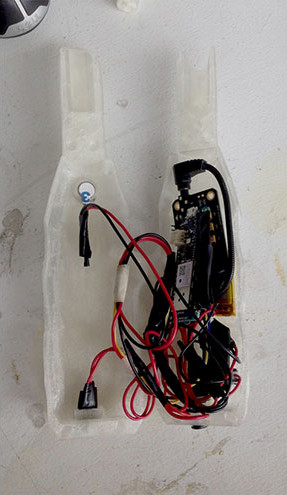
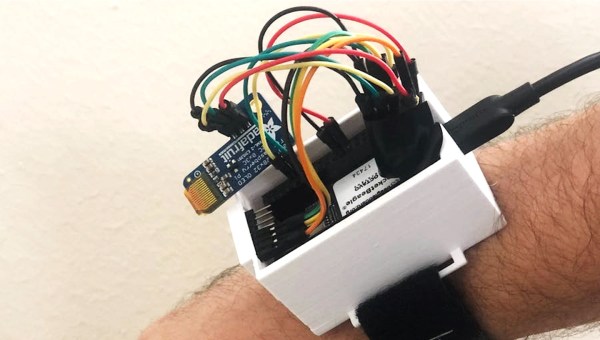
His hardware consists of a PocketBeagle, an OLED, and an MPU6050 inertial measurement unit for capturing his hand motions using an accelerometer and gyroscope. The hardware is pretty straightforward, so the beauty of this project lies in its machine learning implementation.

[Andrei] first captured a few example datasets to train his algorithm by recreating the hand gestures for each number, 0-9, and recording the resulting accelerometer and gyroscope outputs. He processed the data first with a wavelet transform. The intent of the transform was two-fold. First, the transform allowed him to reduce the number of samples in his datasets while preserving the shape of the accelerometer and gyroscope signals, the key features in the machine learning classification. Secondly, he was able to increase the number of features for the classification since the wavelet transform resulted in both approximation and detailed coefficients which can both be fed into the algorithm.

Because he had a small dataset, he used the Stratified Shuffle Split technique instead of the test train split method which is generally more suited for larger datasets. The Stratified Shuffle Split ensured approximately the same number of train and test samples for each gesture. He was also very conscious of optimizing his model for running on a portable processing unit like the PocketBeagle. He spent some time optimizing the parameters of his algorithm and ultimately converted his model to a TensorFlowLite model using the built-in “TFLiteConverter” function within TensorFlow.

Finally, in true open-source fashion, all his code is available on GitHub, so feel free to give it a go yourself. Calculatorium Leviosa!

Continue reading “The Calculator Charm: Calculatorium Leviosa!”

Magic Wand Learns Spells Through Machine Learning And An IMU

Jennifer Wang likes to dress up for cosplay and she’s a Harry Potter fan. Her wizarding skills are technological rather than magical but to the casual observer she’s managed to blur those lines. Having a lot of experience with different sensors, she decided to fuse all of this together to make a magic wand. The wand contains an inertial measurement unit (IMU) so it can detect gestures. Instead of hardcoding everything [Jennifer] used machine learning and presented her results at the Hackaday Superconference. Didn’t make it to Supercon? No worries, you can watch her talk on building IMU-based gesture recognition below, and grab the code from GitHub.

Naturally, we enjoyed seeing the technology parts of her project, and this is a great primer on applying machine learning to sensor data. But what we thought was really insightful was the discussions about the entire design lifecycle. Asking questions to scope the design space such as how much money can you spend, who will use the device, and where you will use it are often things we subconsciously answer but don’t make explicit. Failing to answer these questions at all increases the risk your project will fail or, at least, not be as successful as it could have been.

Continue reading “Magic Wand Learns Spells Through Machine Learning And An IMU”

A Shocking Wizard Duel

You’ve probably heard of Arthur C. Clarke’s third law, suggesting that any sufficiently advanced technology is indistinguishable from magic. Taking this literally and in the best possible way, [Allen Pan] of [Sufficiently Advanced] is using readily available technology to simulate magical wizarding duels in the fashion of Harry Potter.

Entitled the Wizard Analogue No-Magic Dueling Simulator — or W.A.N.D.S. for short — is a slightly more interactive version of laser tag. It’s especially engaging because your body is on the line. A Raspberry Pi using Google’s speech recognition service listens for the spell names and — remember, pronunciation is key — fires off the spell from an infrared LED tipped wand. Each duelist has five spells at their disposal, but their accuracy is up to you.

Once your opponent’s receiver registers a hit, an Arduino triggers transcutaneous electrical nerve stimulation (TENS) devices which sends pulses to various regions on the body to simulate the spell’s effect. What’s a few electrical shocks between wizards, eh?

As a defense from the constant barrage, the spell Protego — aimed at one’s own sensor — grants a few seconds immunity; however all spells have a built-in cool-down to prevent their abuse and an LED on the wand indicates when they’re ready to be used.

Continue reading “A Shocking Wizard Duel”

A Smart Wand For All Us Muggles

Arthur C. Clarke said that “any sufficiently advanced technology is indistinguishable from magic.” Even though we know that something isn’t “magic”, it’s nice to see how close we can get. [Dofl] and his friends, big fans of the magic in Harry Potter, thought the same thing, and decided to create a magic wand that they could use themselves.

muggle-wand-internalsThe wand itself is 3D printed and has a microcontroller and WiFi board, a voice recognition board, a microphone, and a vibrating motor stuffed inside. The wand converts the voice into commands and since the wand is connected to WiFi, the commands can be used to communicate with your WiFi connected lights (or your WiFi connected anything, really.) Five voice commands are recognized to turn on and off music, the lights, and a “summon” command which is used in the video to request a hamburger from delivery.com. For feedback, the motor is vibrated when a command is recognized.

There’s not much technical information in the original article, but I’m sure our readers could figure out the boards used and could suggest some alternatives to get the wand’s form factor down a bit.  Over the years, other wands have appeared on our pages, using some different technologies.  It’s a fun way to interact with the environment around you, even if you know the “magic” involved is just boring old technology.

Continue reading “A Smart Wand For All Us Muggles”

Little Sister’s Turn For Hobby Electronic Party Favors

little-sisiters-turn-for-hobby-electronic-party-favors

[Ian Lee, Sr.] made something special for his daughter’s birthday party. It’s pretty common for girls of this age (this was her 5th birthday) to be enthralled with stories of princesses so he made a blinky princess wand for each party guest. The motivation came when she asked what special thing he was going to do for her celebration. You may remember seeing the LED badge kits that were featured at her brother’s party earlier this year. From the look of the party guests he surely satisfied her desire for a memorable party.

The project is very inexpensive, extremely easy to assemble, and might make a perfect kit for supervised Kindergarteners. It’s basically an LED throwie with a stick and a feather added. [Ian] used CR2032 batteries along with an LED and current limiting resistor to light things up. He clipped off one leg of the LED and replaced it by soldering the LED in place. The remaining leads were then pressed to either side of the coin cell and the whole thing was shoved into a slit cut in the end of a balloon rod. The whole thing was wrapped tightly in with a rubber band before being crowned with a ping pong ball. To trim it out he hot glued a feather at the base of the ball.

The only think that has us worried is what he’s going to do next year to top these parties.

LED Wand Brings Ergonomics To Light Painting

Quit struggling with hastily patched together electronics for your light painting images. Follow [Madox’s] example and build a light painting wand designed with your hand in mind.

You wield it much like a sword, but the only damage it does is to the long-exposure camera pointed its way. The RGB LED strip is controlled by the guts of a tiny little wireless router, a TP-Link TL-WR703N. This lets [Madox] connect using an Android device to upload different images. It also lets you tweak the settings like adjusting the timing between columns to match your exposure settings. The custom handle design provides a home and mounting plan for everything involved. It was 3D printed at the Sydney Hackerspace.

This isn’t the first light painting device running Linux. We’ve actually seen the Raspberry Pi used in much the same way but that final project involved using an entire recumbent tricycle to move the colored lights.