Minestation – An External Weather Display For Your Minecraft World

minestation

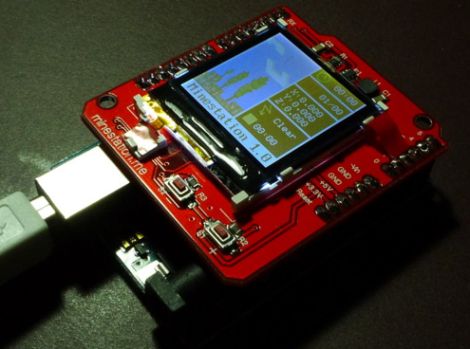
If you’re a big Minecraft fan, the folks at [radikaldesign] have something that might be of interest to you. (Translation) Inspired by some of their Minecraft-loving friends, they have developed Minestation – a weather station for your Minecraft game.

The concept is simple. Here in the real world we have the ability to look out the window and see what it is like outside, but many of us turn to digital weather stations, the Weather Channel, or the local news to get the real scoop. They decided that the world of Minecraft should be no different, so they constructed an Arduino shield that allows players to see weather conditions as they play.

The shield contains a Nokia 6100 LCD screen which displays all sorts of useful information. It features a clock and calendar that reflect in-game time, making it easy to know when night is going to fall. It also continually displays the player’s coordinates as well as what the weather looks like in that region. Having this information at hand when you’ve been slogging away in the mines (losing track of time and weather) seems like it could be pretty useful at times.

You can buy one of the devices at Minestation.me, but the design is completely open, so you can easily construct one of your own without too much hassle.

Continue reading to see a video of the Minestation in action.

[Via HackedGadgets]

Continue reading “Minestation – An External Weather Display For Your Minecraft World”

Chrono-tomic Shield Helps Your Arduino Keep Perfect Time

chronotomic-arduino-shield

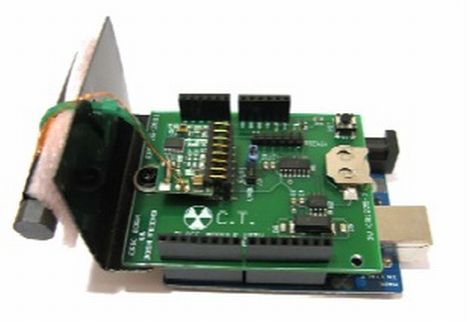
[Josh] and his lab partner [Eric] needed a final project for their Embedded Systems Design class, and thought that designing an Arduino shield would be a cool idea. They noticed that there are plenty of ways to get an Arduino to keep time, though none that they knew of utilized WWVB (Atomic Time) signals directly.

The Chrono-tomic Arduino shield uses a C-MAX radio to demodulate the WWVB signal, demodulating it and passing it along to a PIC16F1824 microcontroller. The PIC decodes the data frame and verifies it is valid, sending the time to an MCP79410N real-time clock module.

We can hear the “Yo dawg I herd you like microcontrollers so I put a microcontroller on your microcontroller shield” jokes already, but the pair says that they offloaded the time processing to the PIC in order to let the Arduino focus on whatever tasks it has been delegated. The Arduino code merely needs to request the time from the RTC whenever it is required, rather than deal with the decoding itself.

Is it overkill? Perhaps – though we think it heavily depends on your application and configuration. We can certainly conjure up situations where it would be useful.

Audio Output Selection Courtesy Of The Internet

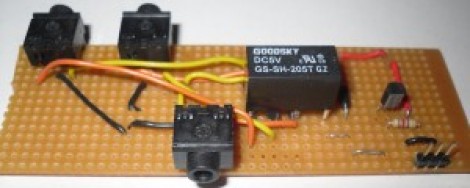
[Peter] was tired of crawling behind his desktop computer to switch between headphones and speakers. We feel his pain, as the headphone port on our computer speakers has its own demonic hum rendering the jack useless to us. His solution was to build this output selector board, then control it via the network.

A relay is responsible for routing the single input to one of two outputs. One output is wired to the normally closed pin on the relay, the other to the normally open pin. The important thing here is to make sure you have a separate audio ground so as not to pick up noise from the rest of the hardware.

What you see above is only the switching circuitry. This is where [Peter] went a little overboard, using an Arduino along with an Ethernet shield to drive the relay via a transistor. For this particular application there must be an easier way. But if you’re working on home automation from your smart phone, this might be just the thing to make your audio setup browser-controlled.

[via Build Lounge]

Inkjet Print Head Driver Shield

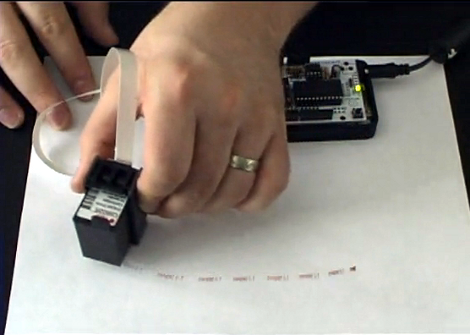
[Nicolas C Lewis] is churning out inkjet print head shield kits for Arduino. If you’ve always wanted to label or brand objects as part of a project this greatly simplifies the process. Using his all through-hole design, an Arduino can print at 96 dpi. At first we had trouble figuring out what we could use this concept for, but [Nicolas] has the answer. In is FAQ he links to a couple of his own flat-bed inkjet printer builds based on earlier prototypes, but he also links to other projects using the same concepts like the Nickel-O-Matic, or the ping-pong ball printer (we’ve embedded video of that one after the break).

The shield only requires five connections with a microcontroller. We love the jumper-based connection system that [Nicolas] chose which lets you use several print heads at once by selecting different drive pins. The project is still in the funding stage but is already over funded. Schematic and code will be posted as soon as the first production run is complete.

Continue reading “Inkjet Print Head Driver Shield”

A Stackable Motor Driver Shield For The Arduino

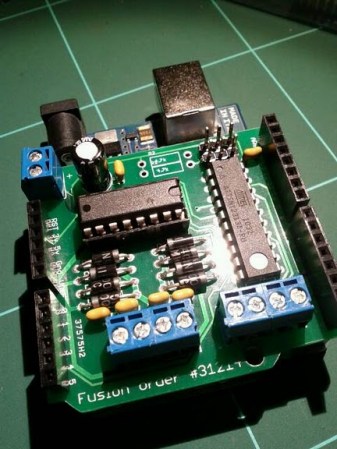
The Arduino has been used for many purposes, and  “shields” are available to make many common tasks easier.  However, [Nick] wanted a stackable motor driver shield, so he build one himself!. There are many motor driver shields available for the Arduino, however, there aren’t any that allow one to drive as many motors as were needed for his project, and none that were stackable.

[Nick] had no experience designing and fabricating a custom board, but decided to try his hand at it anyway. Armed with a free version of [Eagle] PCB design software, he designed the board that he needed then sent it to [Seeed] to be manufactured. According to his article, a quantity of 10 Arduino-sized boards can be purchased for the price of $25. At that price point, some hobbyists may want to consider this option rather than manually creating their own circuit.

According to [Nick], he was able to manufacture his first board with no errors on his first run! Not bad for his first try at something like this.

DTMF Shield Aimed At Ham Controlled Arduino

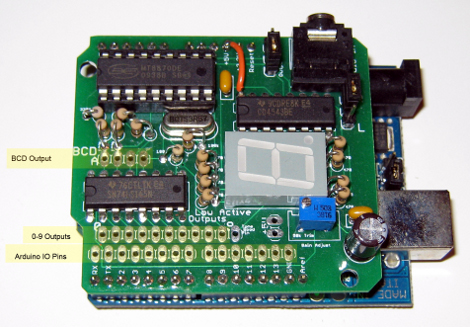
[Colin] wanted a way to reliably control an Arduino via ham radio. One of the easiest methods of automated radio control makes use of Dual-Tone Multi-Frequency signalling. To those who aren’t into amatuer radio you probably recognized DTMF as the touch-tone system for telephone communications. [Colin] built a shield that has an audio input and can decode DTMF signals.

The hardware is based around an MT8870 DTMF decoder chip. This is a popular choice for DTMF hardware because it does all of the decoding work for you. Whenever a valid tone is detected it outputs the associated value in binary on four output pins. There is a fifth pin that strobes after each new tone. [Colin’s] design offers a lot of feedback for what’s going on with the input signal. The DTMF value is displayed on a 7-segment display (controlled completely in hardware), the value is output on for Binary Coded Decimal pins, and mapped to a set of ten pins which pull to ground to match the digit received.

Going Cellular With Your Arduino Projects

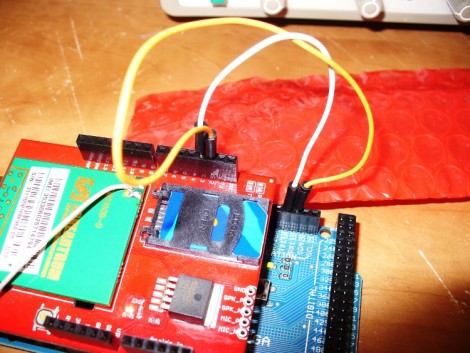
You can add a huge measure of extensibiltiy to a project by using a cellular connection. Anywhere the device can get service you can interact with it. In the past this has been a pretty deep slog through datasheets to get everything working, but this tutorial will show the basics of interacting with phone calls and text messages. It’s the 26th installment of what is becoming and mammoth Arduino series, and the first one in a set that works with the SM5100B cellular shield.

We love the words of warning at the top of the article which mention that a bit of bad code in your sketch could end up sending out a barrage of text messages, potentially costing you a bundle. But there’s plenty of details and if you follow along each step of the way we think you’ll come out fairly confident that you know what you’re doing. Just promise us that you won’t go out and steal SIM cards to use with your next project. Find part two of the tutorial here and keep your eyes open for future installments.