Reflow Oven Controller With Graphic LCD

Reflow Controller

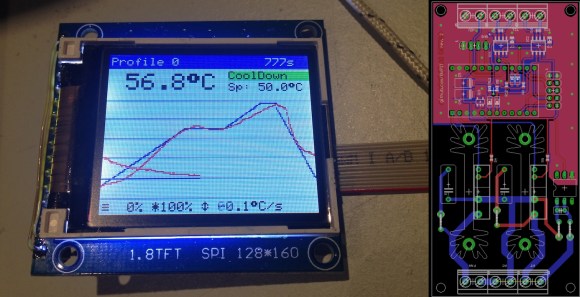
A reflow oven is one of the most useful tools you will ever have, and if you haven’t built one yet, now is as good a time as any. [0xPIT’s] Arduino based reflow oven controller with a graphic LCD is one of the nicest reflow controllers we’ve seen.

Having a reflow oven opens up a world of possibilities. All of those impossible to solder surface mount devices are now easier than ever. Built around the Arduino Pro Micro and an Adafruit TFT color LCD, this project is very straight forward. You can either make your own controller PCB, or use [0xPIT’s] design. His design is built around two solid state relays, one for the heating elements and one for the convection fan. “The software uses PID control of the heater and fan output for improved temperature stability.” The project write-up is also on github, so be sure to scroll down and take a look at the README.

All you need to do is build any of the laser cutters and pick and place machines that we have featured over the years, and you too can have a complete surface mount assembly line!

Manual Pick And Place

picknplacePopulating a large surface mount PCB can take forever. [craftycoder] from Freeside Atlanta has built a great looking manual pick and place machine, removing the need for tweezers. No more will passives stick to your tweezers while you are trying to place them on your PCB!
We have seen a lot of pick and place machines in the past few years. What makes this one stand out is its simplicity and the no-nonsense build. This pick and place is built on an MDF platform, uses bearings from Amazon, standard 12 mm rails, and has a small camera for a close-up look at your part placement. Sure it is a manual method, but it beats painstakingly placing each part with tweezers. It would be interesting to see how much this entire build cost; we expect that it was not too expensive. See this thing in action in the video after the break.

We hope this project has inspired you to go out and make something cool! If so, let us know what you have made!
Continue reading “Manual Pick And Place”

Low-Power SMD Fireflies

lowpowerledfireflies

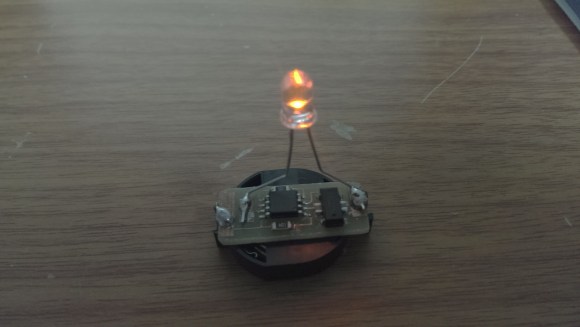
[Tyson’s] family went with creating rather than buying Christmas presents last month, which gave him the opportunity to build some electronic fireflies for gifts. He drew inspiration from a similar firefly project we featured last year, but expanded on the original model by designing dedicated PCBs and housings for each of his firefly pieces.

Although he’d settled on using ATTiny85’s for this project, [Tyson] was fresh out of through-hole versions. He decided to skip the prototyping phase and go right for fabrication, cranking up the laser-jet printer for some toner-transfer, which successfully produced 4 functioning boards (and 3 failures). The fireflies were [Tyson’s] first attempt at SMD soldering, and we’d have to say it’s a job well done; he reflowed each board with a cheap-o heatgun from Harbor Freight.

After some hiccups with fuse programming, [Tyson] got the code uploaded and the fireflies illuminated.  Swing by his site for the nuts and bolts on construction, then snag the project files here. (Direct .zip download)

Woodcut Stamps And Conductive Ink

circuit

Even though it’s been a while since the Rome Maker Faire, we’re still getting some tips from the trenches of Europe’s largest gathering of makers. One of these is a 30-minute experiment from [Luong]. He wondered if it would be possible to create SMD circuit boards by using a 3D printer to fabricate a stamp for conductive ink.

[Luong] told this idea  to a few folks around the faire, and the idea eventually wound up in the laps of the guys from TechLab. the Chieri, Italy hackerspace. They suggested cutting a wooden stamp using a laser cutter and within 30 minutes of the idea’s inception a completed stamp for an Atari Punk Console PCB was in [Luong]’s hands.

As an experiment, the idea was a tremendous success. As a tool, the stamp didn’t perform as well as hoped; the traces didn’t transfer properly, and there’s no way this wooden laser cut stamp could ever create usable PCBs.

That being said, we’re thinking [Luong] is on the right track here with printed PCBs. One of the holy grails of home fabrication is the creation of printed circuit boards, and even a partial success is too big to ignore.

This idea for CNC-created PCB stamps might work with a different material – linoleum or other rubber stamp material, or even a CNC milled aluminum plate. If you have any ideas on how to use this technique for PCB creation, leave a note in the comments, or better yet, try it out for yourself.

Desoldering Chips With Fire

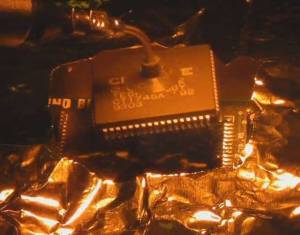
Salvaging components is a staple of any electronic enthusiast, but many times those interesting chips – old 8-bit microcontrollers, memories, and CPUs found in everything from game consoles to old computers – are rather difficult to remove from a board. [Ryan] over on Instructables has a rather interesting method of removing old SMD packages using nothing more than a little fire and a pair of tweezers.

Obviously the best way to go about salvaging SMD components is with a heat gun, but lacking the requisite equipment, [Ryan] managed to remove a few SMD chips using rubbing alcohol as a heat source. In a properly controlled environment, [Ryan] filled a small metal dish with alcohol, set it on fire, and used the heat generated to remove a few components. Alcohol lamps are a common bench tool in a range of repair disciplines because the fuel is cheap and burns relatively cleanly (not leaving an unwanted residue on the thing you’re heating).

It’s an interesting kludge, and given [Ryan]’s display of desoldered components, we’re going to call it a success. It might also work for through-hole components, allowing for easy removal of old SRAM, ROM, and other awesome chips.

A Pick And Place Tool From Medical Equipment

neb

A vacuum tool is an invaluable tool if you’re working with tiny SMD parts, and even with tweezers you might have a hard time placing these nearly invisible components on their pads for soldering. One tool that’s really great for these parts is a vacuum pen, usually made from an old aquarium air pump. [Jon] may have found a much more suitable piece of equipment to scavenge for a vacuum pen build – a nebulizer.

Nebulizers provide asthmatics with low pressure, low volume air to atomize medication for inhalation. Inside the nebulizer is a small diaphragm pump, just like the small aquarium pump teardowns we’ve seen. In just five minutes, [Jon] tore his thrift store nebulizer apart and reversed the flow of air, turning something that blows into something that sucks.

After the suction part of the build was finished, [Jon] needed a way to pick up small components. He did this by blunting a large hypodermic needle and fastening it to the end of a Bic pen with heat shrink tubing. After drilling a small hole in the pen body, he had a very nice looking SMD vacuum pump.

Electric Skillet Reflow Soldering Guide

skillet-reflow-tutorial

It’s no secret that we’re bizarrely drawn to macro videos showing solder paste during the reflow process. This electric skillet reflow guide provides the fix we’ve been jonesin’ for while including some helpful tips for first-timers and veterans alike. Not sure what we’re talking about? Look at the grey paste at the top of this image. As it heats up it’s drawn under each component as seen in the lower half of the image.

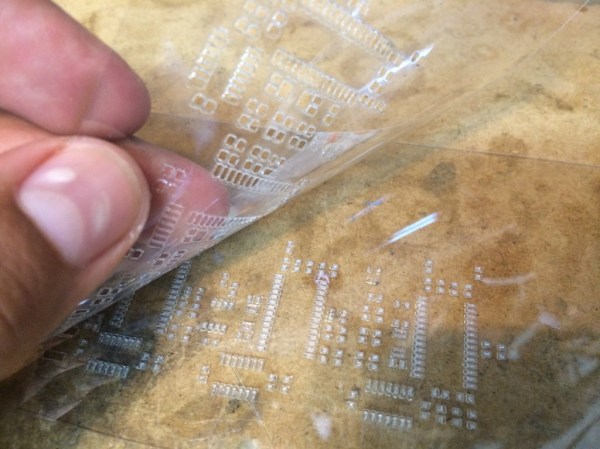
This particular guide is aimed at one-off assembly so a solder paste stencil is not used (we learned a lot about those earlier in the month). It instead uses the painstaking toothpick application technique. It takes time but the upside is that once you get the hang of it you’ll apply the perfect amount of solder each time. After placing all of the components [Count Spicy] carefully transfers the board to an electric skillet, covers it with the glass lid (so he can see what’s going on), and sets the temperature just above the solder’s specified melting point.

Since the skillet is cheap and easy to find you really just have to order the solder paste to get into this type of assembly. Our only gripe is that you can’t really follow a temperature profile with this rig. For that you need to move up to some PID controlled hardware.

Continue reading “Electric Skillet Reflow Soldering Guide”