Photo of the spectrophotometer in question, with a screenshot of the decoding software on the right

Exporting Data From Old Gear Through LCD Sniffing

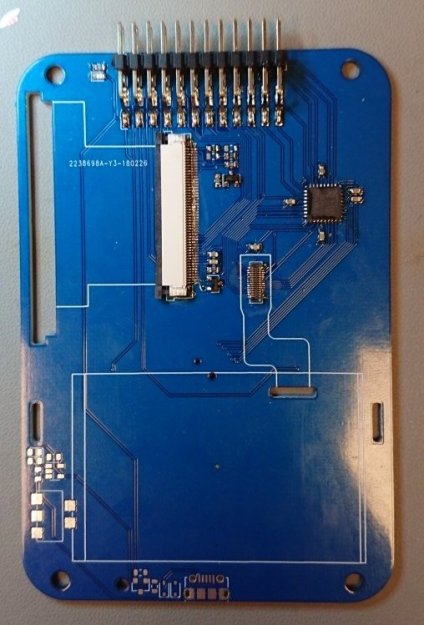
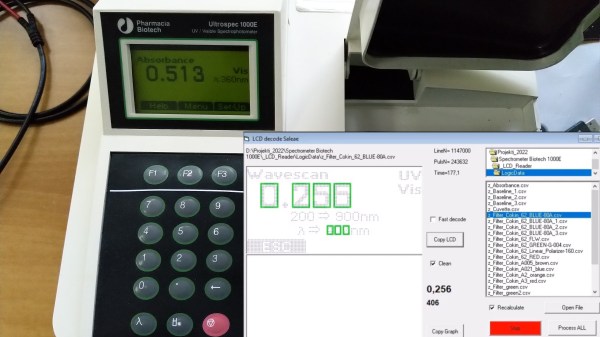
[Jure Spiler] was at a flea market and got himself a spectrophotometer — a device that measures absorbance and transmittance of light at different wavelengths. This particular model seems to be about 25 years old, and it’s controlled by a built-in keyboard and uses a graphical LCD to display collected data. That might have been acceptable when it was made, but it wasn’t enough for [Jure]. Since he wanted to plot the spectrophotometry data and be able to save it into a CSV file, hacking ensued.

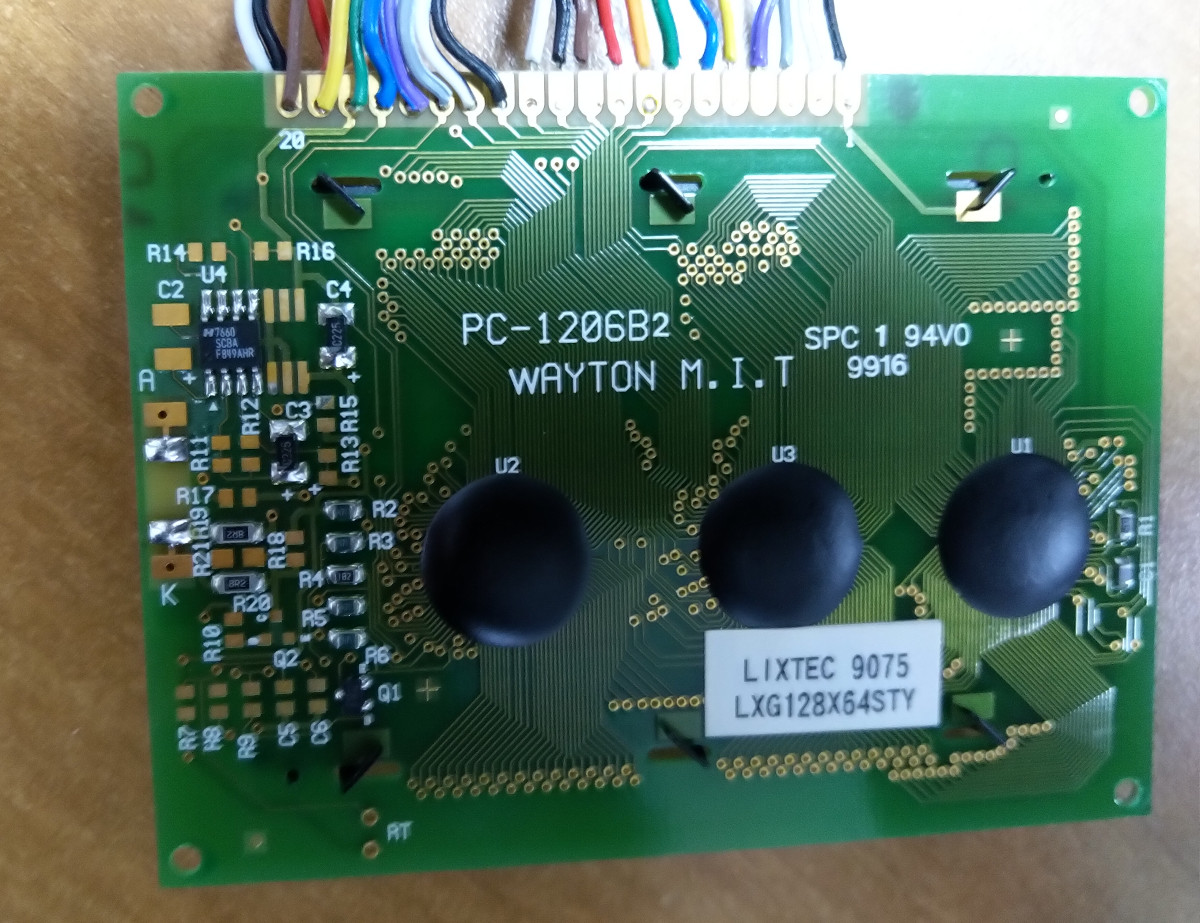
He decided to tap into the the display communication lines. This 128×64 graphical display, PC-1206B, uses a 8-bit interface, so with a 16-channel logic analyzer, he could see the data being sent to the display. He even wrote decoder software – taking CSV files from the logic analyzer and using primitive optical recognition on the decoded pixels to determine the digits being shown, and drawing a nice wavelength to absorbance graph. From there, he set out to make a standalone device sniffing the data bus and creating a stream of data he could send to a computer for storage and processing.

[Jure] stumbled into a roadblock, however, when he tried to use an Arduino for this task. Even using a sped-up GPIO library (as opposed to notoriously inefficient digitalRead), he couldn’t get a readout frequency higher than 80 KHz – with the required IO readout rate deemed as 1 MHz, something else would be called for. We do wonder if something like RP2040 with its PIO machinery would be better for making such captures.

At that point, however, he found out that there’s undocumented serial output on one of the pins of the spectrophotometer’s expansion port, and is currently investigating that, having shelved the LCD sniffing direction. Nevertheless, this serves as yet another example for us, for those times when an LCD connection is all that we can make use of.

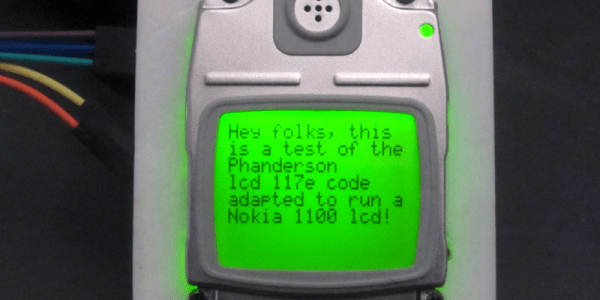
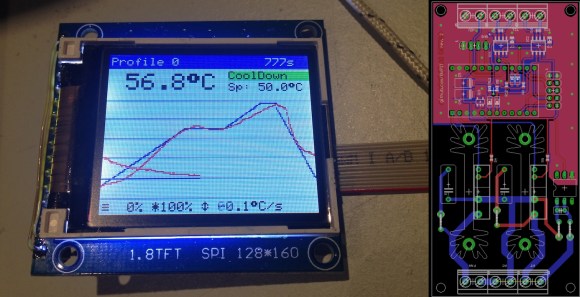
We’ve seen hackers sniff LCD interfaces to get data from reflow ovens, take screenshots from Game Boys and even equip them with HDMI and VGA ports afterwards. With a skill like this, you can even give a new life to a vintage calculator with a decayed display! Got an LCD-equipped device but unsure about which specific controller it uses? We’ve talked about that!

Continue reading “Exporting Data From Old Gear Through LCD Sniffing”

Smoothing Big Fonts On Graphic LCDs

Here’s a neat little trick: take the jaggies out of scaled fonts on the fly! This technique is for use on graphic displays where you might want to scale your fonts up. Normally you’d just write a 2×2 block of pixels for every area where there would have been one pixel and boom, larger font. Problem is, that also multiplies each empty area and you end up with jagged edges in the transitions that really catch your eye.

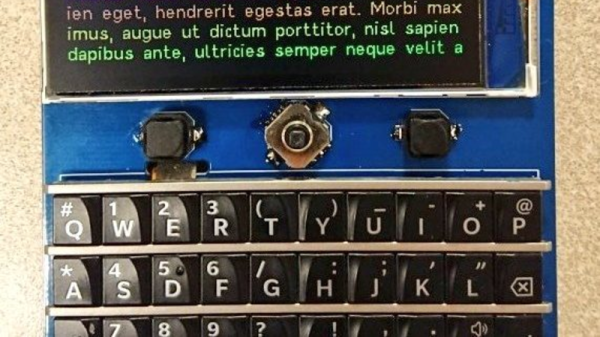
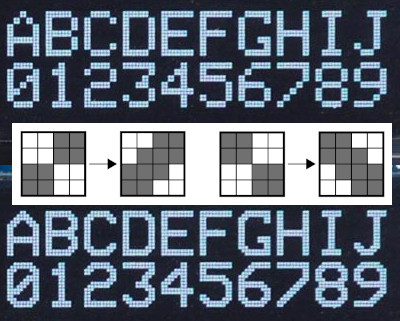
[David Johnson-Davies] entered big-brain mode and did something much cleverer than the obvious solution of using multiple font files. Turns out if you analyze the smoothing problem you’ll realize that it’s only the angled areas that are to blame, horizontal and vertical scaling are nice and smooth. [David’s] fix looks for checker patterns in what’s being drawn, adding a single pixel in the blank spots to smooth out the edge incredibly well!

The technique has been packaged up in a simple function that [David] wrote to play nicely in the Arduino ecosystem. However, the routine is straightforward and would be quick to implement no matter the language or controller. Keep this one in your back pocket!

Now if all you have on hand is an HD44780 character LCD, that one’s arguably even more fun to hack around on just because you’re so limited on going beyond the hard-coded font set. We’ve seen amazing things like using the custom character slots to play Tetris.

Shoehorning A Slick Spotify Remote Into An ESP8266

In 2017 Spotify finally deprecated their public vanilla C SDK library,  libspotify, and officially replaced it with dedicated SDKs for iOS and Android and this new-fangled web thing we’ve all heard so much about. This is probably great for their maintainability but makes writing a native application for a Linux or a hardware device significantly harder, at least without an application process and NDA. Or is it? Instead of using that boring slab of glass and metal in their pocket [Dani] wanted to build a handy “now playing” display and remote control interface but was constrained by the aforementioned SDK limitations. So they came up with a series of clever optimizations resulting in the clearly-named ESP8266 Spotify Remote Control.

The Spotify Remote Control has a color LCD with a touchscreen. Once attached to a Spotify account it will show the album art of the currently playing track (with a loading indicator!) and let you play/pause/skip tracks from its touch screen, all with impressively low latency. To get here [Dani] faced two major challenges: authorizing the ESP to interact with a user’s Spotify account, and low latency LCD drawing.

2 Bit Cover Art

If you’re not on iOS or Android, the Spotify web API is the remaining non-NDA’d interface available. But it’s really designed to be used on relatively rich platforms such as fully featured web browsers, not an embedded device. To that end, gone are the days of asking a user to enter their username and password in a static login box, the newer (better) way is to negotiate for a per-user token (which is individually authorized per application), then to use that to authenticate your interaction. With this regime 3rd party applications (in this case an ESP8266) never see a user’s password. One codified and very common version of this process is called OAuth and the token dance is called a “workflow”. [Dani] has a pretty good writeup of the process in their post if you want more detail about the theory. After banging out the web requests and exception handling (user declines to authorize the device, etc) the final magic ended up being using mDNS to get the user’s browser to redirect itself to the ESP’s local web server without looking up an IP first. So the setup process is this: the ESP boots and displays a URL to go to, the user navigates there on a WiFi connected device and operates the authorization workflow, then tokens are exchanged and the Remote Control is authorized.

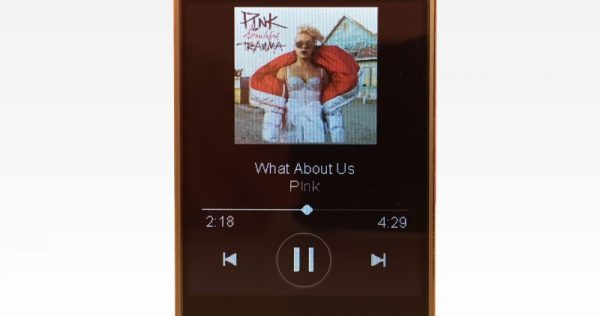
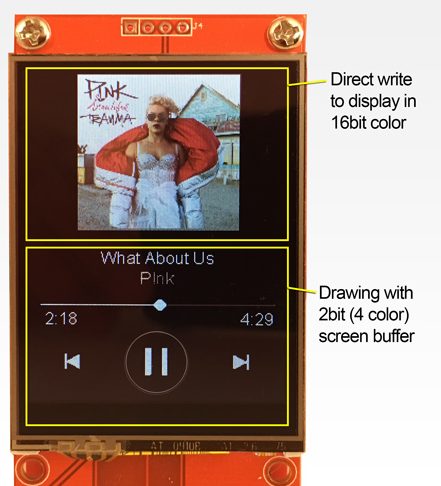
The second problem was smooth drawing. By the ESP’s standards the album art for a given track at full color depth is pretty storage-large, meaning slow transfers to the display and large memory requirements. [Dani] used a few tricks here. The first was to try 2 bit color depth which turned out atrociously (see image above). Eventually the solution became to decompress and draw the album art directly to the screen (instead of a frame buffer) only when the track changed, then redraw the transport controls quickly with 2 bit color. The final problem was that network transfers were also slow, requiring manual timesharing between the download code and the display drawing routing to ensure everything was redrawn frequently.

Check out [Dani]’s video after the break, and take a peek at the sources to try building a Spotify Remote Control yourself.

Continue reading “Shoehorning A Slick Spotify Remote Into An ESP8266”

Regrowing A Blackberry From The Keyboard Out

Here at Hackaday we’re big fans of device-reuse, and what [arturo182] has done with the Blackberry Q10’s keyboard is a fantastic example. Sometimes you’re working on a portable device and think to yourself “what this could really use is a QWERTY keyboard”. What project doesn’t need a keyboard?

Typically this descends into a cost benefit analysis of the horrors of soldering 60ish SMD tact switches to a board, which is no fun. With more resources you can use Snaptron snap domes like the [NextThingCo’s] PocketCHIP, but those are complex to source for a one off project and the key feel can be hard to really perfect. Instead of choosing one of those routes, [arturo182] reverse engineered the keyboard from a Blackberry Q10.

When you think of good, small keyboards, there has always been one standout: Blackberry. For decades Blackberry has been known for absolutely nailing the sweet tactile feel of a tiny key under your thumb. The Q10 is one example, originally becoming avalible in 2013 as one of the launch devices for their then-new Blackberry OS 10. Like most of Blackberry’s business the OS and the phone are long out of date, but that doesn’t mean the keyboard has aged.

[Arturo182] says he can find them from the usual Chinese sources for around $3 each, which is too cheap to not explore. Building on the work of [WooDWorkeR] (on Hackaday.io) and [JoeN] to reverse engineer the matrix and to find the correct connector, he integrated the keyboard into an easy to use breakout board that exposes the key matrix, per-row backlight controls, and even the MEMS mic! More excitingly, he has built a small portable device with all the trappings of the original Q10; a color LCD, joystick, function buttons, and more in a very small footprint.

KiCAD sources, including 3D models, for the keyboard and for the breakout board are available.

Now if only someone can find a way to salvage the unusual square, high-DPI displays from the Q10, we’d be in portable device nirvana.

Continue reading “Regrowing A Blackberry From The Keyboard Out”

Hacking Together A Serial Backpack

A serial backpack is really nothing more than a screen and some microcontroller glue to drive it. And a hammer is nothing more than a hardened weight on the end of a stick. But when you’re presented with a nail, or a device that outputs serial diagnostic data, there’s nothing like having the right tool on hand.

1383501485329153153[ogdento] built his own serial backpack using parts on hand and a port of some great old code. Cutting up a Nokia 1100 graphic display and pulling a PIC out of the parts drawer got him the hardware that he needed, and he found a good start for his code in [Peter Andersen]’s plain-old character LCD library, combined with a Nokia 1100 graphic LCD library by [spiralbrain]. [ogdento] added control for the backlight, mashed the two softwares together, and voilà!

A simple screen with a serial port is a great device to have on hand, and it makes a great project. We’ve seen them around here before, of course. And while you could just order one online, why not make your own? Who knows what kind of crazy customizations you might dream up along the way.

How To Make A Custom LCD From Scratch

If you have ever wondered what it took to make your own custom graphic LCD from scratch, this video from [Applied Science] is worth a watch. It’s concise and to the point, while still telling you what you need to know should you be interested in rolling your own. There is also a related video which goes into much more detail about experimenting with LCD technology.

[Applied Science] used microscope slides and parts purchased online to make an LCD that displays a custom graphic when activated. The only step that home experimenters might have trouble following is coating the glass slides with a clear conductive layer, which in the video is done via a process called sputtering to deposit a thin film. You don’t need to do this yourself, though. Pre-coated glass is readily available online. (Search for Indium-Tin Oxide or ‘ITO’ coated glass.)

The LCD consists of a layer of liquid crystal suspended between two layers of conductive glass. An electrical field is used to change the orientation of crystals in the suspension, which modulate the light passing through them. Polarizing filters result in a sharp contrast and therefore a visible image. To show a particular shape, some of the conductive coating is removed from one of the layers in the shape of the desired image. The process [Applied Science] uses to do this is nearly identical to etching a custom PCB. Continue reading “How To Make A Custom LCD From Scratch”

Reflow Oven Controller With Graphic LCD

Reflow Controller

A reflow oven is one of the most useful tools you will ever have, and if you haven’t built one yet, now is as good a time as any. [0xPIT’s] Arduino based reflow oven controller with a graphic LCD is one of the nicest reflow controllers we’ve seen.

Having a reflow oven opens up a world of possibilities. All of those impossible to solder surface mount devices are now easier than ever. Built around the Arduino Pro Micro and an Adafruit TFT color LCD, this project is very straight forward. You can either make your own controller PCB, or use [0xPIT’s] design. His design is built around two solid state relays, one for the heating elements and one for the convection fan. “The software uses PID control of the heater and fan output for improved temperature stability.” The project write-up is also on github, so be sure to scroll down and take a look at the README.

All you need to do is build any of the laser cutters and pick and place machines that we have featured over the years, and you too can have a complete surface mount assembly line!